Software Bundle Overview
The software bundled with ASRock motherboards is more than your standard fair of drivers and trial software. While you do have CyberLink MediaEspresso Trial and a trial anti-virus program, we are not going to be talking about them. You will also find THX TruStudio software which should simply not be installed. It does not do anything but switch from a speaker profile to a headphone profile. You can pay to get the full software package, but if you do not plan to do this immediately, do not install the THX TruStudio.
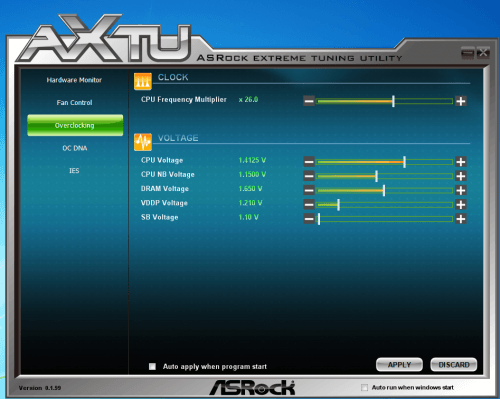
As with most motherboard manufacturers now, ASRock has their own overclocking utility you can use from within Windows 7 called AXTU (ASRock Extreme Tuning Utility). This tool allows direct access to several options and features in the UEFI BIOS. You can load a new BIOS profile, change voltages, alter the multipliers, and fan controls. You cannot however change the bus speed which is currently the only way to overclock an AMD APU. As such, I could use the software to control the fans and monitor the board, but could not use it to overclock the system.
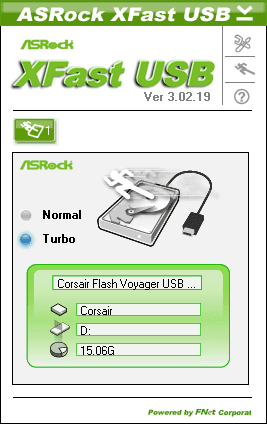
The next set of software you will find is the XFastUSB and XFastLAN. The former is set and forget software. Once you install it, all you can do is enable the feature. The XFastUSB is an advanced data stack and buffering software tool that replaces the normal USB 2.0 transfer buffer to ensures the highest speed. I will include XFastUSB results in my IO tests.
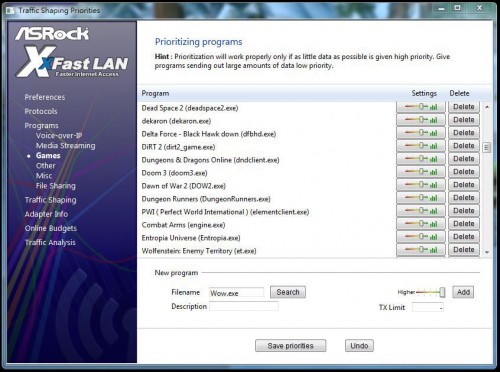
The XFastLAN Utility is something completely different. This is a full software suite of LAN options. It allows you to not only monitor traffic, but micro-manage bandwidth, traffic control, software bandwidth priority, and many other options. If you need to control your bandwidth, prioritize your VOIP, or limit the amount of bandwidth a torrent program has each day, XFastLAN has you covered. It’s similar to what the Killer NIC E2100 does, but at a non hardware accelerated level.
You will also find ASRock’s InstantBoot Utility. Like the XFastUSB, this too is set it and forget it software. The InstantBoot Utility claims it can reduce boot time to only 4 seconds with a standard HDD and it can do exactly this. This however is not practical as it simply alters the Windows definition of “Shut down” to a state similar to Suspend. The InstantBoot will keep all data related to software that starts with Windows in RAM, even when the system is powered down. Once you press the power button, this information is still in RAM and does not need to be loaded, drastically reducing boot time.
The former mode is called “Fast Mode” in the InstantBoot software. There is also a Regular Mode. This mode uses a software trick to convince Windows to shift into a standby mode during the initial boot to directly load a previous boot state into RAM as one large program. The result is once Windows 7 shows a desktop, all boot software is loaded near instantly saving around 8 to 10 seconds on boot time for me.
BIOS and Overclocking Notes
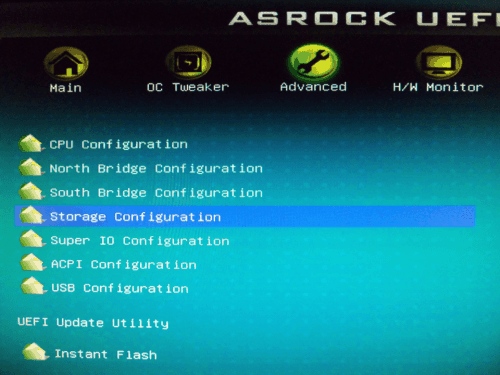
ASRock has completely moved to the UEFI BIOS system for all their motherboards and the A75M-ITX is no different. The UEFI BIOS is a great addition to this motherboard. Removing the old BIOS keyboard requirements means you could use this board as an HTPC with only a media remote.
The UEFI BIOS from ASRock is also very well laid out and easy to understand. I do have a small issue with several options being hidden by an “Auto” setting for a whole section. In the Overclocking section you often have to change a button from “Auto” to “Manual” to review several other sub-options. This can be a little confusing as you often don’t know how much control you have until you are actually changing something.
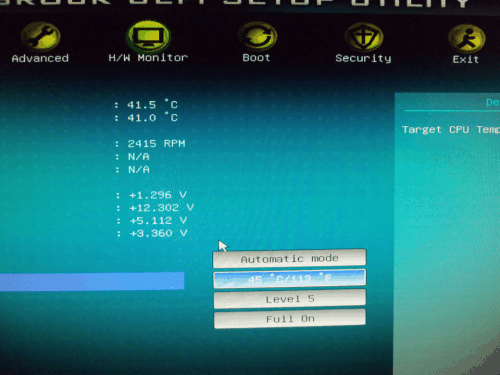
The fan controls are also a feature I enjoyed. It allowed me to set 9 different levels of default power to keep the fans from fluctuating when at idle. This control applies to all 3 fan headers on the board. Much like the AXTU, the UEFI BIOS is great, but not designed for this board.
Lets get right into what you really want to know about this board, does it overclock well? The simple answer is I don’t know. When I first attempted to overclock the ASRock A75M-ITX, I turned off the power throttling and AMD Cool-N-Quiet. I then restarted the system to ensure these features were off. I then set the bus to 105 MHz (100 MHz being default). I restarted the system and tested stability in Windows 7. I repeated this until I was up to 115 MHz and this is where the story goes all wrong.
As the system was stable at 115 MHz, I noticed the multiplier for several things had been changed to ensure stability much like the GIGABYTE GA-A75M-UD2H. As the system had effectively reset, I decided to go up to 120 MHz (3.12 GHz for the CPU) which is a speed I have done with this chip before. My system would not POST. I attempted to clear the CMOS and still could not get a POST screen. I then disconnected the motherboard completely and set the Clear CMOS jumper to sit overnight.
This is a common remedy known to correct stuck BIOS. After letting it sit overnight on clear, I moved the jumper back and rebuilt the system. This time I still did not receive a POST screen. ASRock was happy to send me a replacement board so I could get a second try at overclocking. This time I decided I would be happy with just the 115 MHz I got before. I rebuilt my test system with the new board and booted into windows to verify it worked at stock. After some software updates, I attempted the overclock again.
This time I started the same way I did before by first disabling at features that would power down the CPU and restarted. Once I was back in the BIOS I set the fan speed to my preference and set the memory multiplier from 8.00 to 9.33 (1600 MHz to 1866 MHz). I then restarted the system with no changes to voltage or bus speed, but the system would not POST. It was the same story as before. I tried several different fixes, but could not get the system to recover.
In a nutshell, this board will overclock memory just fine, but stay away from trying to overclock the APU. Let’s get cracking on the benchmarks to see what else we can find out.

