
The Republic of Gamers series is the top of the line when it comes to ASUS’ illustrious motherboards and video cards. But, it was the launch of the ROG motherboards back in 2006 that started the road to hard core gaming with a side of overclocking. Since then, ROG has evolved from good looking to fantastically designed motherboards and video cards with performance in mind. Still, many people aren’t sure what it is they’re getting when it’s an official ROG product. Hopefully we figure that out with our look at the ASUS Maximus IV Extreme P67 Motherboard.
Features and Specifications
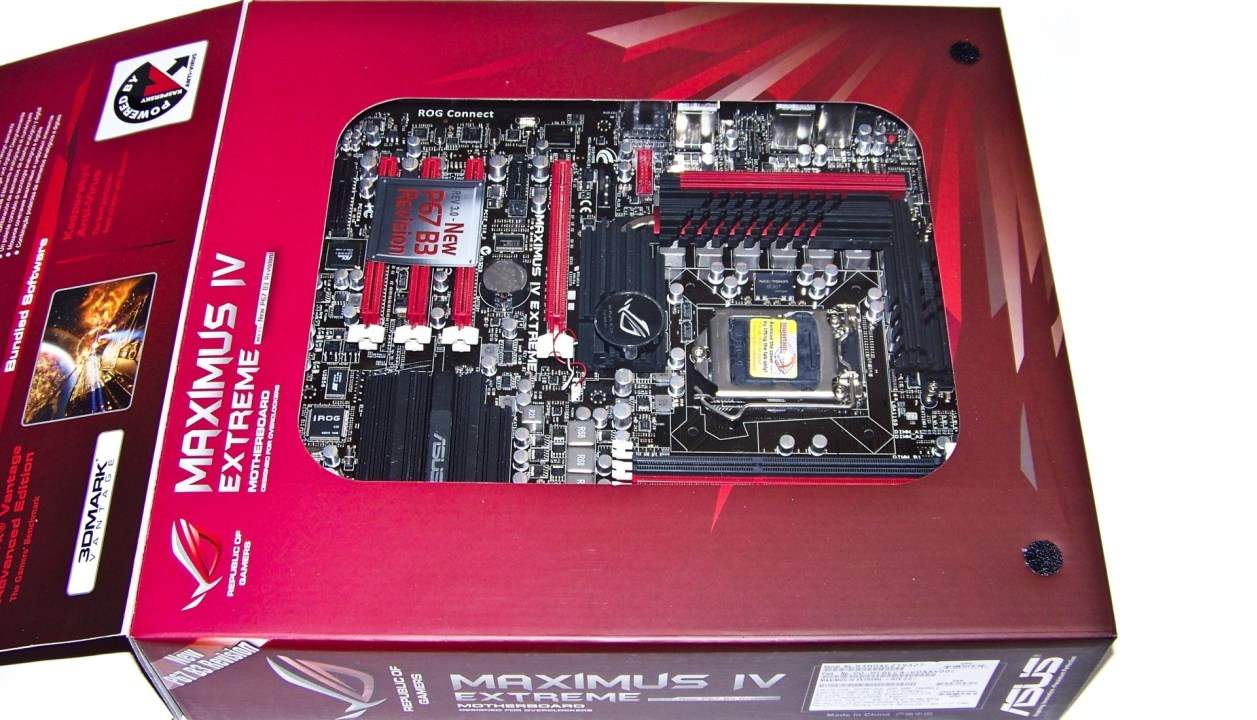
An ROG product means ASUS engineers have gone all out to offer an attractive design and the best quality components money can buy. Features like Dual Intelligent Processors and DIGI+VRM get special attention so that overclocking is essentially ensured to be above average to excellent. At the same time, the boards offer full NVIDIA and CrossfireX support for the most serious of gamers. One such platform landed in our hands named the Maximus IV Extreme still found on many a shelf. This is a highly tuned P67 ROG motherboard that really gives this platform a new life even in the face of the Z68 and X79.
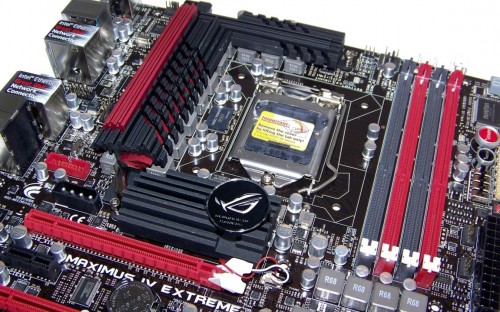
When it comes to ASUS’ DIGI+VRM implementation, engineers use different micro-processors to help manage the motherboards power needs as well as monitor things like temperature and voltages. The board has the ability to manage itself far more intelligently than any previous generation motherboard. That in turn means we don’t have to force all kinds of voltage down its throat to get it stable. Instead, we use things like “offset” voltages in the BIOS to make overclocking magic happen. Let’s have a look at the board first in our overview video below.
Granted, not every gamer is an overclocker. But, if you had the option of making a couple easy selections in the BIOS or ASUS TurboV overclocking software, would you? You bet your big iron chokes you would! That’s just one of the things we’ll cover in the overclocking section later.
As for NVIDIA SLI and CrossfireX support, this board supports any PCI express friendly video card you can buy. Our board ran ZOTAC, MSI, GIGABYTE, and of course ASUS GTX series video cards without issue no matter the size of the video card. That’s because there are four PCIE slots in a row to accommodate regular to slightly taller video cards like ZOTAC’s AMP edition with the sexy Zalman VGA coolers.
In terms of price, we found the ASUS Maximus IV Extreme on Newegg’s shelves for $349.99 and even locally for about $20 more. That puts it near the price range of some other boards we’ve tested like GIGABYTE’s GA-P67A-UD7-B3 which is around $329.99 depending on your store.
Some Board Layout Notes
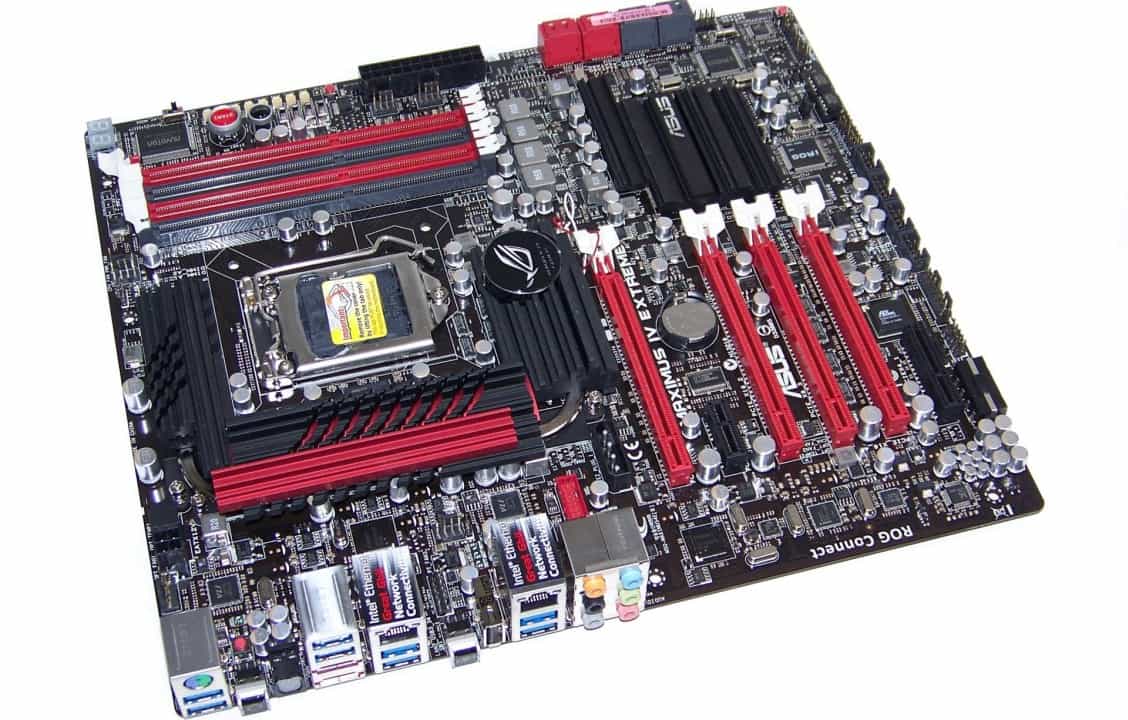
Like any high end gaming or overclocking motherboard, the MAX IV has some extra power requirements. There are two standard 4-pin Molex connectors on the motherboard above the top PCIE slot and bottom of the last PCI slot. The extra power will help stabilize those power hungry GTX 580s or especially the GTX 590s when you start getting the CPU overclock on.
If you decide to attempt some frothy overclocking, and you know you will, there is a CMOS reset button on the back of the motherboard. As I tested the board here, the button needed held about 5 seconds for a quick reset. If your board refuses to reset, the CMOS CLR jumper is located at the bottom of the board between the BIOS chips and three capacitors.

Also in the back is the ROG Connect button feature. Pressing it will allow users to connect a notebook “just like the race car drivers” so that you can monitor the system’s functions while you overclock. If you really want to get fancy, ASUS includes an RC Bluetooth Card in the accessories that connects to a header right next to the ROG Connect button. With it installed, you can overclock, tweak, and tune the MAX IV with your iPhone, iPad, or Bluetooth friendly mobile device. Neat!
Test System and Installation Notes
Thus far, everything about the Maximus IV Extreme looks very promising. But we all want to know how it performs. The most comparable board in our hands is the GIGABYTE GA-P67A-UD7-B3 motherboard which we’re including in our results. With that in mind, here’s the specs of the test systems before we get to installation notes.
- Processors: Intel Core i7-2600K “Sandy Bridge” LGA1155
- Motherboard: ASUS Maximus IV Extreme
- Memory: Kingston HyperX Genesis 4GB 2133MHz DDR3
- Graphics: ZOTAC Geforce GTX 560 Ti (Single and Dual)
- Power Supply: Antec CP-850
- Storage 1: Seagate 500GB 7200.12 SATAII (OS drive)
- Storage 2: Kingston 128GB SSDNow V+ (SATAII Test)
- Storage 3: Seagate 2TB Barracuda XT (SATAIII Test)
- Storage 4: WD 2TB Caviar Black + Rosewill RX358 (USB 3.0 Test)
- OS: Windows 7 Pro 64-bit
- CPU Cooler: Noctua NH-C14
One of the great things about the HyperX Genesis memory is its good looking low profile that doesn’t interfere with many CPU tower coolers. However, the NH-C14 is a horizontal cooler that hangs neatly above all the components while blowing air downward. While we don’t have an issue with heat, it does help keep everything well cooled.
The ASUS Q-Connectors makes connecting the front panel and USB headers super easy. Simplicity is a bonus. However, depending on your computer case, you may find the bottom 4-pin axillary power connector to be a challenge if the motherboard sits nearly against your chassis. If you have just enough room, I recommend you connect the 4-pin first, then install the board. Other than that, this is one of the most super clean ROG installations yet.