Taking a Closer Look…
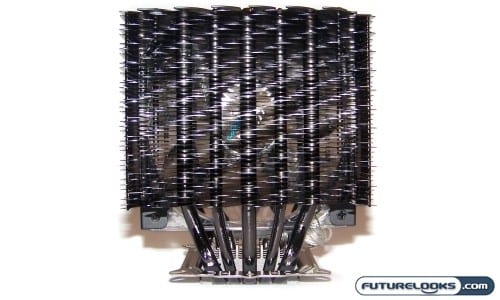
You’ll notice that the sides of the cooler are closed off. The fin edges are all flattened to help channel air through the depth of the cooler. This is actually an efficient approach ensuring that each fin and heat pipe stays as cool as possible rather than randomly blowing air through. It also just happens to make handling the cooler easier.
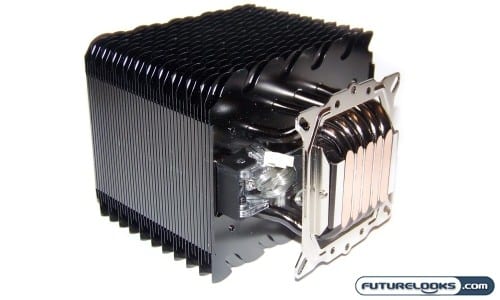
Flipping the cooler on its side, you can get a better look at the “Core Contact” heat pipe base. An aluminum block is used to help ensure the pipes are protected and stay in place since they are just made from copper. Without it, the pipes could easily flex over time.
If you look closely, you can see the seams between the CC and aluminum block base. It’s important to make sure these seams are as close as possible or some of the thermal transference breaks down. This is why it doesn’t hurt to apply paste directly to the base itself before attaching to the motherboard. More on that during installation.
The cooler’s main mounting bracket already comes attached. Due to its design, it’s a very sturdy bracket which is held in place by two screws. While it may look like it can spin or tilt in either direction, the bracket sits inside the base well enough that it can’t move.

Cleaning the internal fan is quite easy due to a very clever design. Simply remove the four black screws in the black Tuniq marked plate. Then, pull up on the plate and the fan comes along. At that point, you can blow, clean, wash, and wipe down each piece to your heart’s content.
Since the fan comes with a controller, Tuniq opted for a standard 3-pin, rather than 4-pin, 120mm blue LED fan. It’s capable of moving about 90 CFM of air through the cooler at full speed. A 4-pin connection is useful if you’re plugging straight in to the motherboard which allows the BIOS to monitor and control said fan. Since we have a fan controller, it isn’t necessary here.
Test System
Our every powerful and towering Core i7 system provided by our illustrious partners was once again called to action.
- Intel Core i7 975 Bloomfield CPU (Test 1 @ 3.3 GHz, Test 2 @ 4 GHz)
- Cooler 1: Tuniq Tower 120 Extreme
- Cooler 2: Coolermaster Hyper N620
- Cooler 3: Retail Cooler
- GIGABYTE GA-X58-Extreme Motherboard
- Kingston HyperX 6GB 2000 MHz Triple Channel DDR3
- Zotac Geforce GTX295 Graphics Accel-a-RATOR
- Kingston V-Series 128GB SSDNow
- Antec 1000 Watt Quattro
We figure if the 120 Extreme can keep this CPU cool at stock 3.3GHz or 4 GHz, no one will ever have anything to fear. We kept testing simple this time around. OCCT and Crysis were the only two programs used. Temps were recorded using both low and high fan speeds. Also, any fan speed monitoring was turned off in the BIOS to allow all fans to spin at full speed. Ambient temps were 68 F.
But before we get to that, let’s go over how the actual installation went down and what things you’ll need to look out for when installing this beast into your own system.