Going Inside the NZXT Hades
After donning my heat and fire resistant suit, the side panels were removed to get a look inside Hades. There weren’t any smoke or flames, but there was a hot sexy, black chassis staring back.
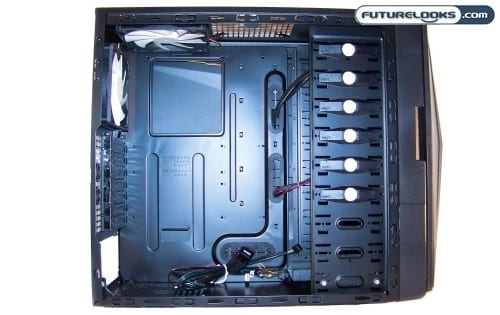
The chassis is indeed extended and sports several worthy features that include tooless 5.25″ bays up top specified by the white quick release buttons. The lower area is vented for mounting power supplies and black rubber lined grommet holes facilitate better cable management. A really large CPU cut-out in the motherboard tray makes CPU cooler installations easier.
At the bottom center of the drive bay frame, there is an area for mounting solid state drives (SSDs). Since the market will eventually start offering larger and more affordable SSDs, users will find this handy. Otherwise, if a user wants to add a 128GB SSD for their OS boot drive, they’ve got a nice out of the way spot.
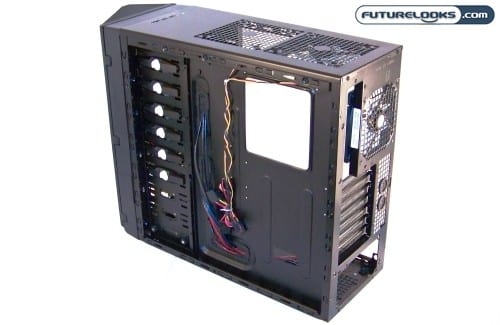
Taking a look at the left side (back of the motherboard tray), you can see that the tray sits inward just enough to get some wires in there between the panel and chassis. NZXT includes some zip ties so you can keep them from moving around. Personally, I like insulated wire ties. They’re reusable and not so permanent.
Test System Setup
Part of the case evaluation process is how easy things install, tuck in and clean up inside a good chassis. As a result, we’ve created the following list of components to install into this case. Even though the Hades is not strictly a gamer’s case, I decided to use components that create an “extreme overkill” situation which generates a worst case, thermal scenario.
The components include:
- Core i7 975 Bloomfield Processor
- GIGABYTE GA-X58A-UD5 Motherboard
- Kingston HyperX 6GB 2000MHz DDR3 Memory
- Zotac Geforce GTX295 (this thing gets hot!)
- Antec Quattro 1000 Watt Power Supply
- Two Seagate 500GB SATA2 Hard Drives
Next we’ll walk through some of the challenges during installation (if any) that you should know about.
Installation and Setup
While for the most part the setup process was uneventful, we ran in to a couple of specific obstacles that we thought were worth mentioning.
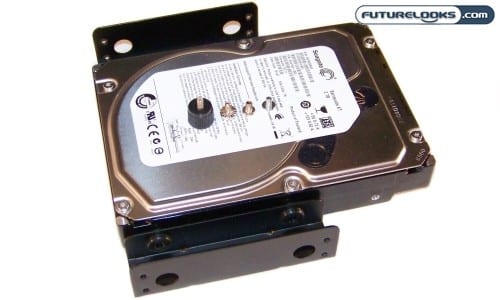
First, there are four slots specifically for hard drives that require using black drive mount adapters. For whatever reason, only three come inside the accessories box. Second, there aren’t any screws long enough to mount the hard drives because of the width of the black rubber grommets designed to liit hard drive vibrations. So, this puts a stop in the process until you hit the hardware store to find screws.
I picked up some 10mm black ones to match the mounts but more often than not we know NZXT to take care of their customers. But if you can’t wait, the 10mm screws work just fine.

On the other side of the coin, the 5.25″ trays are tooless and work pretty easily with most if not all optical drives. Simply slide them in, slide the black strip, and turn the white dial to lock it in place. Also, SSDs do fit nicely in to the small internal tray.
Also, the motherboard cut out is practically perfect in size. You will be able to get the largest CPU coolers and back plates known to man kind in there without issue. This is a welcomed feature and should be a standardized design across the market.