GIGABYTE Z87X-UD5H – UEFI BIOS and Overclocking
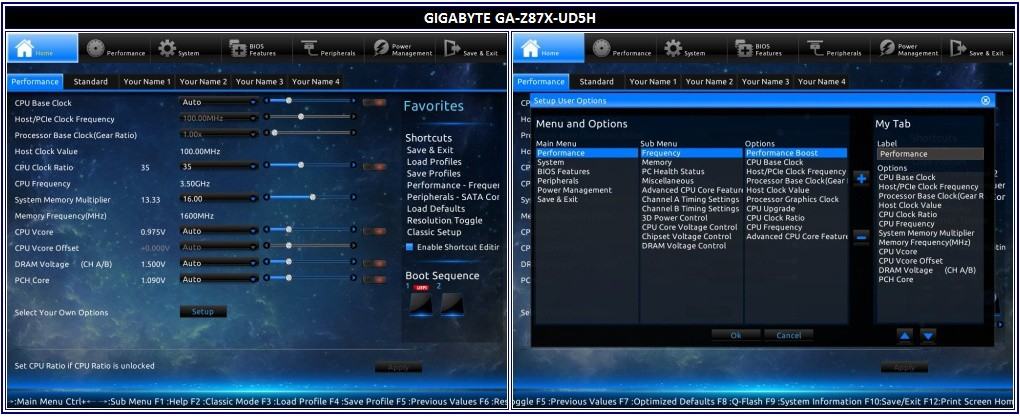
After handling the new UEFI BIOS, I can safely say that the 3D BIOS is a bad memory. The new BIOS allows for customized Favorites, or settings you regularly use but it’s not built in to every page. And, there are On-Off buttons that enable editing the settings. While it’s kind of a neat feature for semi on-the-fly tweaking, it sometimes slows down the process. The Home screen has everything most overclockers and tweakers need. A sliding Boot Sequence option is on the page as well. There are sub-tabs for creating four profiles which can customized to support four of your best performance habits.
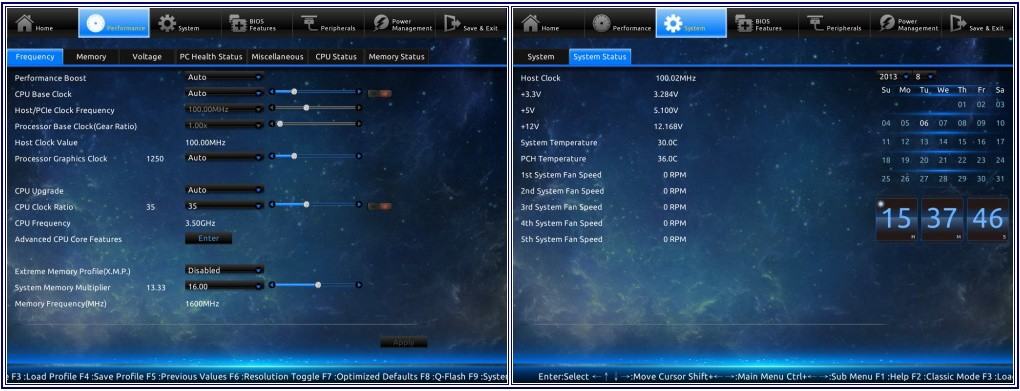
Layout wise, the Performance tab is the main page for getting down and dirty with your overclock or simply maintaining the system. The memory, voltage, health status, CPU status, and memory status are all logically located here. The System tab is essentially the security page but also has redundant System Status data. Oddly there is also an option to change the BIOS Start-up page you’d like to see when the BIOS first loads. This would serve better if always visible on the BIOS task bar.
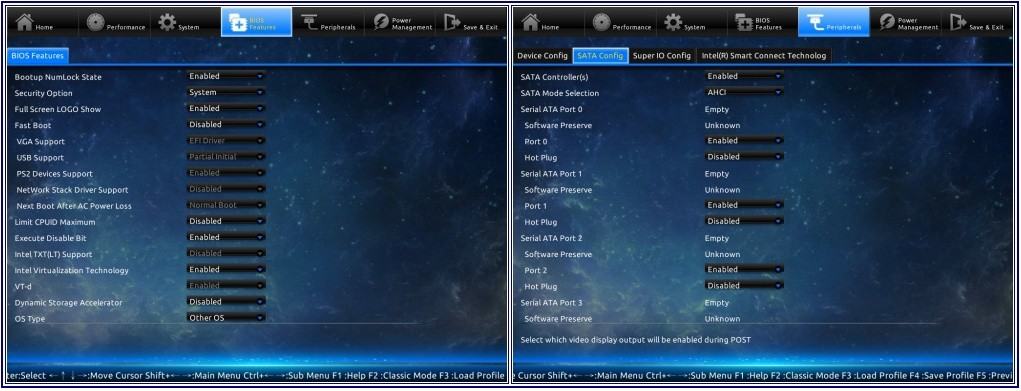
The BIOS Features page contains more miscellaneous settings not commonly used. You’ll find the Peripherals page contains boot device, SATA, IO, and all the Intel built in feature settings. Despite a couple editing issues and crammed text, users will probably be able to figure things out if they’re familiar with BIOS options. I did also notice the lack of explanations and information bar when clicking on settings.
Working through the BIOS and checking out preset overclocking settings, the UD5H was pretty solid up to 4.5GHz but nothing more. The board also manually feeds a loftier 1.35 volts to maintain stability. Manual tweaking revealed the CPU was stable with less than 1.3 volts. As long as you have ample CPU cooling, you’ll be fine. If you have weak cooling and attempt this, you deserve the wrath of the CPU spirits. Top end manual overclocking resulted in 4.8 GHz at 1.43 volts but a little voltage droop was evident. I noticed a couple of the high frequency and large capacity kits used correct XMP frequencies but not always the correct timings. Fortunately, a little manual tweak corrected the settings and the board scaled to meet the fastest 2666 MHz Corsair Vengeance specs.
Things that could use some adjusting: I noticed that the information bar at the bottom was very limited on some settings. For example, when hovering over SATA Mode Selection, the note said “Determines how SATA controller(s) operate.” A little more information about the modes in short hand would help users. The BIOS Start-Up Page option would serve better if moved to the Home page for quicker reference. Also, occasionally, the BIOS would stop communicating with the CPU fan. While only for a second, if you have CPU protections enabled, you’ll keep getting alert notifications or possibly a power down.
MSI Z87-GD65 Gaming – EUFI BIOS and Overclocking
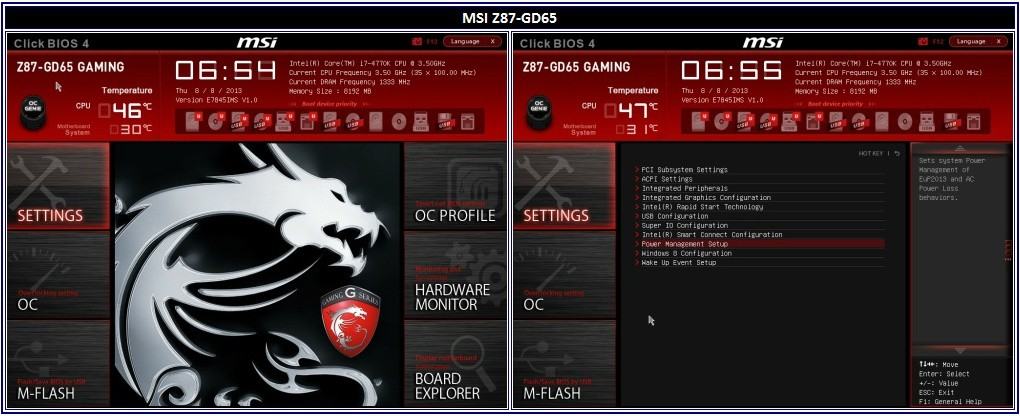
MSI has pretty much stuck with the previous gen UEFI BIOS that was also used in their Z77-GD65 board. The home page kind of resembles Windows 8 where users will find Settings, OC, M-Flash, OC Profile, Hardware Monitor and Board Explorer tiles. A row of sliding boot drives and current system specs make up the header.
My favorite MSI hardware to BIOS feature this round goes to the Go2BIOS button. OC Genie 4 switch control 4GHz and 4.2GHz selections worked flawlessly as well. These are achievable with decent CPU cooling. Anything higher, requires manual tuning and very good CPU cooling.
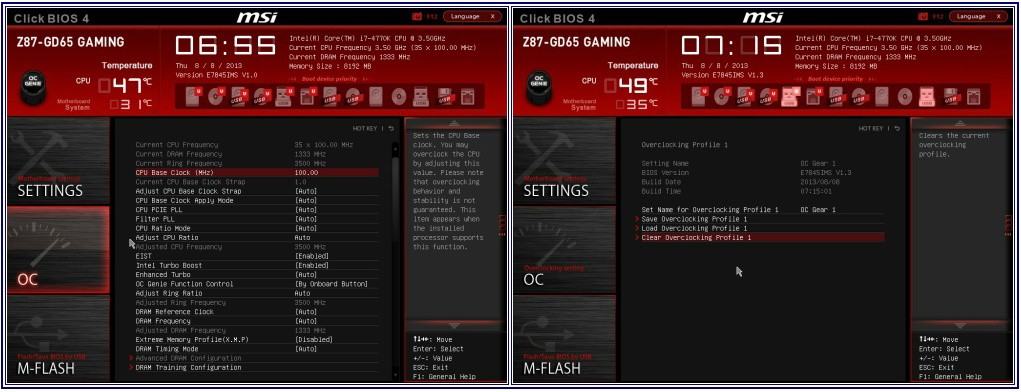
In the Settings, you’ll find peripheral, IO, storage, and component options. A lot of built in Intel configurations are here as well. The OC tab has all the frequency, voltage, memory timings, and XMP options. Basically, the OC is all about tweaking your overclock if you prefer over the OC Genie 4. OC Profile saves several choice configurations. One very handy setting is the Offset voltage options. This option is safer to use than setting a constant manual core voltage. A stable 4.7GHz with 1.29 volts was achievable relatively easy. Going for anything hire like 4.8GHz required voltage that gets entirely too hot with Haswell.
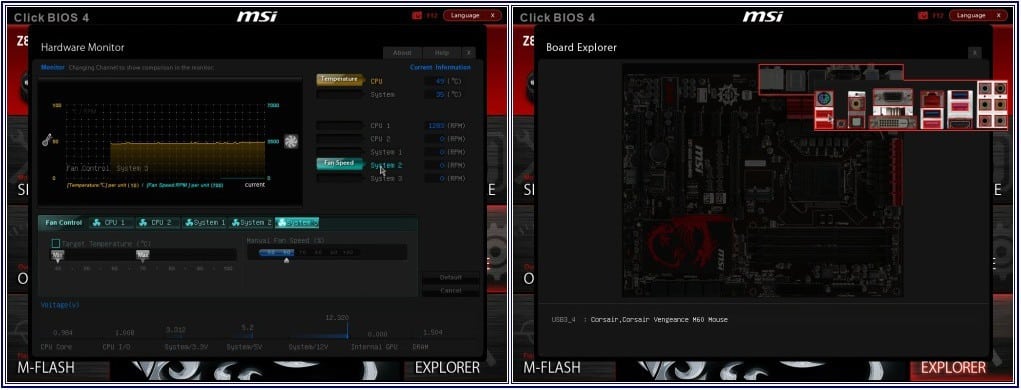
Hardware Monitor basically contains the system’s “medical” statistics such as power settings, voltage reports, temperatures, and fan control. I used this tab quite a bit while keeping an eye on Haswell’s nuclear core. Cooling is very important so it’s nice to see some kind of fan control. While there is full CPU and CPU optional fan control, there is only partial chassis fan control instead of full fan control like the ASUS BIOS.
While the functions of the MSI BIOS are better than the previous gen, I found it to be the least fluid in terms of layout and interactivity. You have to get use to clicking the Settings tab to find the option to Save and/or Quit as there are no quick note options.
Quality Control and Thermals
I took the time to examine each board’s component and operation quality looking for noises and any thermal issues. The ASUS Z87-Deluxe was very quiet and operated noticeably cooler than its Z77 cousin. It was especially cool when the 4-Way Optimization setting switches to “Away Mode” cutting back on wasted power. Forget EPU mode, 4-Way lets you have the best of both worlds.
The GIGABYTE Z87X-UD5H was also very cool and quiet bringing back impressions of the UD5H-TH from last gen which basically set a new low thermals standard. Easy Tune’s power saving mode will help lower the VREG heat just a little more. There isn’t much there by default.
The GD65 Gaming surprised me this time keeping cool and quiet. Command Center has a similar option to conserve power which can lower heat just a bit more. In either case of these boards, it takes quite some effort and overclocking to these boards to top 55 C.
Power Consumption and Voltages
Power consumption was measured at the socket using the Rosewill Tachyon Platinum 1000. This gave me a general idea as to how each board manages power from idle to load running the same exact load tests (Prime95 and Unigine Heaven 3.0 Demo) in intervals. Voltages were monitored using each board’s corresponding software and corroborated with Hardware Monitor Pro.
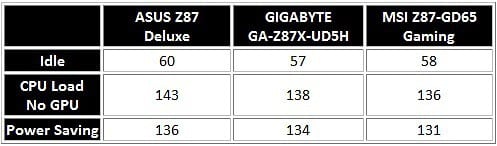
As expected, the ASUS Z87-Deluxe consumes a little more power because it has a couple more monitoring processors and featured connectivity. However, notice the idle power consumption at a low 60 watts. It’s surprisingly close to the UD5H and GD65 which are both good representations of average power consumption you can expect among medium range motherboards. In each system’s corresponding power saving modes, only a few watts less was consumed. Voltages stayed well above further supporting the great need for 80Plus efficient power supplies.
Now let’s start breaking down the boards even further!