Testing System
Our test system was setup with the following components. Although some of the components would be over spec for a build like this, it should still give us a real world look at performance.
Hardware
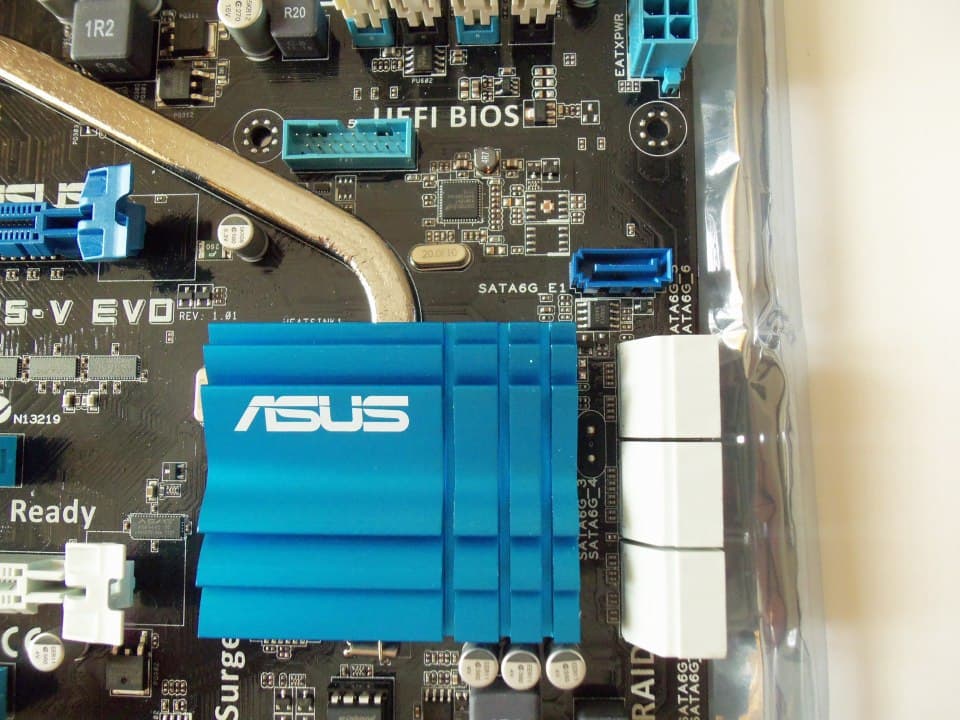
- Motherboard: ASUS F1A75-V EVO
- CPU: AMD A8-3870K Llano 3.0GHz Socket FM1 (clocked at 2.9 GHz)
- GPU: AMD On-die HD 6550D default 600 MHz core speed
- Memory: G.Skill Ripjaws X 2133 MHz (9-11-10-27) @ 1866 MHz (9-10-9-27)
- Power Supply: Antec 850W HCP 80+ Gold
- Case: SilverStone TJ04-EW
- SSD: Patriot Pyro SATA III MLC 60 GB (Sandforce 2281 controller)
- HDD: Seagate Barracuda XT 2 TB
- Sound: Realtek ALC889 (Integrated)
- USB 2.0 Test: Corsair Flash Voyager 16 GB
- USB 3.0 Test: Rosewill USB 3.0/eSATA Enclosure + Samsung SpinPoint F3 1 TB
Software
- Windows 7 64-bit Ultimate
- PCMark07
- 3DMark11
- Alien Vs. Predator DX11 benchmark
- Resident Evil 5 DX10/DX9 benchmark
- FRAPS
- Metro 2033
- Battlefield 3
- CrystalDiskMark 3.0.1
- OCCT’
- ATTO Disk Benchmark
- FurMark Burn-in
- RightMark Audio Analyzer 6.2.3
Let’s get to installing the board and providing some of our notes on the installation process.
BIOS, Motherboard Layout, and Installation Notes

There is a lot going on here with the additional controllers, audio chip, display I/O component array, DIGI+ EPU, etc.; however, nothing seems to be crowded or forced into areas it should not be. Thanks to the great use of spacing, you will have no issues with the installation of the F1A75-V EVO. Once the entire system is built, you will have no issues reaching ports or headers if needed to add new components such as a graphics card or two.
The only problem I had during installation was that there were only two USB 2.0 ports on the back. Once occupied by my keyboard and mouse, I did not have a working USB port for pre-installing Windows 7 drivers or so I thought. The ASMedia ports, however, needed their own drivers to be properly recognized by the system, so they are not functional until the OS is installed. Moving the thumb drive to one of the two ports from the A75 FCH provided USB 2.0 support.
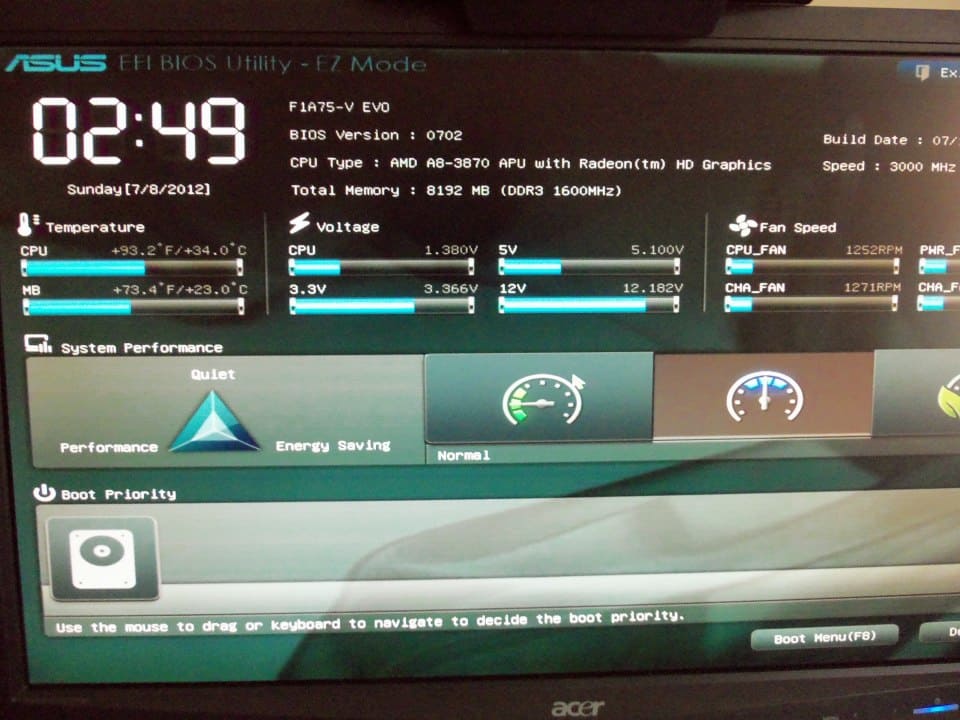
The ASUS F1A75-V EVO come with the UEFI graphic BIOS you would find on their top tier boards. By default you are given the EZ mode which gives you all the basic information you would need on a single page. You can see the time, current clock speeds, hard drive boot order, major voltages, fan speeds, and temperatures of CPU and motherboard. Since the only things you can change are the boot order of drives and presets provided by the EPU/TPU, this is a great mode for most people who just need to get their system up and running quickly.
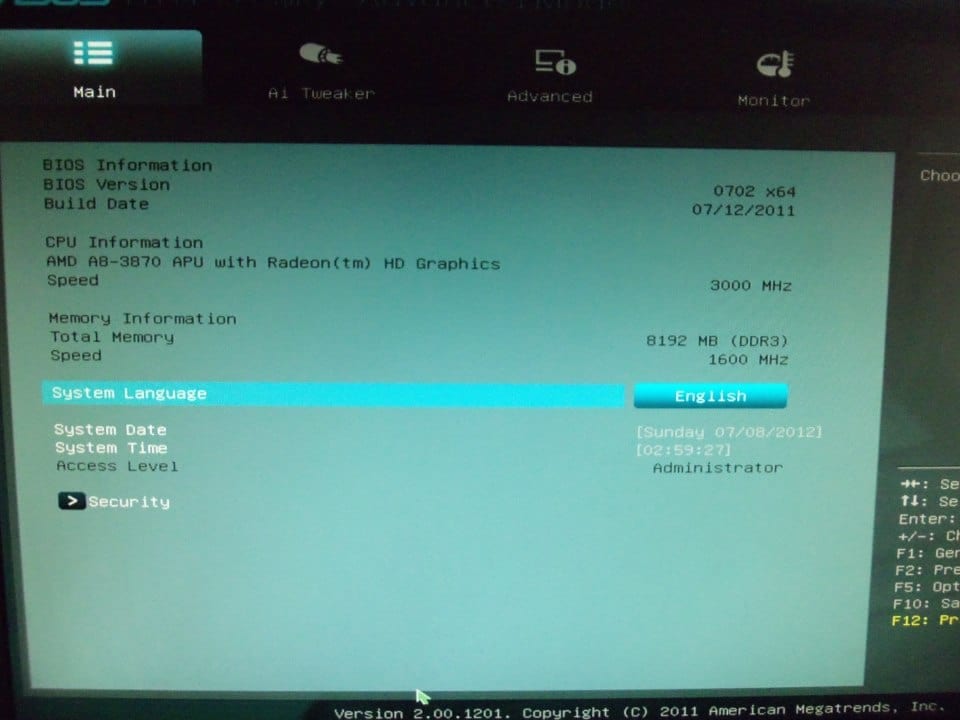
If you click on the Exit button you will seen an option to enter the Advanced UEFI BIOS mode. This takes you to a design that is much more familiar to DIY builders with the addition of being able to use your mouse. You will find any and everything you would ever need to control the options of this motherboard including APU, voltage, timing, and on-board feature controls. You can also save your settings to easily restore to a stable point during overclocking.
The nice thing about the ASUS boards is that the BIOS isn’t your only option as their software seems to be just as capable.
Software Bundle

I know I normally don’t exclusively talk about the included software with my reviews, but this time is a little different. Most bundled software are trial offers of other products such as Norton Anti-virus, or MediaEspresso 6.5, etc. The only software you find with the F1 EVO is the ASUS AI Suite II. While a single piece of software, it is a veritable swiss army knife of features for your motherboard.
The ASUS AI Suite II allows you all the access you need to tweak your motherboard without a required restart. It is a fan controller, overclocking tool, temperature monitor, and BIOS updater all in one. If you needed to tweak your system, iron out performance kinks from your last overclock, or just turn the fans on low so you can watch a movie, the AI Suite II is all you need. This is something that other companies can learn from. As we found out in our review of the GIGABYTE User Experience, having a bunch of non-unified apps installed all over your hard drive doesn’t really help you. All manufacturers could learn from ASUS in this respect.
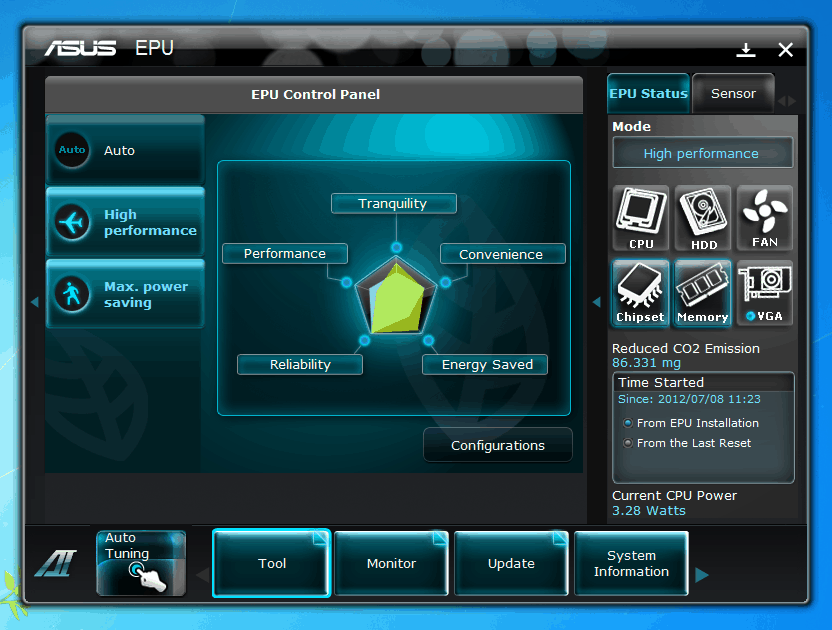
Just like the ASUS UEFI BIOS, the AI Suite II can be a simple tool for average users or a complex PC control center for experts. I personally like being able to control the EPU settings without restarting my PC. The automatic setting works well, but not nearly as well as the Max Power Saving Mode. I use this mode for watching Netflix as it made my build near silent.
The only really weakness to the ASUS AI Suite II is the BIOS updater. It had real trouble locating the correct BIOS update for the F1A75-V EVO. After waiting nearly 10 minutes, I found it easier to download the file myself and use the “Update from file” option. I am not sure if it was the software or the BIOS update server creating the issue, but it was an easy enough work around. Hopefully it’s just an easily rectifiable server glitch on their end.
Tools like this often feel like you are forcing your motherboard to do something it should not be. The AI Suite II feels like it is there to help your motherboard do what you need it to do to the best of its ability. This could be because it is all bundled together and provided by the manufacturer; or because all the key features are represented in a way that seems like the version of AI Suite you are using was built just for your F1A75-V EVO. Again, something that many manufacturers simply do not do right, thus we end up just not installing them at all.
Let’s have a look at the overclocking experience.