Installation and Setup
After unpacking all the box contents and having everything in front of me, I was ready to hook the scanner up to my computer. One would think that a piece of hardware like this should be relatively straight forward. Plug it in via USB, install the driver and you are good to go.
Of the 3 quick start guides, I had no idea which guide to start with first so I started with the plustek “Read Me First Guide”. This guide walked me through the connection of the hardware and installation of the driver software. This was relatively straightforward using the plustek OptiFilm Setup Application CD Rom.
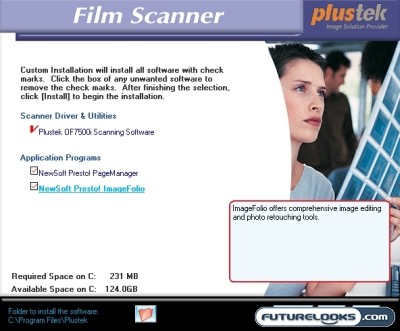
There are two pieces of other software on the driver CD:
- NewPresto Page Manager – this is a file organization program
- NewSoft Presto ImageFolio – this is an imaging editing and retouching program.
I figured that I would choose not to load Page Manager and Presto ImageFolio as I like to organize my folders my own way and like most people I already have other imaging editing and retouching programs that I am comfortable using such as IrfanView and Adobe Lightroom. If you do not have image software that you already use, then utilizing NewSoft Presto ImageFolio would be a viable option.
After the scanner is installed, the scanner icon installs itself in the windows system tray by the clock.

Double Clicking this icon or going via the Start, Program menu, you can access the QuickScan settings window.
Using the Software
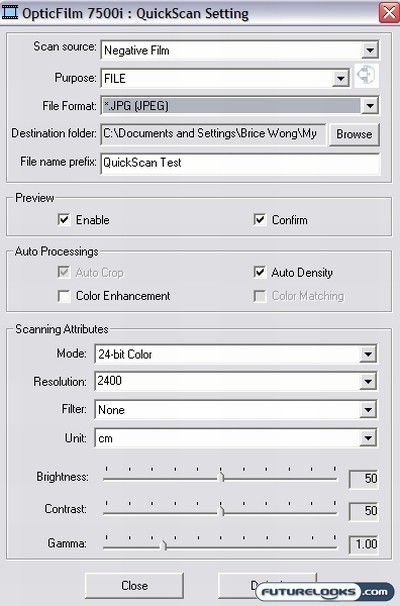
Most of the options are pretty straight forward and intuitive to use. Of all the changeable options, the 4 most important changeable options in this menu to me were:
1. Selecting between 4 different file formats ( TIF, JPG, PCX, or BMP) that you want the scanned file to be saved as.

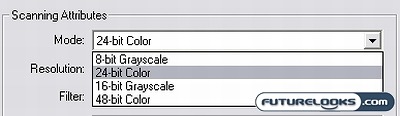
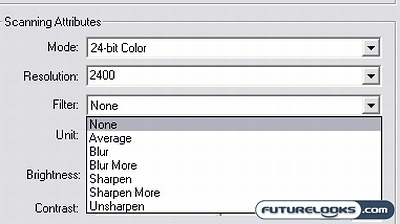
2. Selecting from a number of color modes. 8-bit Grayscale, 24 –bit color, 16-bit Grayscale, and 48-bit Color.
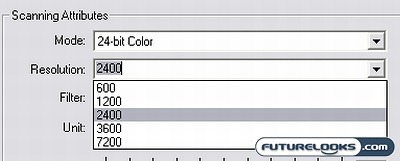
3. Choosing the resolution you want the image to be, 600 dpi, 1200 dpi, 2400 dpi, 3600 dpi, and 7200 dpi.
4. Apply a number of filters to the scan if you also like. Blur, Sharpen, Average, Unsharpen etc.
The true power of this scanner really comes from letting the user choose the resolution and the color mode of the scan.