
A Look At The BIOS…
Each motherboard was evaluated on aspects like installation, setup, and BIOS. These are the main aspecs DIY users will work through especially in regards to the BIOS. Here are some notes on what we experienced as end users.
MSI Z97 Gaming 7
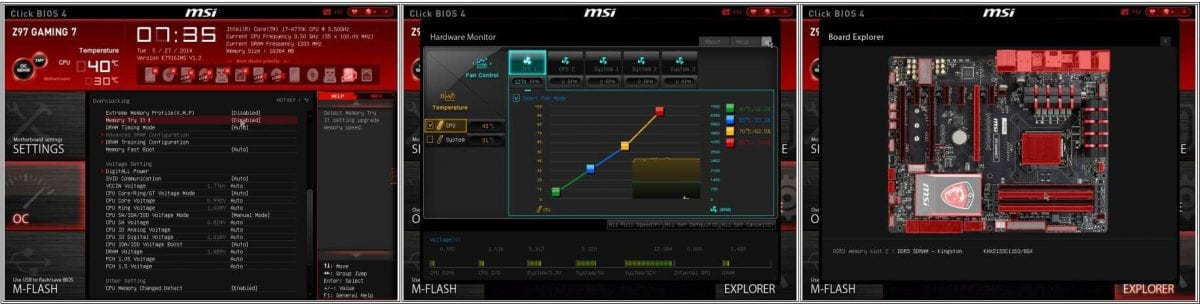
The easiest to setup was the MSI Z97 Gaming 7. Hardware configuration is very clean and simple. They’ve finally got their driver software a bit more aligned so that it’s easy to install. When it comes to configuring the BIOS, only three main buttons on the left which will be easy to remember. Flashing the BIOS is also quite easy. The main BIOS screen makes it easy to arrange your Boot drives by dragging and dropping the order.
Unfortunately, the Info bar on the right still doesn’t quite educate the user to each setting’s purpose. For the user who needs a quick installation without all the minute tweaking options, this is your board.
ASUS Z97 Sabertooth MKI
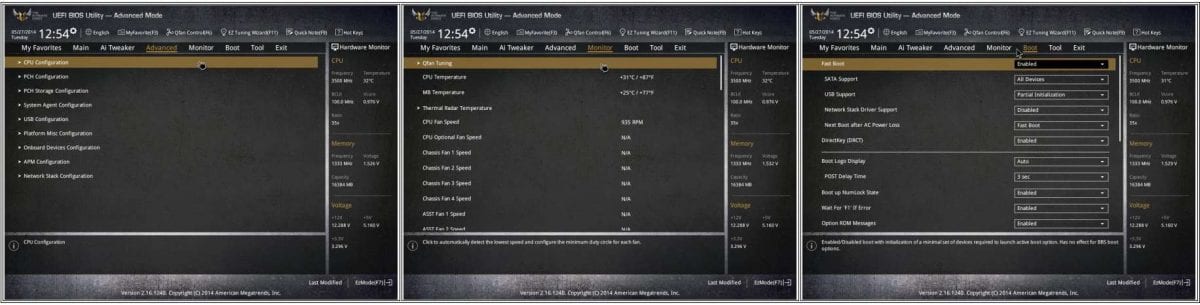
The most informative experience was the ASUS Z97 Sabertooth MarkI. Users will find it surprisingly simple to setup despite the seemingly complex platform and numerous features. The most difficult steps involve adding the optional small cooling fans which really aren’t needed, and the routing of WiFi cables. It’s easy to see where everything needs to go and the quick connect front panel headers are still useful.
The ASUS software suite is thorough and only includes what is supported by the board, to minimize bloatware. But the BIOS is the most complex of the lot with plenty of settings for tweaking and overclocking. However, the information bar makes the BIOS user friendly explaining a lot of the settings. In fact, the basic user won’t even have to venture past the main screen to the advanced mode.
GIGABYTE GA-Z97X-UD5H

The GIGABYTE GA-Z97X-UD5H is slightly more involved in that the set up has a larger software suite which includes a lot of apps for different aspects of the system. Users don’t have to install everything to experience the board but most are needed. Manual setup still requires installing the App Center first or else the supporting app software will appear to install without any error yet can’t be accessed. That’s one of the caveats for having hub-based software, but it is far better integrated than GIGABYTE’s previously disjointed effort, that involved installing a whole bunch of mismatched software.
The BIOS reveals a lot of information and settings but the descriptions are still fewer than expected. There are plenty of tuning options for overclocking, which is to be expected from GIGABYTE. Unfortunately, the shortcut F key options are jumbled at the bottom which can make it feel chaotic. Two lines of text would be a better and clearer option.
Aside from the small issues, users will find the basic installation process easy enough without having to go to the BIOS.
ASRock Fatal1ty Z97 Killer

Finally, the ASRock wasn’t difficult to set up in terms of software but the hardware installation had some obstacles partially due to its slimmer PCB base.
First, the DIMM (RAM slots) are closer to the CPU socket than most other boards meaning you’ll probably want to use low profile memory, so that things clear properly. Second, the bottom PCIe slot is so close to the chipset heatsink that the locking clip just barely allows enough room to tilt the big video cards out. Third, the gray SATA ports near the heat sink are flimsy and tilt noticeably if any pressure is placed on them. Fourth, only one active USB port is available during setup. If you install Windows from USB, you only have the one port which means no keyboard or mouse making it very frustrating.
Some minor placement issues include the CMOS and BIOS selection jumpers which are between the two red PCIe slots and the front panel (case) header, which is located in the middle of everything at the bottom. Hopefully you won’t need these jumpers when running dual cards.
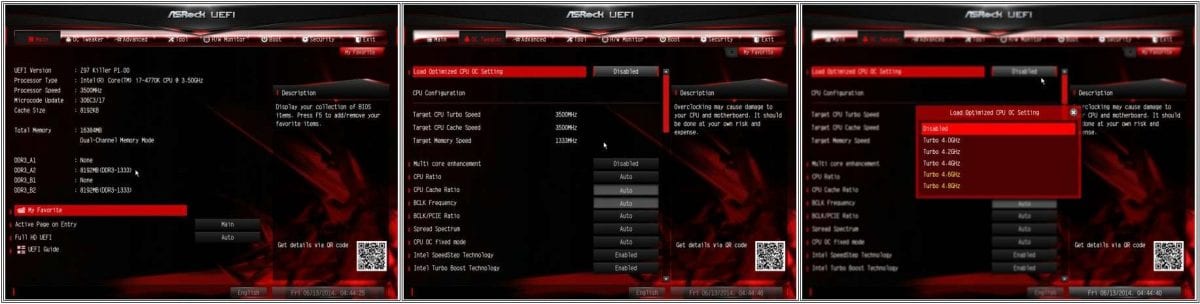
Finally, the BIOS is quite simple as it’s a gamer supporting board. There are plenty of tuning options but it also lacks some of the better descriptions for more novice users.
Global Test System Configuration
Here is the list of the components used in testing. The only change was the swapping in and out of motherboards. Otherwise, the rest of the components were kept standard through each test set, to maintain consistency.
- Processor: Intel Core i7-4770K and Core i7-4970K
- CPU Cooling: be Quiet! Dark Rock Pro 3
- Motherboard 1: GIGABYTE GA-Z97X-UD5
- Motherboard 2: ASUS Sabertooth Z97 Mark I
- Motherboard 3: MSI Z97 Gaming 7
- Motherboard 4: ASRock Fatal1ty Z97 Killer
- Memory: Kingston HyperX Beast 16GB
- mSATA M.2: Kingston 120GB (SM22803G/120G)
- Storage: Kingston HyperX 240GB SSD
- Graphics: ZOTAC NVIDIA GTX 770 2GB
- OS: Windows 7 Pro
- Power: beQuiet 850 Dark Power Pro 10 (80Plus Gold)
All the latest firmware, BIOS, and drivers at the time of writing, were used with the boards. And because of constant refinements of these items, performance may vary slightly down the road.
The systems were benchmarked in an open tech station from Epicenter Design Works. I’ve been using the aluminum stations for almost two years now as the design is one of the most easily accessible chassis around. This way we can keep the systems as cool as possible.
In terms of benching software, we used PCMark 7 first, as it performs a pretty extensive overall system test, seeing if the motherboard can influence the scores. SISOFT SANDRA was used to test each boards’ basic IO performance which includes SATA, USB, network bandwidth, and any other connective features. Some game benchmarks were thrown in to make sure the boards can support PCIe graphics flawlessly.
Audio performance, overclocking, and power consumption finish off the tests. Alright, it’s benchmark time!