
A Closer Look at the Vengeance 1500 USB Headset
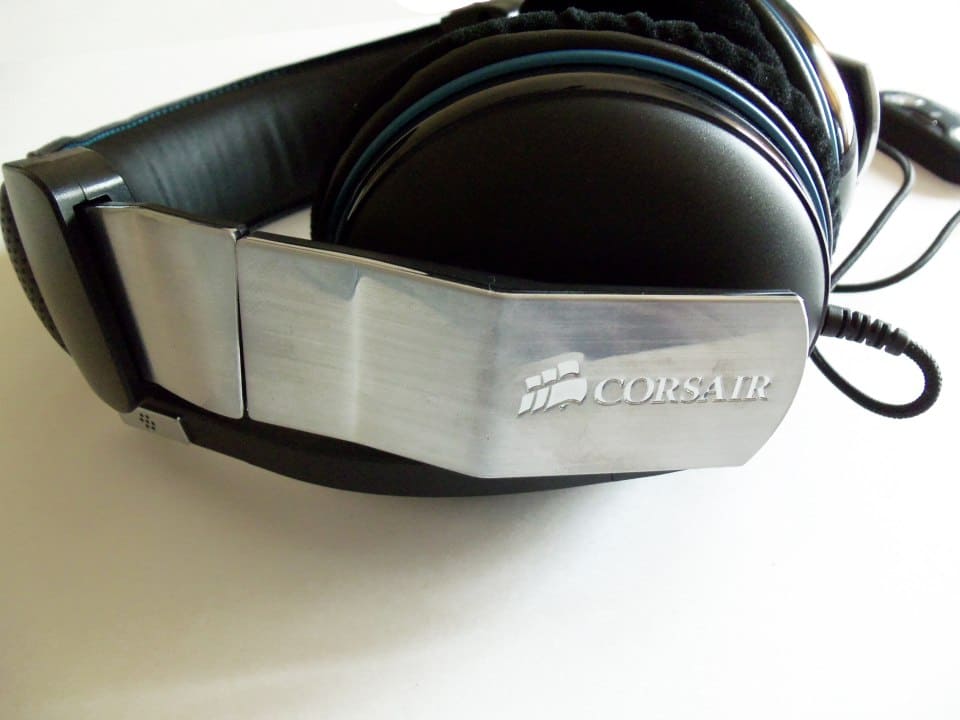
The Corsair Vengeance 1500 Gaming Headset looks great. The first thing that will grab your attention is the shiny sliver arms with the stamped Corsair logo. It gives the appearance of metal, but is clearly plastic once you touch it with your hand. It has what appears to be a silicone coating to prevent scratching and makes restoring the shine easy with just a damp towel.
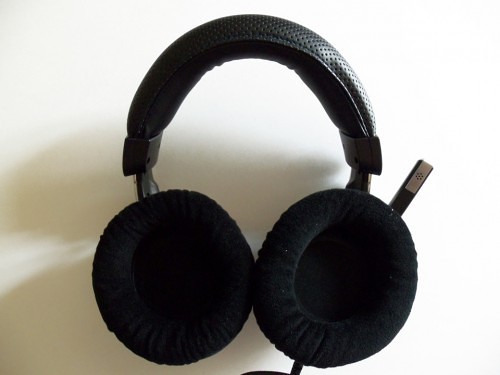
The ear cups themselves are very large oval shapes with a micro-grit texture and matte black color, surrounded by a glossy black plastic band. This is then finished with a Corsair blue band. The mic arm is coated in durable soft foam with a silver tip. The tip is the same material and design as the headset arms. The arm itself is flexible and can be curved though I found this to be largely unneeded thanks to the great placement of the mic boom.
The headband is vented black faux-leather with Corsair blue stitching. This is a nice accent and tells me the designers paid a lot of attention to detail. The overall look is great with plenty of contrast and good material choices. Now lets install the software and look at the audio control panel.
Setup and Software
The Setup process is very easy and straight forward. You simply go to the download section of the Corsair Vengeance 1500 Gaming Headset product page here, download the driver/software, then start it like any other installer. During the process, as with most USB drivers, you will be asked to plug-in the headset. Now you are done as a system restart is not necessary because the software is merely installing alternate audio drivers. When you are using your Corsair Headset, you are not using your computer’s default audio codecs.

The audio codec is C-Media’s CM6302 designed for USB 1.1 devices, but does support USB 2.0. When you plug-in the Corsair Vengeance 1500, it will initialize and switch over to its own driver. The audio processing for 5.1 and 7.1 surround sound is provided by Dolby Prologic II. In addition you can find preset audio settings for MMO games, FPS games, music, and others.
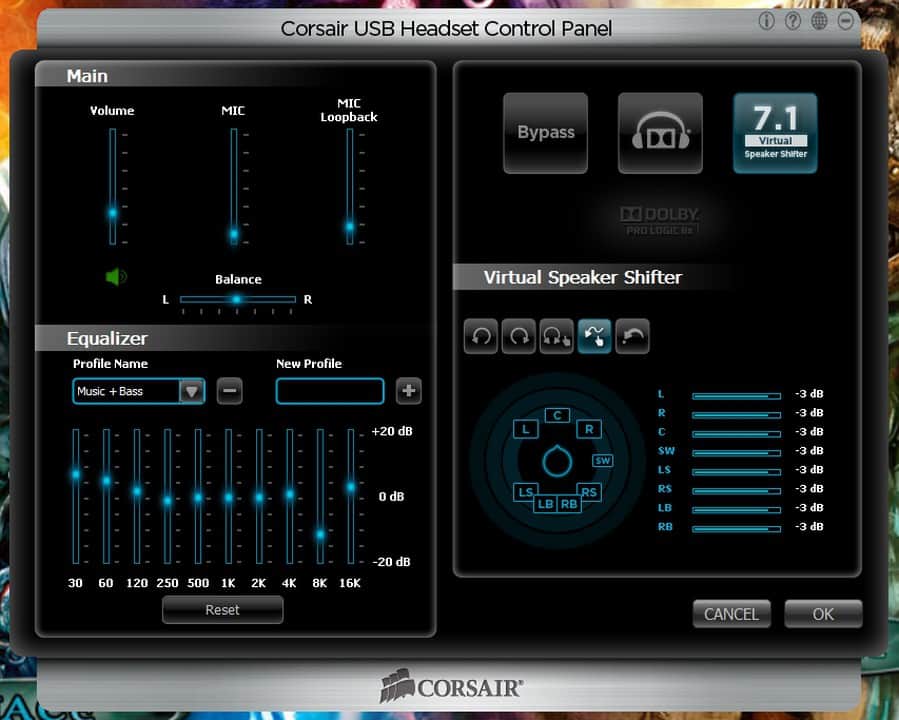
The control panel is simple and straight forward. There are no sliding panels, different pages, or pop-ups. In addition, only the options that apply to the mode selected can be seen in the bottom right. This cuts down on clutter and does not overwhelm users with dozens of options they may not fully understand.
The latest version (1.1 as of this writing) of the drivers for the Corsair Vengeance 1500 comes with Dolby Home Theater 4. I find the inclusion of this software redundant as it offers the same options you get from the software Corsair provided. In addition, it creates a conflict that prevents the mic from initializing when first connected. If you find the Dolby Home Theater software to be useful, then by all means use it. I personally recommend that you simply remove it after you install the drivers.
The default setting is “Bypass” which is straight 2.0 stereo with no audio processing and has no additional options checked. This is a good starting point for you to evaluate all the other settings against. The second Dolby Digital 5.1 surround sound allows you to adjust the distance away from the virtual speakers. When active you can change the environment which changes the default distance used in simulation calculation for audio. The final mode is clearly labelled 7.1 Virtual Surround sound. This mode gives you full control over the location of each virtual speaker.
Let’s move on and see how these things rate when it comes to important things like comfort and audio quality!