Removing the Glass

Four thumb screws secure the tempered panels on each side. You can see the very nicely fabricated aluminum motherboard tray. There’s enough space for a 165 mm (6.5 in) tall tower cooler. Since mini-ITX don’t have enough real estate for large CPU coolers, you should choose your cooler carefully. Most every CPU cooler manufacturer includes the height on the product page so make sure to double check. If you aren’t sure about air cooling, consider all in one liquid cooling because it’ll fit even better.
Thumb screws secure the storage trays that support platters or SSDs. Users have the option of removing what they don’t need. Below the storage trays, there is a thumb screw secured dual 120mm aluminum frame. Users can add cooling fans or a 240 mm radiator. That’s just enough to cool a medium to entry level graphics card and quad core CPU, if you choose to do a full loop.
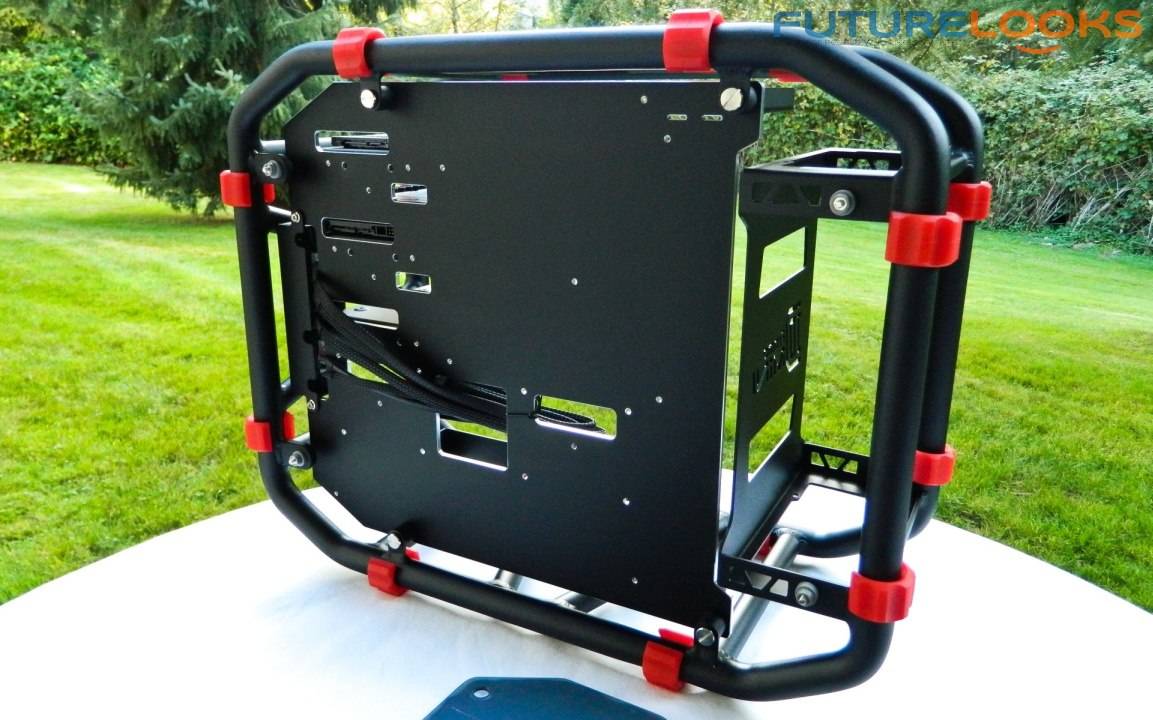
On the left, there’s just enough room for managing wires. However, there isn’t quite enough room to stack PSU cabling if you like to bundle them up in one run. As long as they laid down relatively flat, it will all fit nicely. The enclosure accessories include plastic rings that can be placed in any one of the empty holes visible on the back.
The only thing missing from motherboard tray is a cut out handy for mounting CPU coolers. If there was a cut out, users could mount it after mounting the motherboard. As it stands, a CPU cooler will have to be mounted first. We’re not sure if a cut out would have compromised the integrity of the case or system, but it’s a standard feature today, and should be included.
Test System Setup
An air cooled CPU cooler and all in one liquid cooling system was used for testing the difficulty of installation, and overall functionality of the IN WIN D-Frame Mini enclosure. Here are the hardware specs.
- Processor 1: Intel Core i7-4770K Haswell
- Motherboard 1: ZOTAC H87-WiFi Mini-ITX
- Processor 2: Intel Core i7-4790K Devil’s Canyon
- Motherboard 2: ASUS Maximus VII Impact (Z97) Mini-ITX
- Memory 1: Kingston HyperX Fury 16GB 1866 MHz DDR3
- Memory 2: Kingston HyperX Savage 16GB 1866 MHz DDR3
- Graphics 1: ZOTAC GTX 980 AMP! Extreme Edition
- Storage: Kingston HyperX Fury 240GB SSD
- CPU Cooler 1: Cooler Master Hyper T4
- CPU Cooler 2: Thermaltake Water 2.0 Extreme
- Power: be quiet! Straight Power 700W 80Plus Gold
- OS: Windows 7 Pro 64-bit (Patched)
How did it all install? Did everything fit and was it supported well by the IN WIN D-Frame Mini? We answer those questions next.
Installation Notes

As previously mentioned, any cooler other than the Intel retail cooler must be attached before installing the motherboard. The holes for the enclosure are pre-drilled and require installing stand offs before hand. All the stand offs and screws needed are in the accessories bags.
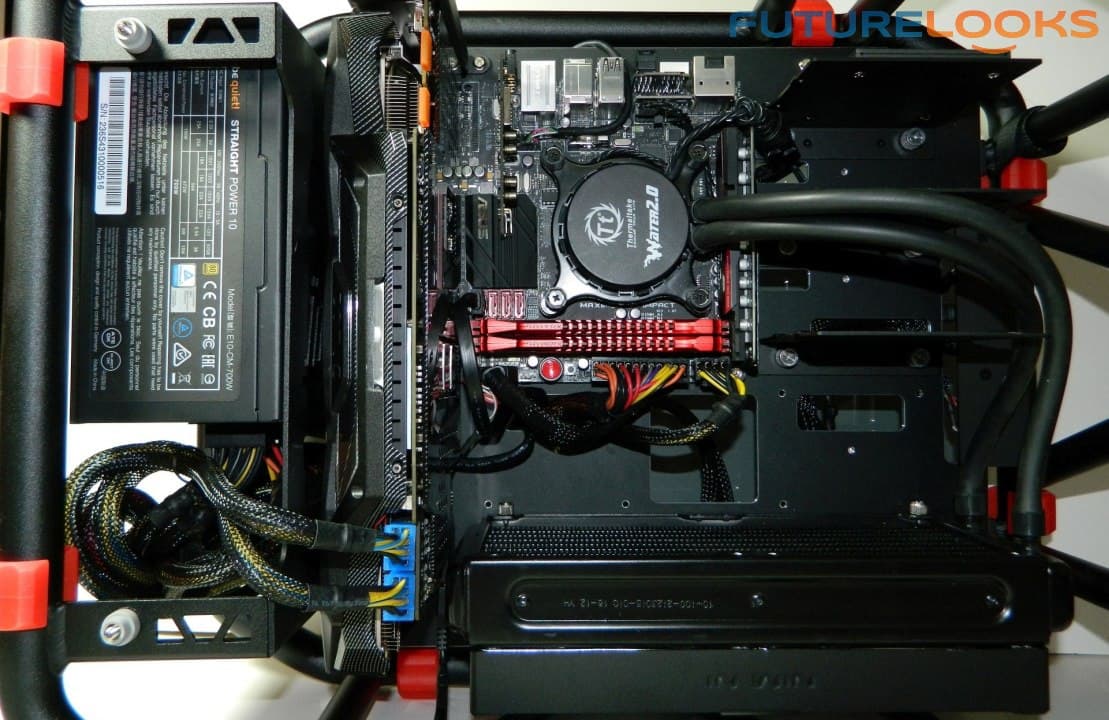
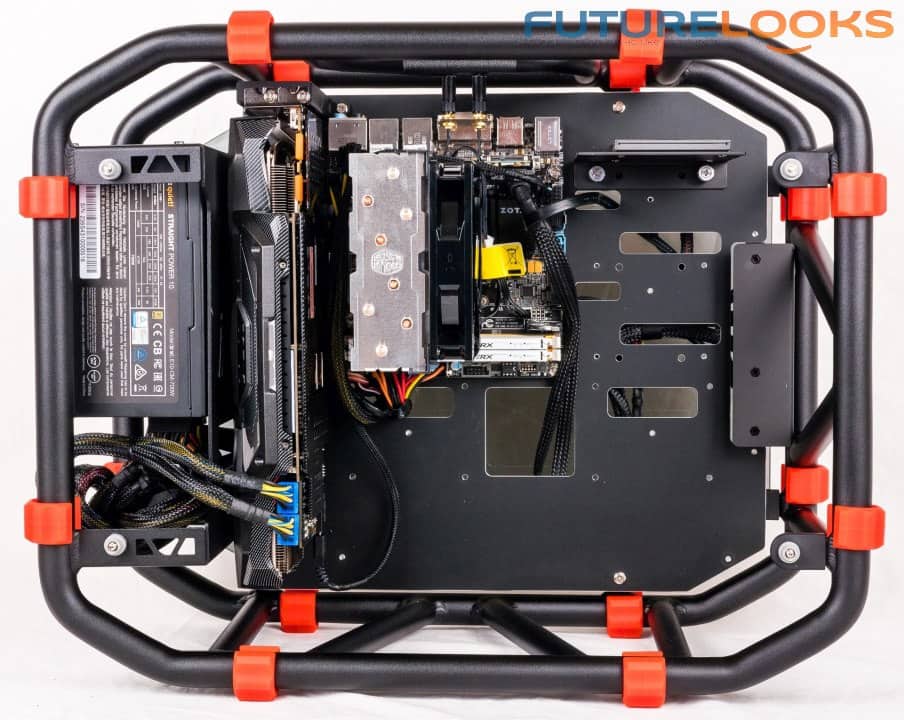
As you can see, the IN WIN D-Frame Mini really goes well with a system you want to show off. In two of our examples, one is a bit more conservative, perhaps for serving as a mid-range gaming system. The tall fan cooled tower fits easily with some room to spare. And, the other is an elite work of red and black art. Liquid cooling fits easily and frees up a bit more space. In either case, the systems can get a little tight depending on the video card, given the placement of the motherboard.
There is one limitation that should be noted. Video cards that require more than two PCIE slots won’t fit between the PSU cage and motherboard. IN WIN could easily remedy this by moving the motherboard hole placement forward without too much trouble during fabrication.
Next, we try to figure out how to actually test this for performance.