
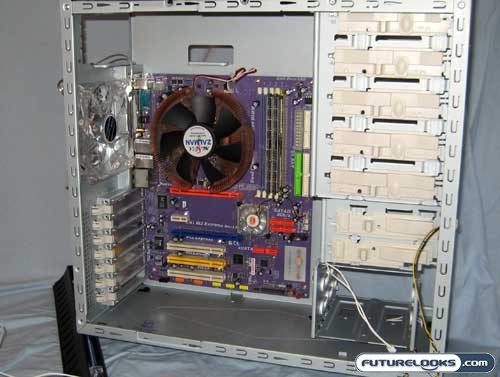
After I removed as many in-the-way parts as I could which included the two bottom feet (so the case could stand properly without wobbling), hard drive bay, front panel and side panels, installation of the motherboard was fairly straight-forward. After ensuring I placed the standoffs in the correct location for my motherboard type, I just screwed it down and it was good to go. I reinstalled the hard drive bay and one of the bottom feet only to notice that the case would not stand up by itself. If I had the front panel on this would not have been a problem but since I removed the front panel I had to prop the case with the other foot temporarily. Though I normally do not work on a case standing up like this, it made it easier for taking pictures.
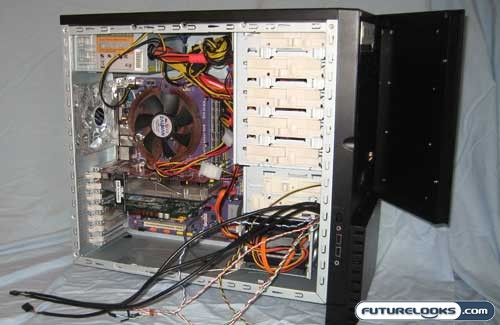
One I installed all the components into their respective spots I took notice of how cramped it looked in there. I started to wonder if the Core-Fan bracket was going to fit properly especially since my MSI 7600 GT video card was slightly longer than the eVGA 7600 GT card below it. The case was also very messy with its wires all over the place and not many places to hide them.

At this time I also tried to close the front panel and found that it would not close properly. Even though the inside of the front panel is recessed a bit it would not fully close. I found that the culprit was the front bezel of the LG DVD Burner I had installed. It would not sit back far enough to be flush with the rest of the case. So what did I do? I went out and bought a new LG SATA DVD burner which fits perfect in the 5.25” bay and allows the door to close properly. Your experience here may differ depending on the front bezel of your optical drives. The insert for the 5.25” bay has an inner bezel which stops the drive from being moved back flush. If you do not want to keep trying drives until they fit, you could probably file down the inner lip of the 5.25” bay panel flush but that is up to you.
Now that all the components were in and the door could close I could look at installing the Core-Fan bracket. Again, I was a bit worried that it might not fit with the current configuration I had.

The Core-Fan bracket is a pretty interesting and unique feature to the Tuniq 3 case and allows for a bit of customization. The manual shows various configurations for the two 120mm fans and I found that the default one (the two fans together, one above the other) would not work as the lower fan was getting in the way of my SATA connections. I choose to place one fan over the CPU and suck air in while the other fan moved air front to back. For me to do this I had to remove the fan grill and reposition the fan so that it brings air into the case over the CPU’s heatsink.
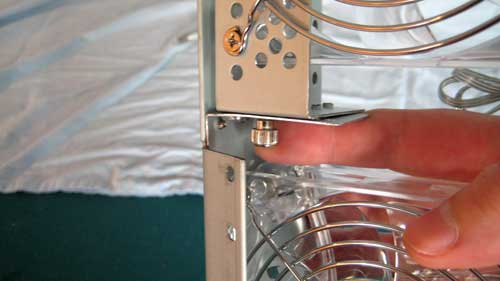
I also had to fiddle around with changing the angle (0 to 50 degrees) of the top fan but found it quite hard to do with my fingers, especially for the lower thumbscrew. It’s as if it was built for smaller Asian hands or something…
Real-Time Price and Stock check – Check More Products