The Interior
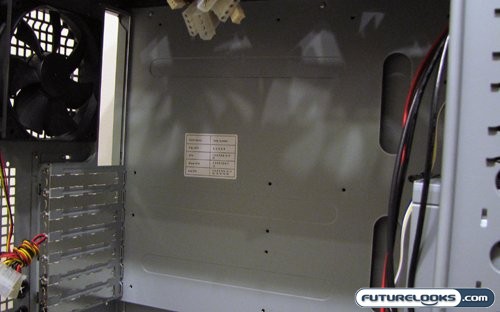
The interior of the NZXT Tempest is quite roomy, and fairly easy to access. The side left side panel is removed by simply undoing two thumbscrews and swinging the panel open and out of the way. Since this is the most opened panel, this makes sense. As for the right panel, which resides behind the motherboard, you’ll need a screwdriver to undo the two screws holding it on. As for actually mounting a motherboard, NZXT claims that the Tempest will hold an Extended ATX (EATX) motherboard. The configuration of mounting holes does support this, however such things can be precarious in a mid-tower case.
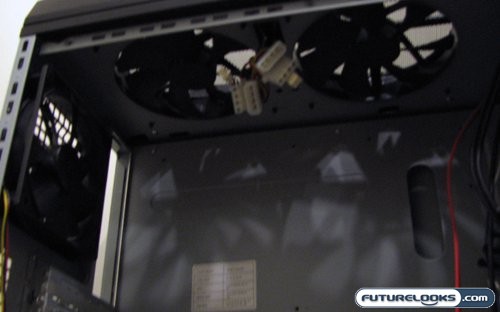
At the top of the Tempest we can get a good look at the other side of the two 140mm exhaust fans. As I had mentioned earlier, both these fans excel at pulling hot air away from the CPU and upper components. However, the interior also has mounting holes for a dual-120mm radiator. NZXT has essentially made this case water-cooling ready.

NZXT has also made the interior of the Tempest completely open. The means nothing is blocking airflow to the power supply, should it have a fan on the bottom. Though the PSU mount does block the fan, NZXT has setup the mounting bracket so you can flip your power supply around and have the fan point up.
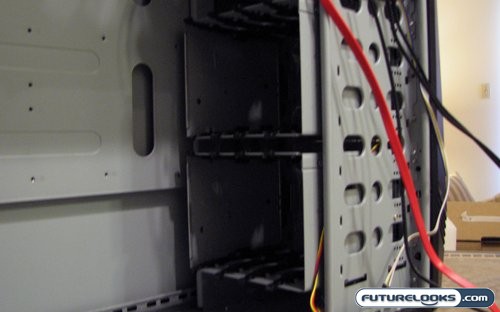
When it comes to installing hard drives in the NZXT Tempest, you’ll want for nothing. NZXT has configured their case to hold up to eight 3.5″ hard drives, and each drive will be amply cooled by the front 120mm fans. The drives themselves are mounted using rails, and the bays they are mounted into are removable. This is useful because it appears that the bays have the possibility to block small portions of an EATX motherboard. This could cause cabling issues, should any connectors be placed at the edge of your EATX board.
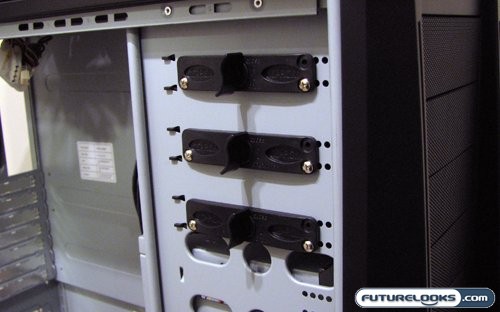
As for installing any additional drives, if you are installing them in the top three bays they are quite easy to install. All you do is twist the lock on these brackets, remove the bracket, slide the drive in, and replace and lock down the bracket. Should you wish to further secure the installed drive, NZXT provides some long drive screws in the clearly marked “ODD Screws” bag.
Real-Time Price and Stock Check – Check For More Products