To be perfectly honest, I haven’t exactly had the best of experiences with Lexmark products in the past. Many years back, I went through two less than stellar Lexmark printers. I was unhappy with the print quality, print speed, and overall build quality. To be fair, they were remarkably cheap and I guess I got what I paid for. Fast forward many years later and I suppose it’s time I get Lexmark a fair shot at a second chance. In this review, I take an in-depth look at the Lexmark Genesis S815 all-in-printer. Let’s just say that it has more than a few unique tricks up its sleeve to win me over again.
Features and Specifications
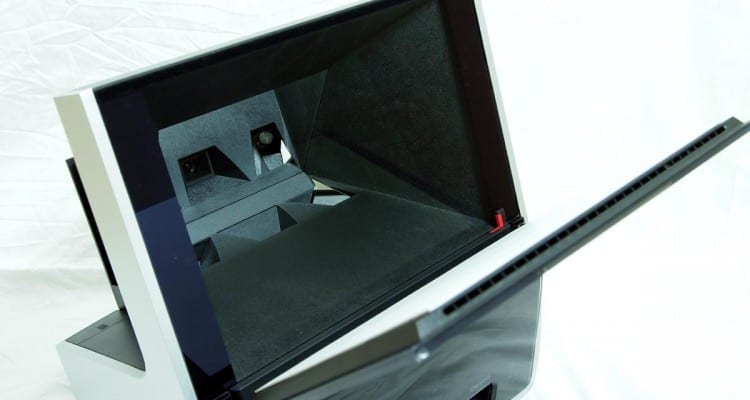
When you’re trying to shoehorn a home office into cramped quarters, an all-in-one printer is an absolute must. Even then, they can take up too much room. Lexmark tries to address part of this was the vertical orientation of the Genesis S815.
Instead of having a horizontal flatbed, it has a vertical area for scanning. To make matters even more interesting, it doesn’t have a “scanner” in the traditional sense. Instead, it uses a 10 megapixel imaging sensor to quite literally take a picture of your document. This is with the company’s so-called Flash Scan technology. There’s also a 4.3-inch color touchscreen, WiFi-N wireless connectivity (with WPS support), fax functionality, Eco Mode, and full color printing.
The Lexmark Genesis was announced this January at CES 2011 for Canada, but we’d already heard of its arrival for the US market in October. It’s currently shipping and it’ll set you back at cool $399 Canuck Bucks which is probably around $349 US. Considering many all in one units cost far less, the Genesis will really have to impress us.
What’s in the Box?
If you’ve ever used an all-in-one printer in the past, then you’ll probably be reasonably familiar with what to expect with the Lexmark Genesis line. In addition to the printer unit itself, you get the four ink cartridges (three colors, one black), USB cable, telephone line (for fax), power cable, installation CD, and user guide.
To get a closer look at some of these components, as well as a brief overview of the printer and how it’s laid out, check out the embedded unboxing video above.
Connectivity, Setup, and Configuration
Having a printer with integrated Wi-Fi isn’t exactly groundbreaking, but it is definitely a useful feature to have. The Lexmark Genesis S815 comes with 802.11n, so you can enjoy faster speeds and greater range than those G-equipped all-in-ones. The setup process, at least initially, requires a wired USB connection.

You can stick with a wired USB connection and use the Genesis as a local printer, but the wireless connectivity is great for sharing the printer across computers. The setup and configuration process took longer than expected — a little over half an hour — but you really only have to do this once.
After plugging in the power to the printer, it starts the setup process automatically. This is where you can set your language, date/time, and time zone. It’ll also get you to install the print cartridges, of course, and getting them in there was a little more finicky than I would have liked. They don’t “click in” all that easily, as you need to find that sweet spot of an angle before it fits just so.
After that, it’ll print out a page to align the print cartridges. It takes the paper in and out several times over the span of several minutes to do this, so be patient. After all of that is a go, you then run the software CD and connect the USB cable when instructed to do so. The wizard is very easy to follow, but it’s unfortunate you need to run through it (at least a truncated version) on every computer that wants to use the Genesis.