
Coolermaster has given the DIY world some really popular computer cases over the last few years. Some of them were visual-gasms to behold such as the ground breaking Cosmos 1000, while some were cavernous like the HAF X gaming chassis. Following in those foot steps is the new CM Storm Trooper gaming case which has been many months in the making and it finally looks like it’s ready for the most demanding DIY users and enthusiasts. This is a premium gaming case bringing back many of the polished features we all love. Let’s see how all these features come together for the CM Storm Trooper!
Features and Specifications
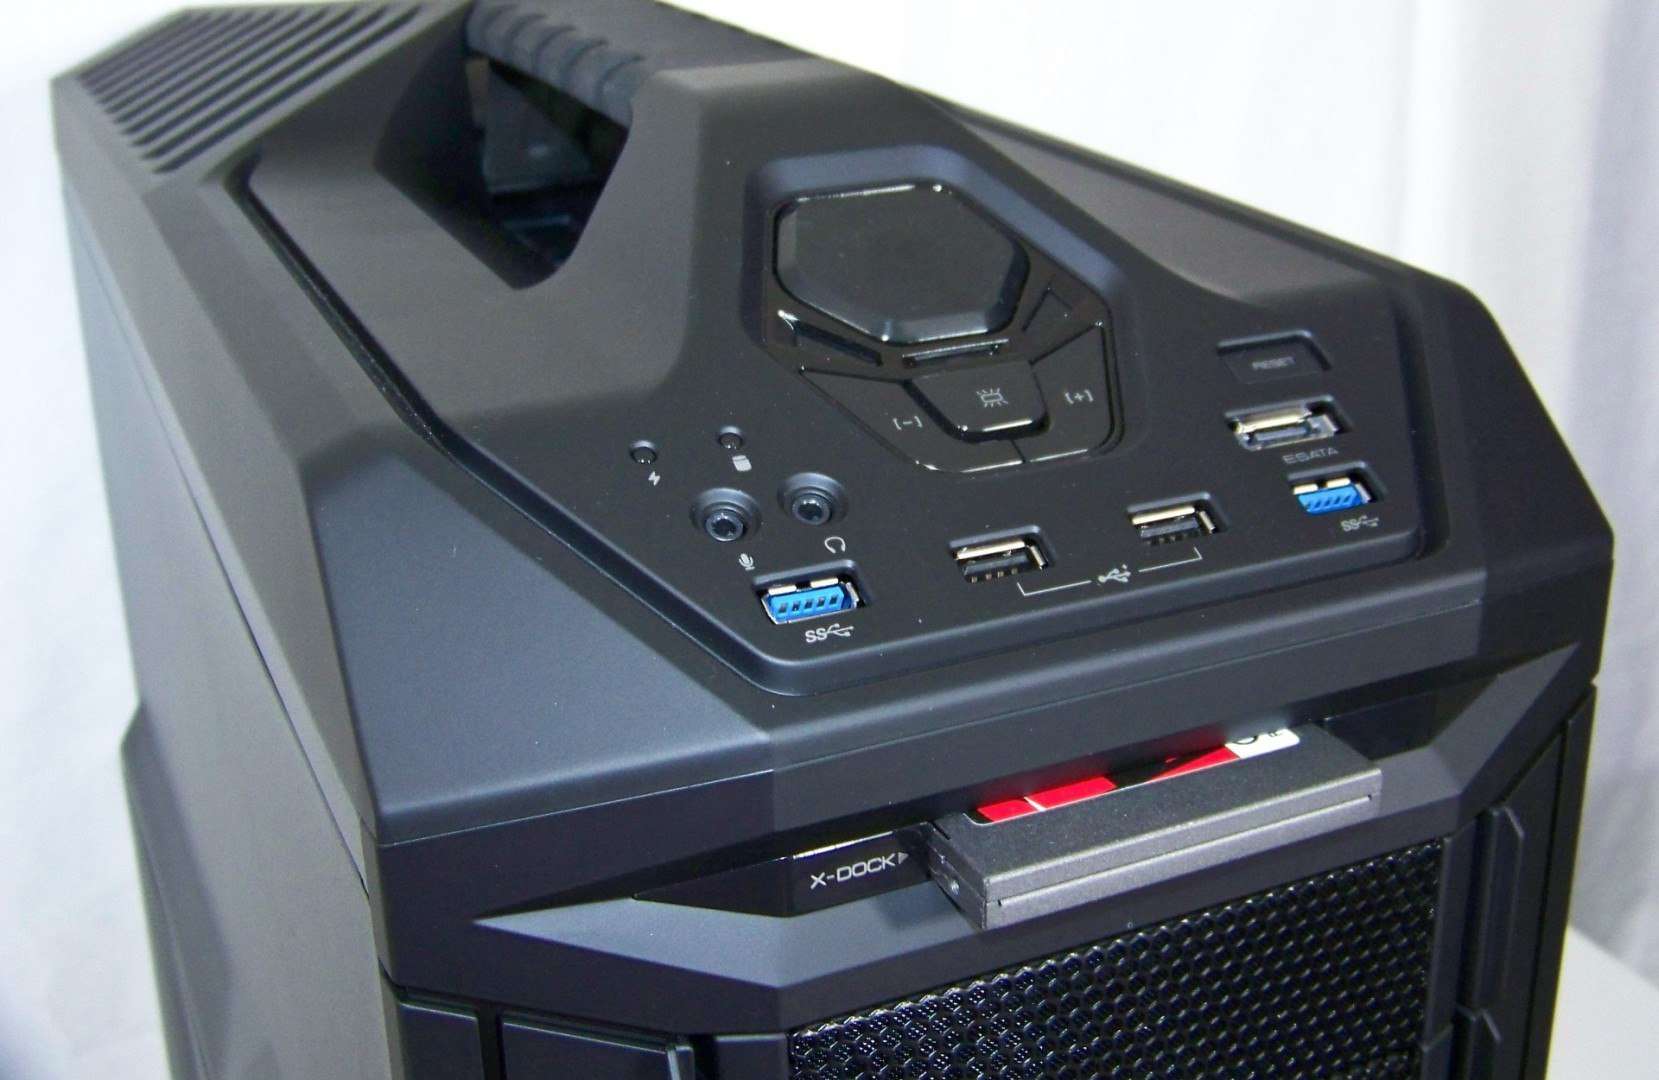
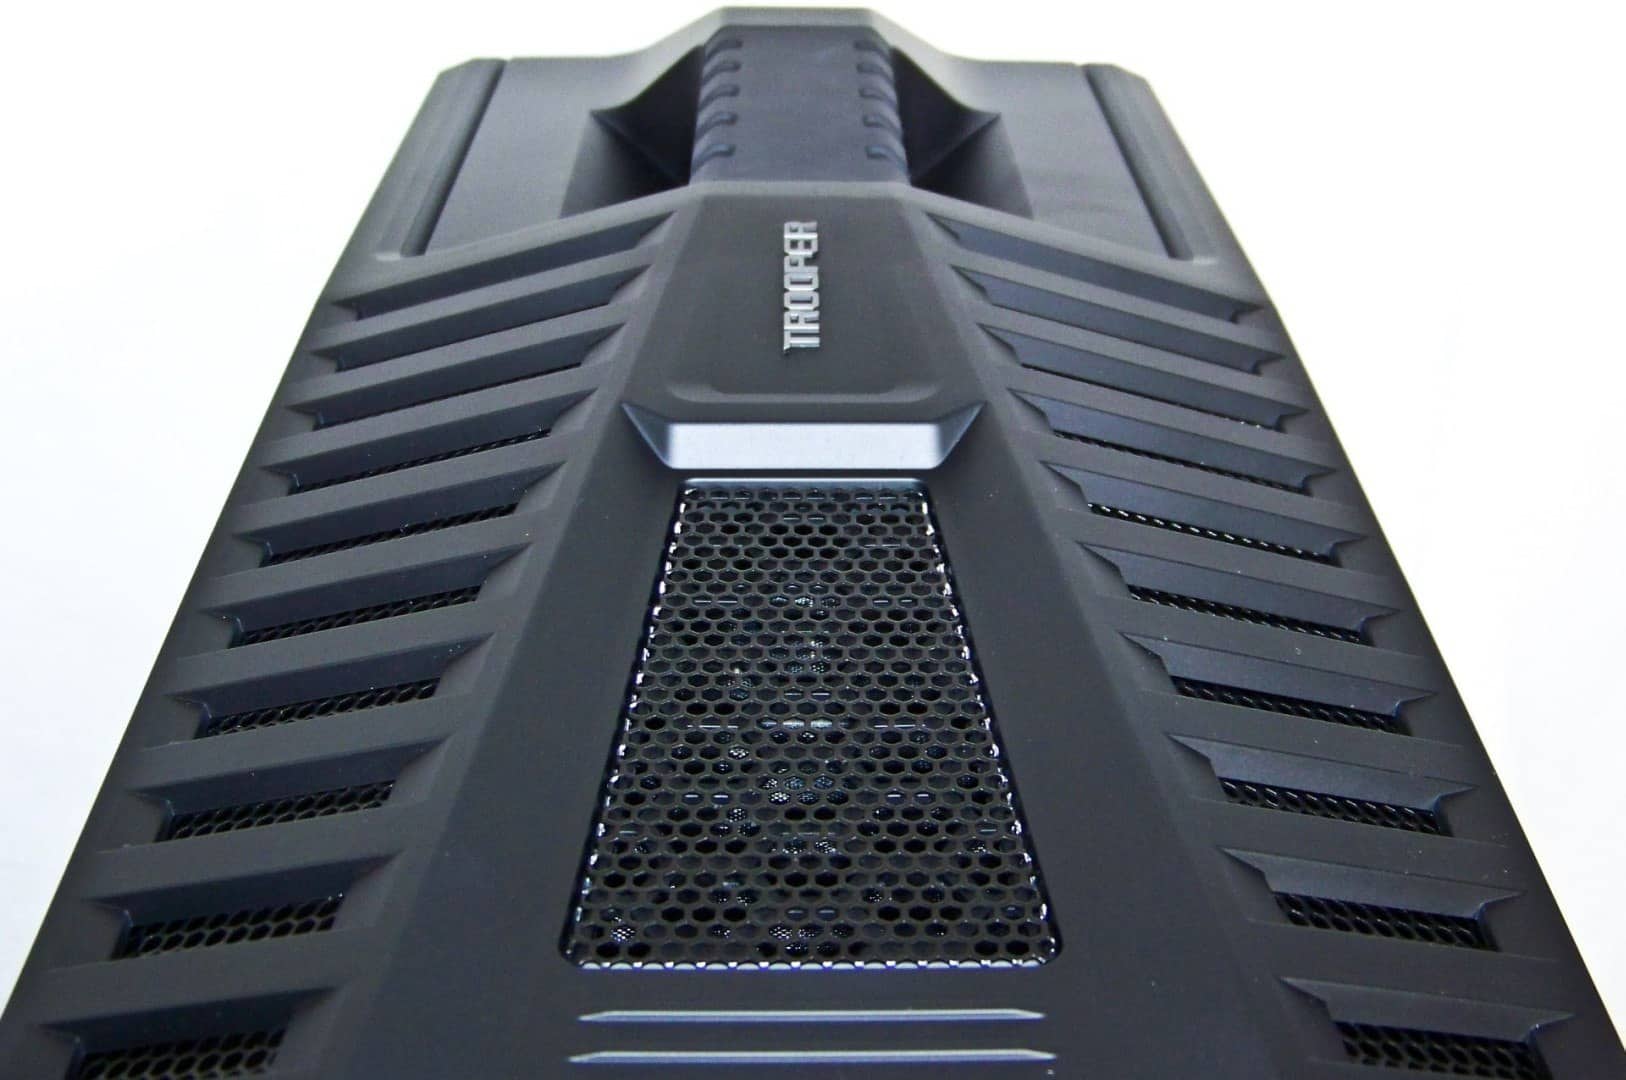
The CM Storm Trooper features a continual mesh front bezel with easily removable slot covers that hide the reversible 5.25″ drive cages which can be mounted side ways to from the front through an innovative mounting method. The very bottom case badge hides a tool tray handy for keeping your screws and extras with the case at all times. The case also sports a comfortable rubber handle that is seamlessly built in to the chassis capable of withstanding 95 pounds. And, if that isn’t enough, that great looking top is rubber coated to give it a special feel and resilience. Best yet, we’ve got a complete video walk through of most of these features in our initial unboxing and overview below…
One of the features I like is how the engineers hid the 3.5″ docking station. Many users won’t see it there at first glance. I like those kinds of features to be hidden if it’s something I may not regularly use. The way the USB, audio, power and fan controls are integrated in to the top is also simply fantastic. The design makes the case look so clean yet draw the right amount of attention when you want it to. It’s really something that you have to experience in person because even though it’s only plastic and metal, it’s really well put together plastic and metal.
Given the respectable $189.99 US/CA cost, I can’t help but wonder if there is a window panel replacement hiding in the warehouses. It seems a bit of a shame to hide the insides of this clever creation especially if you’re integrating some of your own water cooling. Hopefully CoolerMaster is listening and plans to put a SKU in the warehouse to service our desires.
Test System and Configuration Notes
I know case manufacturers like to see newer, higher end hardware inside their cases. But, we like use the hottest and loudest components we can find to create a worse case system scenario. That said, we will be using an AMD case heating system containing components that can still be found on retail shelves. This includes a classic 140W AMD Phenom II 965BE quad core processor and a very hot (literally), NVIDIA GTX 8800 Ultra video card.
Between the retail fan and GTX 8800 Ultra cooling fan, we’ll see how well this chassis handles hot and loud components.
- Processor: AMD Phenom II X4 965 Black Edition
- CPU Cooler: Retail Phenom II
- Motherboard: ASUS M4A9GTD Pro/USB3
- Memory: Patriot Memory Division II 1866MHz 4GB DDR3
- Graphics: NVIDIA Geforce GTX 8800 Ultra
- Hard Drive: Seagate Barracuda 7200.11 500GB SATA2
- OS: Windows 7 Pro 64-bit
- Sound Meter: Extech 407732 Type 2
- Temp Meter: NZXT Sentry LX
- Case 1: Coolermaster CM Storm Trooper (as tested)
- Case 2: Coolermaster HAF X NVIDIA Edition
- Case 3: Raidmax Scorpio
The way this works is the five temp probes from the Sentry LX are centered on the hard drive, video card PCB (centered nearest the GPU socket), South Bridge heat sink, North Bridge heat sink and CPU cooler. Temp ranges were recorded with the case cooling fans on high settings while running OCCT and Furmark which really heats up the system.
Noise level averages were recorded with the side panel removed and installed. I’m looking for how much fan noise the case is able to block and control. Ideally, cases with optimal fan placement will cool the hot test system best which means less fan noise. I’ll be including baseline test results taken from a generic designed Raidmax Scorpio case for comparison as well as it’s older brother, the HAF X NVIDIA Edition that we did a video preview of earlier in the year.
Cooling Performance

First off, the Raidmax has very limited air flow which caused component temps to climb quickly. This may look like high temps, but they really aren’t given the selection of components.
Both the CM Storm Trooper and the HAF X manage those temps very well. The HAF X cools the VGA better because of the large 200mm side mounted fan. The Trooper doesn’t have any side cooling but has the option for additional fans. Overall, the Trooper cools pretty much just as well as other top cases like the Thermaltake Level 10 GT (reviewed here) or Silverstone Fortress 2 (FT02) (reviewed here). That means it’s in fact in a premium cooling league.
For those wondering about fan placement and options, I switched the drive cages so that the 120mm fans pushed cool air to the back which barely shaved a couple degrees at best from the CPU and chipset bridge sensors. Adding two 25mm thick side panel fans help cool the video card a little better. Keep in mind, the side fans shouldn’t spin faster than the front fans or else they disrupt the wind tunnel effect that works best for these kinds of chassis.
Replacing the top 200mm fan with two 120mm fans actually didn’t help cool any better. Adding a 240mm radiator up top shouldn’t cause air flow problems as long as you use relatively stronger cooling fans to offset the radiator’s resistance.
Let’s look at the effect of these fans and components on noise levels.