Test System Setup
In order to remain more of less uniform with testing of X99 boards, we’ve taken the same components used in our previous ASUS X99 Deluxe and Intel Core i7-5960X launch articles. Here is the listing for reference.
- Processor: Intel Core i7-5960X Haswell-E
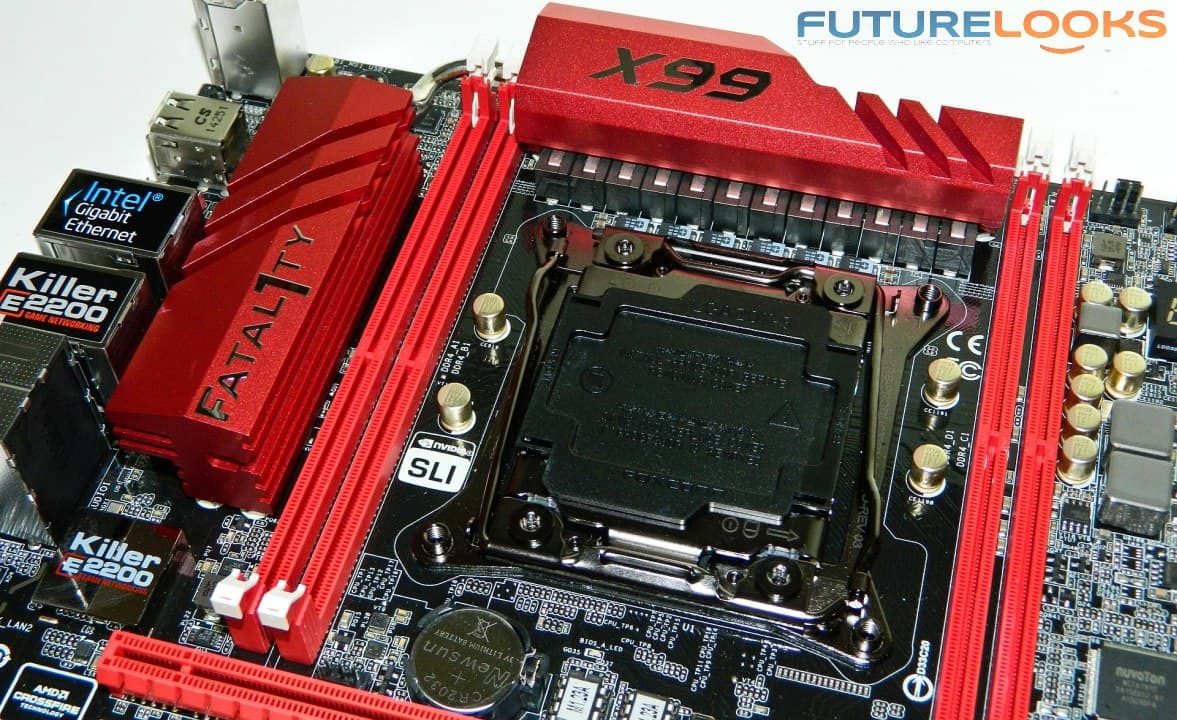
- Motherboard: ASRock Fatal1ty X99M Killer m-ATX
- Memory: Corsair Vengeance LPX 16GB 2800 MHz DDR4 (CMK16GX4M4A2800C16)
- Graphics: NVIDIA GeForce GTX 980 Maxwell
- Power Supply: be quiet Dark Power Pro 850W 80Plus Gold
- Storage: Kingston HyperX 3K 240GB
- Cooling 1: be quiet! Dark Rock Pro 3
- Cooling 2: Thermaltake Water 3.0 Extreme
- OS: Windows 7 Pro
Drivers included the NVIDIA 344.48 graphics, ASRock 1.60 UEFI BIOS, Intel Management Engine version 10.0.25.1048, Intel INF driver version 10.0.20_PV, Atheros LAN driver version 1.1.42.1291, Intel LAN driver version 19.1 and Intel USB 3.0 driver version 3.0.0.20 for testing.
Installation Notes
This section is very important in terms of evaluating the motherboard. The overall experience determines whether or not consumers will value the board equally. The smoother the installation and setup, the better. Here’s what we experienced.
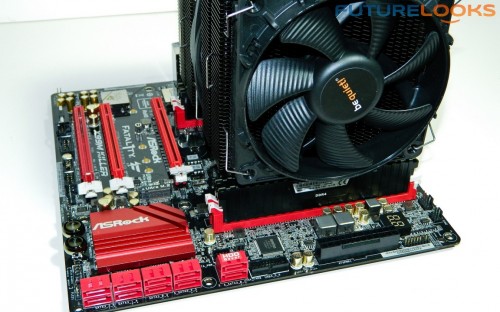
During installation, seating video cards, DDR4 memory, and the CPU cooler was not an issue. The main connections are all around the board’s edges so they’re easy to access. Also, locating the ports is easy in a mid-tower or full-tower chassios. The IO ports detected any and all connected devices including some of the random gamer keyboards with internal memory. However, the DIMM slots are close to the CPU socket which were slightly covered by our quiet! Dark Rock Pro 3 CPU cooler. This should not be an issue with smaller coolers, or liquid coolers.
BIOS and Overclocking Notes
After updating and browsing the BIOS, it’s nice to see ASRock put some effort in to clearing things up a bit. The BIOS is a little simpler to navigate than others in some respects which is not a bad thing. It’s best when users can find what they need and understand the functions relatively easily.
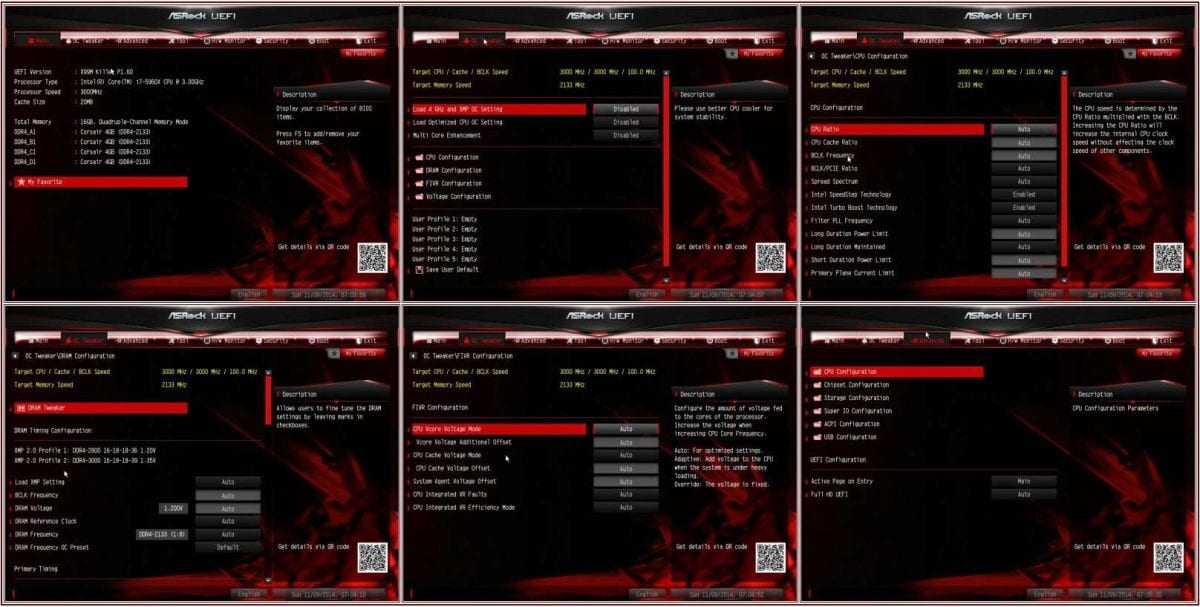
(Click to Enlarge)
Setting up the BIOS was quite quick. Locating the storage, connectivity and overclocking features is easy. The overclocking settings are all located in one tab. However, understanding those settings based on their label isn’t so clear. There are two specific settings that overclock the CPU along with a max XMP memory profile or ones that just overclock the CPU. Not many Haswell-E processors can achieve 2800 MHz or higher XMP settings, so the first proved useless. The second offered 4.0 to 4.5 GHz frequencies. The maximum stable setting achieved was 4.4 GHz which is surprisingly robust for an mATX platform in this price range.
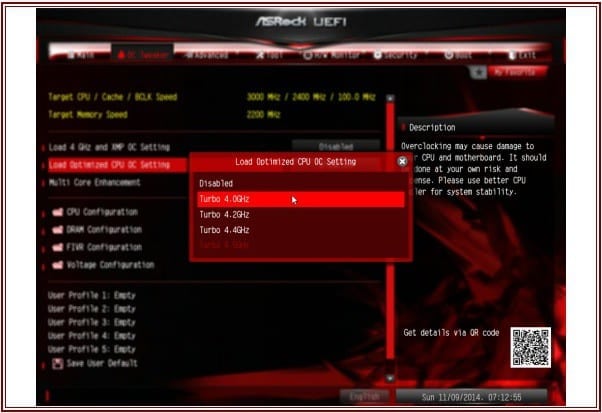
The side effect with overclocking is that the ASRock X99M Killer automatically ramped fan speeds to max using 4.3 GHz or higher options. PWM control went out the window so noise was about 24 dB(A) on the lab CPU air cooler and 35 dB(A) on the liquid cooler. Keep in mind this is almost par for the course on most motherboards when overclocking.
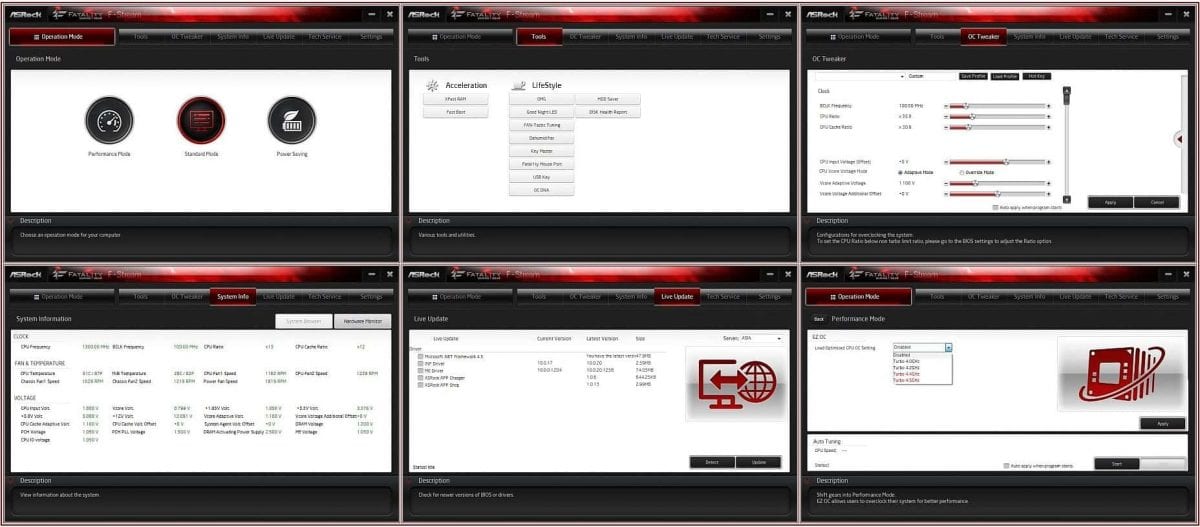
The ASRock’s F-Stream Utility
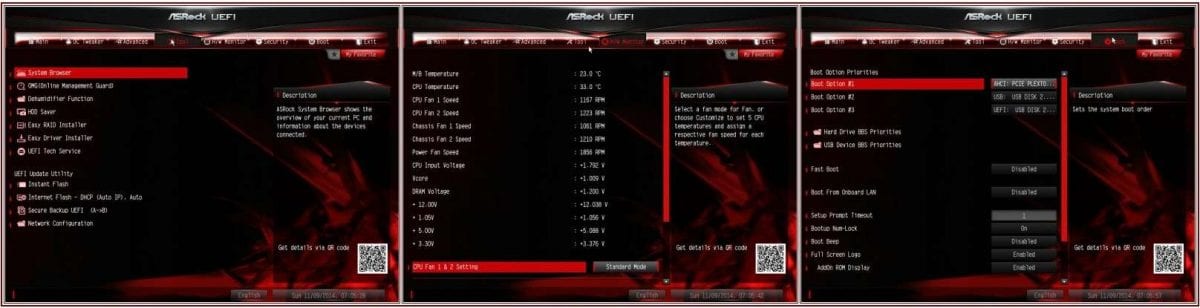
(Click to Enlarge)
After handling F-Stream up close and personal, we found that it’s actually simple enough to use, yet includes enough advanced settings to get dangerous. Operation Mode offers Performance, Standard and Power Saving modes. Performance mode offers overclocking presets ranging from 4.0 GHz to 4.5 GHz, which is actually Haswell-E’s safest upper limit on the average. The system was perfectly stable at 4.4 GHz but not any higher. Standard leaves the system in stock configuration. Power Saving mode makes lower power consumption the priority which is noticeable mainly when doing desktop things but not standard use.
The Tools tab lets users access ASRock’s features like XFast RAM, USB Key, Key Master, Fatal1ty Mouse Port as well as Intel’s own features like Fast Boot settings for shorter response times. All of these LifeStyle options allow users to control and configure the gamer friendly options as well as the LED lighting on the board.
OC Tweaker has slider style options for manually overclocking the system. The sliders worked as well as can be expected within the OS. Like all desktop overclocking utilities, at some point the system will become unstable which is often why enthusiasts like the BIOS route better. Overall, DIY enthusiasts should find F-Stream a nice usable feature.
Overall, it looks like the BIOS and software are coming along well, and we might even see further improvements as X99 boards mature. Next, let’s get to benchmarking to see how everything holds together.