Taking a Look Inside
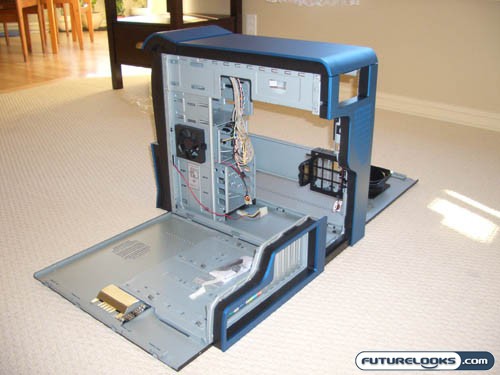
With the side panels flipped down, we get a really good look at the inside of this case. The side panels make it very easy to install the motherboard with plenty of room to work on installing all your other components as well. It is also very apparent that all edges are rolled or smoothed off so there’s no chance of cutting up your hands.

Included are 3 fans: 1 – 80mm rear fan, 1 – 80mm HDD cooling fan, and 1 – 120mm front case fan. There’s also a spot for another 80mm fan to draw hot air away from your video card. You’ll have to supply that seperately however as it is optional.
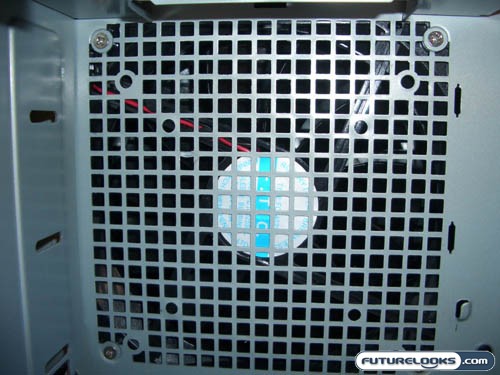
Taking a closer look at the 120mm front case fan reveals that it’s DC brushless fan, as are all the other fans. This will ensure noise is kept at a minimum. Unfortunately, there are no filters so dust could be a problem, but that’s nothing a good blast of compressed air once in a while couldn’t fix. However, being that there are so many other finite details in this case, I’m surprised this one was left out.
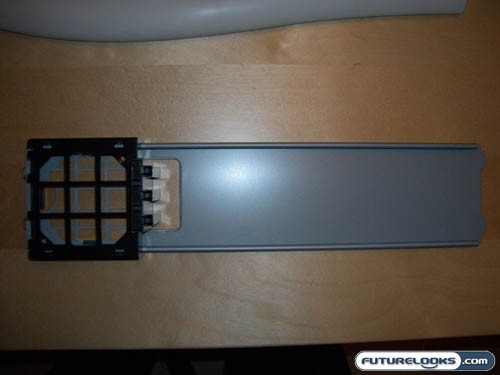
The “Enforce Bar” allows for the addition of an 80mm fan. This is located right across from where your videocard (or cards if your lucky enough to have an SLI setup) would be installed. This is a great location, especially if you have 2 videocards, as the space in between 2 videocards would have little to no air circulation. From it’s name, the purpose of “Enforce bar”, I assume, would be to help re-enforce the integrity of the case. Because of it’s weight, some reinforcements are required to keep the chassis from flexing when you’re moving the case around during transport.
Real-Time Price and Stock check – Shop Like a PRO!