Hyperthreads, multi-core, full load, and stability are just a few of the words and phrases that accompany today’s most powerful Intel Core i7 and AMD Phenom II Processors. These chips are calculating and execution monsters that are capable of crashing through every performance record. However, you’re not going to smash through any records if you connect some sheepish power supply to your new state of the art ninja killing system. That’s why you’ll need a very formidable PSU like the Corsair HX750W Professional Series ATX Power Supply. Let’s check this beast out!
Features and Specifications
I’ve heard from different technicians throughout the industry that have repeatedly recommended the HX Series for one main reason: Reliability.
Corsair states that the HX Series is designed and engineered to ensure stable, clean, and reliable voltages essential to high-end gaming PCs and workstations. With an 80 Plus Silver certification standard reaching upwards of 90% energy efficient, it’s no wonder it comes so recommended.
It also offers a massive 62A single +12V rail as opposed to multiple. That’s because multiple +12V rails don’t always equate to the best power available. Rather than lay six paragraphs of technical misery, let’s just say there is nothing wrong with a massive, beefy single +12V rail.
To sum up the power supply’s best features, it supports ATX 12V 2.3, EPS12V 2.91, and older ATX12V 2.01 systems. The PSU provides 25 Amps to both the +3.3V and +5V rails. That’s a perfect amount of power since the bulk of it goes to the +12V, as it should.
What’s In The Box?
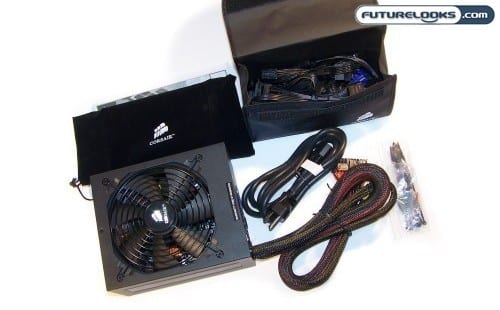
Pulling the HX750W out of the box reveals that the PSU itself comes wrapped in a black velvet bag. Though not really that useful after you install it, I found it to be more useful for holding all the extras that are left over.
Another black pouch holds all of the important modular wiring including the power cable. Everything is nicely wrapped and organized. There are 2 x Floppy wires, 2 x 4-pin standard wires, 2 x 6-pin PCIE, 2 x 8-pin PCIE, and 3 x 3-lead SATA cables. You’ll also find a little bag with zip ties and other items to help tidy up the wiring.
Rounding this off is a very simple manual made specifically for novice users and will make finding what you need to install the HX750W power supply very easy.
The Massive Beast Up Close
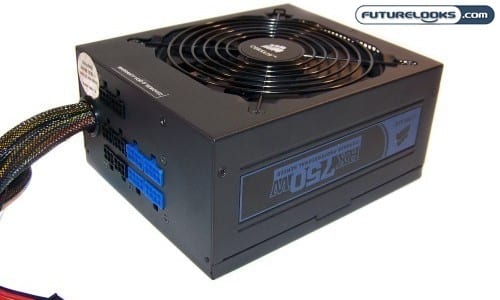
Overall, the HX750W isn’t all that flashy. It’s not an ugly beast mind you. Just an all around jet black, solid power supply with a Corsair badge on the 120mm cooling fan. The PSU’s finish exudes an “industrial” feel and exhibits a very healthy weight. Extra weight typically means that more was spent on internal components that improve performance. “Bling” doesn’t always equate in to quality. We can think of several power supplies over the years that looked good but didn’t perform.
Taking a look at the wiring and modular sockets, you can see the main 24-pin power and 8-pin 12V Auxiliary leads are permanent. These provide the bulk of the computer’s power which ensures optimal connection. Since these have to be connected at all times, it also saves you money not making it modular.
Checking Out the Circuits
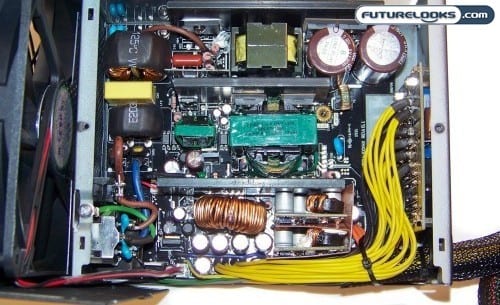
You can see that there isn’t a fancy spread of heat sinks. Instead, there are three very thick, black aluminum heat sinks standing straight up. That’s not a big deal especially when the transistors are of rather good quality. Again, function is more important than fashion. Having a less cluttered heatsink layout can also make things cooler due to uninterrupted air flow.
The same can be said for the two maroon capacitors in the corner. These are two 420V capacitors that keep all of the rails powered at all times. This will also account for how clean and reliable the PSU’s amperage is during half and full load operations.