Visual Inspection
With manual in hand it’s time to take a closer look at this case, and eventually install one of my high end rigs into it. The first thing I did notice, while moving this case for in moment infront of the camera, is that for a steel case, it’s rather heavy. Steel cases aren’t known for being light to begin with, but at 30lbs, this case weighs almost as much as some full systems. This is probably due to the plastic and sound dampening used in the construction of the case. Those are liable to add a good amount of heft.
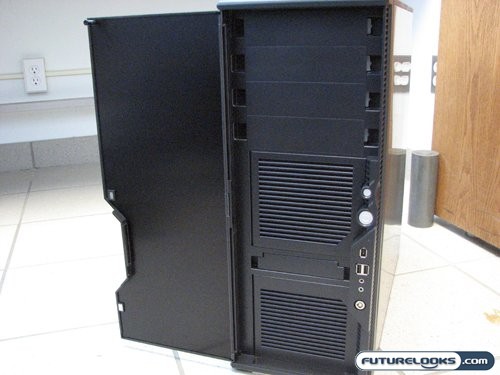
Behind the front door you can see the four 5.25" and one 3.5" external drive bays. The front door itself is stated to open a full 270 degrees, making it very easy to access the drives and front fans. The reason I only have it open to 180 degrees here is simple, and is stated in Antec’s FAQ on the P182. Basically, when the case is brand new, the plastic is a bit stiff, and needs to be gently worked in to allow the door to freely open the full 270 degrees. This feature is also handy for more clumsy individuals who tend to break doors, bending them the wrong way.
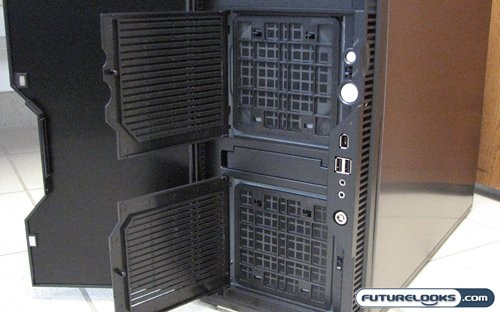
Behind the magnetic front door is two more spring-clip fan doors that allow you to access the washable fan filters. Once your fans get gunked up, you can remove these filters, wash them with warm water, and replace them. Next to the fan grates is the connection block, which sports the external USB, FireWire, and Audio ports. These are accessible even if the main door is closed. It isn’t the same case for the power and reset buttons, as they are behind the door when it’s closed. This adds a slight measure of security should your system be in a public location.
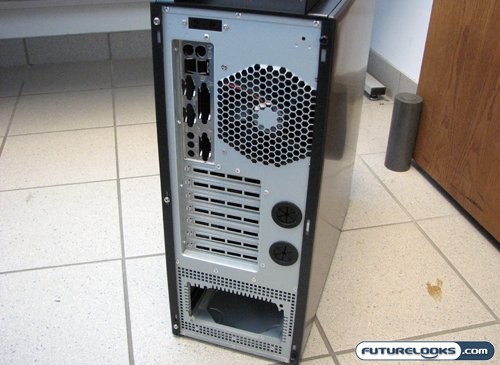
Turning around to the rear of the case, we get to see how the dual chamber design is implemented. The power supply and hard drives are in the lower part of the case, and the other major components are in the upper part of the case. There are also some additional features seen here that aren’t present on very many other cases, even those found in the high end of the market.
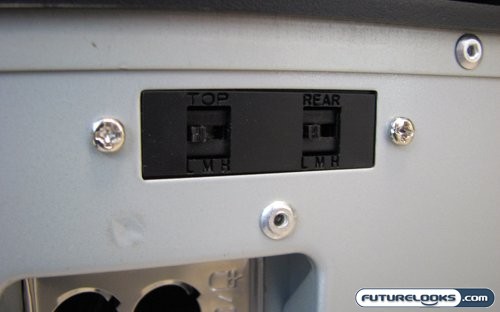
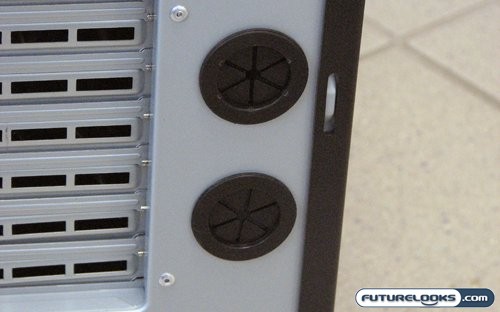
The first of these two features is appropriately located at the top of the P182, directly above the motherboard I/O shield. It’s a couple of three speed fan controllers; one for each of the two 120mm TriCool fans installed on the top and rear of the case. The second added feature is the rubber grommeted ports on the rear. The intent behind these ports is so you can mount external liquid-cooling hardware with ease, and route the hose safely through the rear of the case.
Real-Time Price and Stock Check – Shop Like a PRO!
