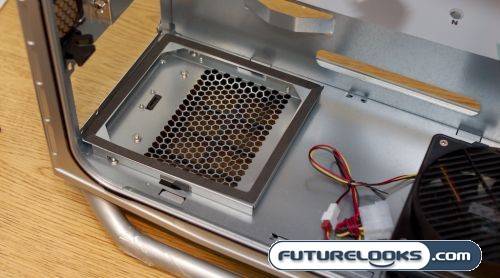
Removing the VGA cooling tunnel gives us a better look at what resides on the top side of those bottom intake vents. To the left, you’ll see the mounting point for the power supply. The power supply will mount face down if it uses a large 120 or 140 mm fan. Although you can run a power supply with a rear mounted fan, it won’t take advantage of the additional ventilation afforded by this mounting point.
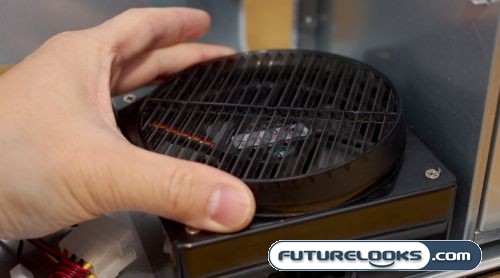
The other lower intake fan is attached to a plastic mount that features a fan nozzle that you can rotate, allowing you to influence the direction of the air flow somewhat. This fan can also be removed and mounted to the top of the drive bays in case you don’t need as much internal airflow. Unfortunately, they don’t give you two of them, however, Cooler Master has recognized that people may want to cool both the inside of the case and the hard drive bays and are mailing out free ones to those that ask for them.
Keeping with the tool-free theme, the 5.25″ device bays use a quick release system that works surprisingly well. I’ve used other systems that leave the devices wiggling around, but Cooler Master seems to have balanced the right amount tension into these spring loaded wonders. Push them in to lock. Push them again to unlock.
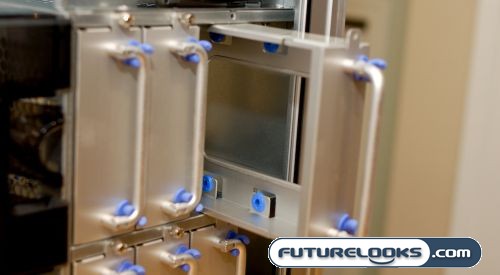
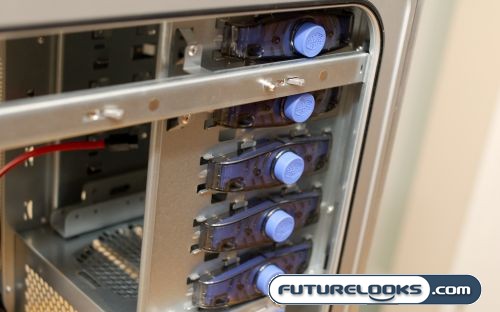
Although the hard drive bays aren’t as quick release oriented, they still hold up to tool-free scrutiny by employing thumb screws and handles. The only thing you will need tools for is for mounting the drives into the caddies, and even then, Cooler Master provides you with a screwdriver in the accessory box included. The drive caddies feature rubberized mounting grommets and handles that lock away when not in use.
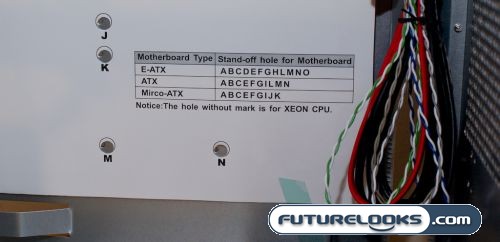
Motherboard mounting is assisted using a template that is taped to the inside of the case. Just install the motherboard standoffs that you need in the right holes and drop the board in. The only thing that isn’t great about this is that if you change the form factor of the board, you’ll have to refer to the manual again since you’re obviously not going to leave this piece of paper inside the case. Cooler Master was doing so well with the details, you would think that someone would just laser etch it inside the case, or just sticker up the holes permanently. The cavernous space supports from mATX to full sized E-ATX boards, and of course, your regular ATX boards.