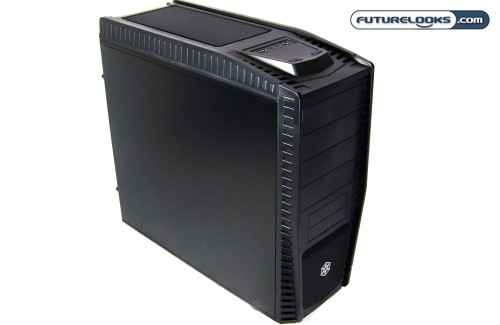
Silverstone has often been on the forefront of innovative thinking when it comes to their computer case designs. We’ve seen the Fortress FT02 and the Sugo SG07 enclosures continuing a line of features unlike any other manufacturer. But not everyone can afford the fancier enclosures with every last bell and whistle. Sometimes we just need an enclosure to fit our basic needs without looking like we spent bottom dollar. That’s where the Silverstone Precision Series PS05 Enclosure comes into play. Is Precision Series just fancy words intended to cover up a featureless case? Let’s find out.
The Video Walkthrough and Features
Before diving into some more details, here’s a quick video walkthrough of the case including a quick look at what you find inside the box. We’ll include what we’ve missed after the video intermission.
For more pictures of the case, definitely check out photo gallery on the last page.
Our Precision Series is the PS05 B (for black) model but you can also get the PS05 BW that comes with a window. Personally, I love windows especially when showing off the jet black internal chassis. Why should we hide such a potentially cool looking chassis? The reason is cost of course and it’s cheaper to have no window if you’re on a budget, which is the idea behind this case.
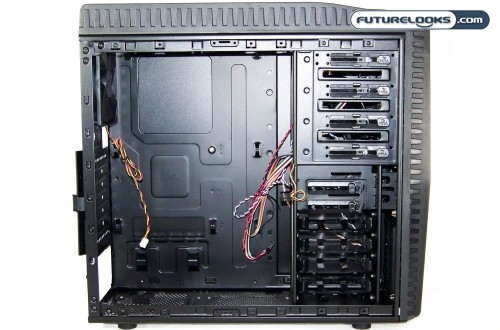
Again, the case and drive bays and PCI slot mounting are all completely tool-free. You might need a screwdriver to crack a case panel thumb screw or two. There are a total of 4 x 5.25″ ROM drive bays and 4 x 3.5″ hard drive bays plus two more not in a bay. This might work for SSD users who want to show them off. The hard drive bays also use a tool free anti-shake drive mount system which we’ll get into a little later on.
For cooling purposes, the PS05 includes one 120mm rear chassis cooling fan and there are optional locations for two top 120mm, one front 120mm, and another bottom 120mm cooling fan. Of course you’ll want to pick up more fans if you run hotter components.
As far as pricing and availability, the case is available right now for as very low cost $49.99 US. You should be able to find this at NewEgg or Amazon for even less.
Thermal Testing System
We’ve spent some time developing some simple ways to test a computer enclosure’s air circulation. In many instances, some cases sport a lot of fans but fall short designing the chassis to allow efficient air circulation. I’ve resorted to using smoke wicks while watching how the smoke flows through the chassis as well as how quickly it finishes clearing out the case. The less efficient the air moves, the louder and hotter our WCS (worse case scenario) system gets.
Here’s the break down of the setup:
- Processor: AMD Phenom II X4 965
- CPU Cooler: Stock Phenom II Heat Pipe
- Motherboard: ASUS M4A89GTD Pro/USB3
- Memory: Corsair Dominator 4GB 1600MHz DDR3
- Graphics: NVidia Geforce 8800 GTX
- Storage: Seagate Barracuda 7200.12 250GB Hard Drive
- Power Supply: Antec TPQ-1200 Tough Power Quattro
- Computer Enclosure: Silverstone PS05 Precision Series Enclosure (as Tested)
- Additional Hardware: Two Yate-Loon 120mm Cooling Fans
- Operating System: Windows 7 64 Bit Ultimate
Again, this is as worse case a scenario of a test system we could assemble. It’s using some of industry’s hottest and loudest components ever designed. If your system uses more efficient components, your operating temperatures will most undoubtedly be lower.
Installation Notes

The tool free bays and trays are actually pretty intuitive. It takes very little effort or movement on the part of the ROM drive clips to fasten the drives in place. The same applies for the 2.5″ drive bays as well. These would make for a cozy little spot for SSDs rather than a floppy disk drive. This case also features one of my new favorites mounting systems for hard drives. Instead of bending the drive trays in to place, the hard drive just sits on four small pegs via the bottom of the casing. Then, two small black dual prong tabs secure the drive in place from the sides and can’t easily pop out. These are a much better solution flexible trays used in other designs.
The two top cooling fans are the easiest to install. These basically just sit on top and are fastened from underneath. The front 120mm fan actually mounts to a removable fan plate fastened with a single thumb screw once you pull off the bezel. It actually pulls off with minimal effort. And, alas, the bottom fan is just as easy as the top.
Unfortunately, just about every PSU on the market will easily encroach on the bottom mounted fan. And, if you do find a small enough PSU, you’ll have to make sure there is a fan guard on the fan.