Installation Notes
Unlike custom liquid cooling, all in one systems like the Thermaltake Water 2.0 Pro or Extreme simply need an enclosure’s existing single or dual 120mm fan ports to be installed. No tube cutting, custom parts ordering, or special effort is required. Don’t misunderstand, I’m in no way knocking custom liquid cooling simply because it can look so elite and cool multiple hot components better all at once. However, it does require a certain level of technical prowess which most DIY enthusiasts don’t have the time to hone. That’s why all in on systems have become popular and are getting better all the time.
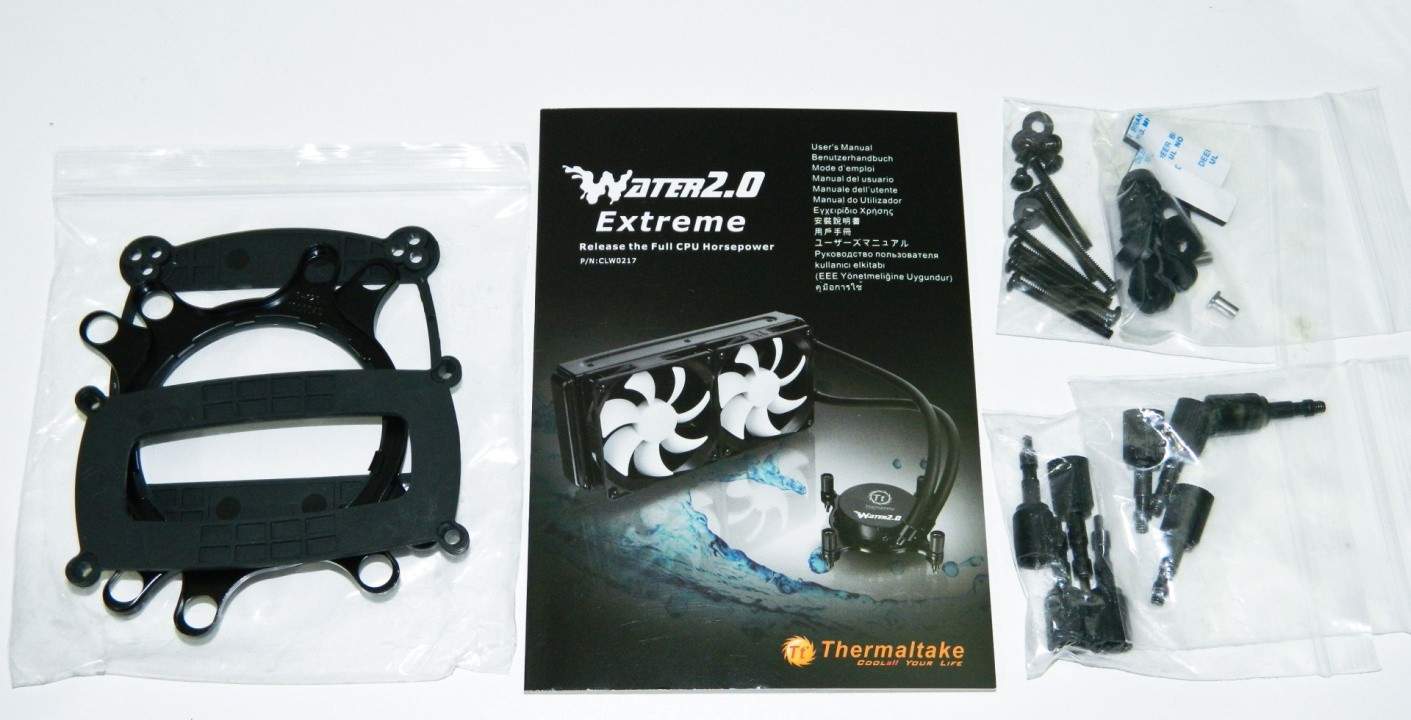
Thanks to a complete range of installation components and a helpful manual, installing the Water 2.0 Extreme was as easy as any other CPU liquid or air cooler. The manual has detailed enough pics making it easy to follow. The system easily installed into an NZXT Switch 810, Fractal Design R4 Define, a Coolermaster HAF XB, and a Danger Den Tower 21. Keep in mind custom enclosures like the DD 21 may require your own screws for proper fit.
The default installation method has the chassis airflow blowing through the rad and out the top. If your case has poor air flow, I suggest flipping the fans so that they blow or pull cool air through the radiator. Another option is to mount two additional fans for a push and pull configuration and will require additional hardware not included in the box. But it can be done easily.
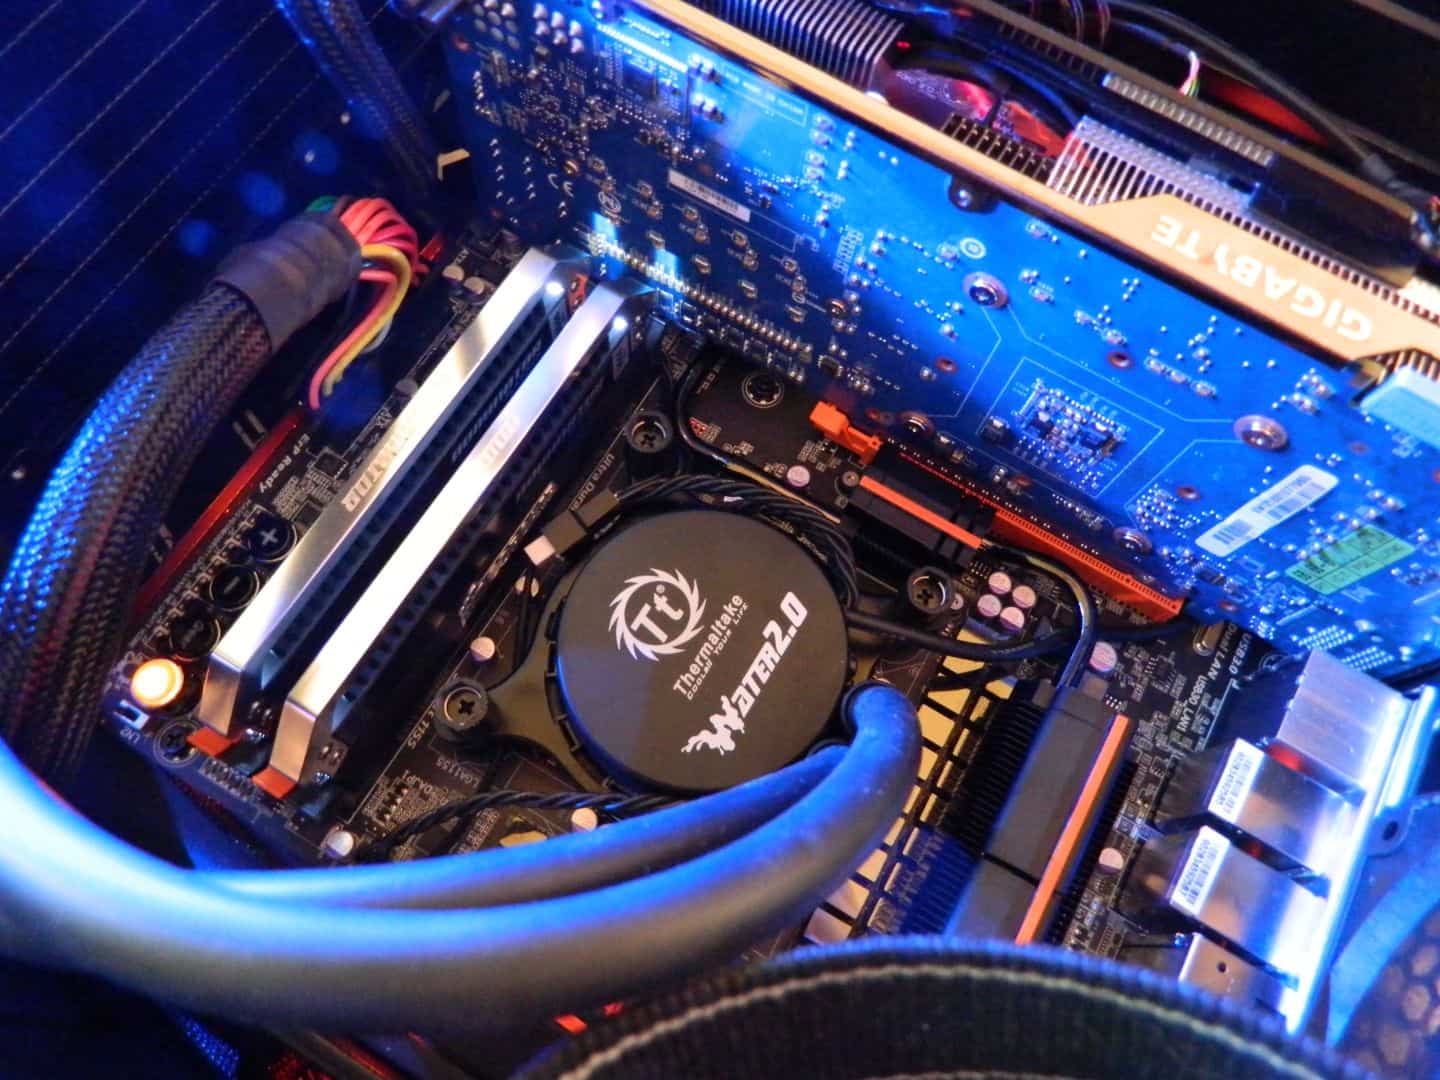
I’d like to also point out the cooler’s base can be orientated to just about any position thanks to the very flexible rubber tubing. The mounting bracket actually has a bottom clip to lock the top fastening ring in place so you don’t have to hold it all together. This is a very nice touch and something other competitors should consider.
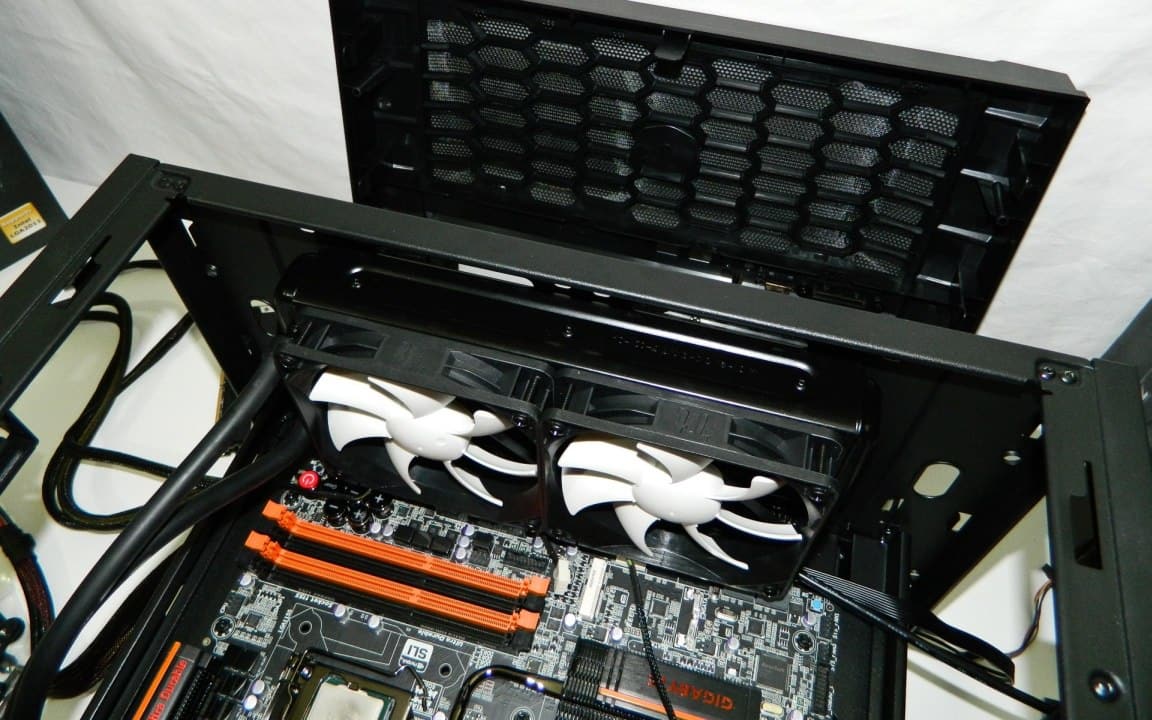
The Water 2.0 Extreme required a little thinking and tinkering when mounted in a Coolermaster HAF XB chassis, which is a flat, shorter tech station of sorts. The very long GIGABYTE GTX 670 OC video card took up too much space. I simply removed the two front Coolermaster case fans and used the Thermaltake fans and four included long screws to mount the Extreme radiator. The dual 120mm fans were installed drawing cooler air inside through the radiator in to the enclosure and there was no measurable performance penalty. Now, the system really rocks.
Now let’s get on with testing!
Cooling Performance and Noise Examined
Low, high, and automated PWM control fan speeds were set while monitoring the processors’ temps. Ambient temps were 70 F or 19 C. Noise was also measured from three feet which is about a common distance we typically sit from the computer. Keep in mind my tech station is wide open and not enclosed like a regular cases so depending on how good the airflow is in your enclosed chassis, your results may vary.

First, let me say, o m g! The Water 2.0 Extreme really controls the heat produced by both the Gulftown and Ivy Bridge processors. The unit handles the heat almost as well as the best air cooler(s) I have in the lab. And, the Water 2.0 Extreme is surprisingly quieter than expected.
Compared to the HAVIK 140, which generates about 26dBA, and the Venomous X, which generates around 35dBA, the Water 2.0 Extreme seemed in audible. In fact, it was actually generating less than 24dB of noise almost all the time which is something high performance single tower coolers just can’t compete against.
Final Thoughts

Ever since all in one liquid cooling systems first arrived, I’ve honestly not seen one cool as well as the Thermaltake Water 2.0 Extreme and that’s why we’ll be seeing even better units hit the market soon. In this system, most of the magic happens inside the unit between the internal coolant and radiator’s thermal dissipation surface. Their engineers did a great job of finding the truly optimal cooling level. And, they made sure to include every major accessory needed for a successful installation. The Water 2.0 Thermal Control software software is equally super easy to utilize and most importantly, works well. But you don’t have to use it if you don’t want to.
There’s not really anything that over shadows the product from installation to use. Now that they have a solid base line to work with, perhaps engineers will give us some white tubing next time to make it really pop especially for enthusiasts. But of course, thanks to our CES 2013 coverage, we already know that the new Water 3.0 Extreme will receive updated fans and an even better pump, and pricing is said to be the same. It’s hard to imagine performance being any better with this configuration.
Finally, let’s look at pricing. At between $117.95 – $139.99 according to our pricing engine, the Water 2.0 Extreme may seem expensive. But it’s a far cheaper and easier to install solution over custom liquid cooling. However, with the competition heating up with new entries from NZXT and CORSAIR coming down the line, we’ll have to see how it holds up, even with it’s 3.0 revision on the horizon. But today, you really can’t go wrong with this system and I highly recommend it.
Pros
- Dual 120mm fans and 240mm radiator
- High performance cooling
- Surprisingly quiet
- Bundled software works well
- Easy installation
- Good compatibility with many cases/configs
Cons
- Costs about $20 more than competitors
- USB header required
Overall Rating: 9.0 / 10.0

Help Us Improve Our Reviews By Leaving a Comment Below!