Installation and Setup
There were a lot of things that made setting up a system easy with the HAF932…
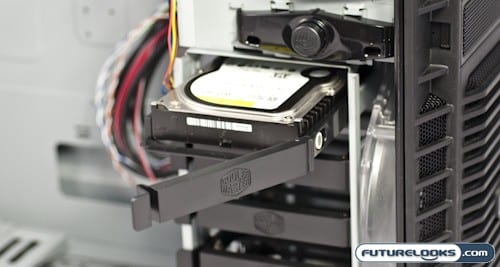
The hard drive bays used a completely tool free system that even combines rubber grommets for noise dampening purposes. The 90 degree mounting of the drives also provides more room in the motherboard area, giving you more space. Aiming the cables away from the motherboard area keeps the rats nest to a minimum. The 5.25″ drive bays all uses Coolermasters push button retention system, allowing me to quickly mount the optical drive.
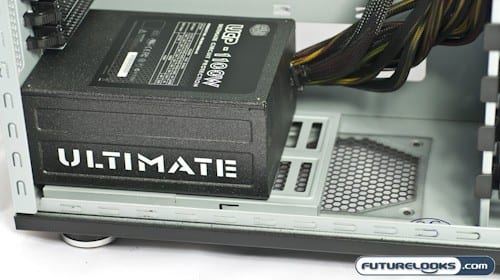
I chose to mount the power supply in the bottom of the case using the existing mounting system. Using a thumbscrew, you can slide the tray to match the size of the power supply. Unfortunately, there weren’t enough holes to really match it up to the length of our Ultimate UCP 1100W Power Supply. No biggie, but something to ponder.
As mentioned earlier, this PSU is a great match for this case. For starters, the fan grill was reinforced so that it doesn’t compress when mounted fan side down. I’ve used power supplies in the past that simply could not be mounted face down because it would compress into the fan. The other thing, which I initially thought was a mistake, is the fact that the word “ULTIMATE” is upside down on one side. This actually allows it to be right side out facing you whether you mount the power supply at the top or the bottom of the case. Nice detail!
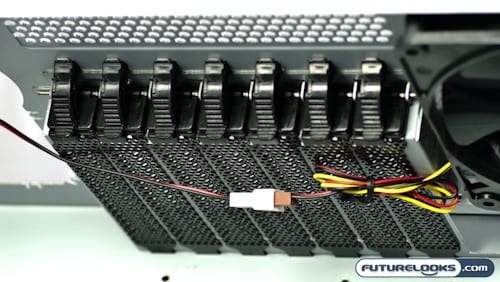
Tool free action is also available on the expansion slots using clips that rotate up to release the slot and then flip down to secure the expansion card. For the most part, it worked well, especially with dual slot video cards. However, I did find that the ASUS Xonar D2 Audio card mounted in the bottom slot had a tendency to slide down as there wasn’t enough pressure to secure the card properly. Coolermaster could easily solve this by adding a metal lip to the left of the final slot.
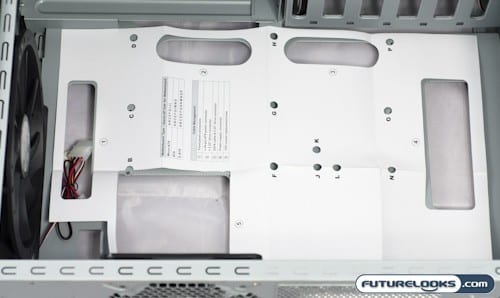
When we moved to mounting the motherboard, we were assisted by a template that was included with the instruction booklet. This allowed us to easily figure out which motherboard stand offs were required to fit our form factor of choice without having to guess.
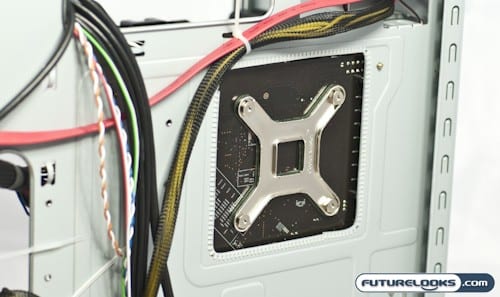
Typically, installing a new CPU Cooler entails the complete removal of the motherboard. Coolermaster has implemented probably one of the simplest fixes for avoiding full system disassembly in the form of a cut out that exposes the space behind the CPU. This allows you to easily mount any heatsink without taking things apart.
