Installation and Setup
The setup process will take you a few minutes, but it’s very easy to understand. Even if you intend on using the IP540 primarily through a Wi-Fi connection, you will still need to have a wired connection for the setup process. With that in place, you pop the installation CD into your computer of choice and run through the wizard.
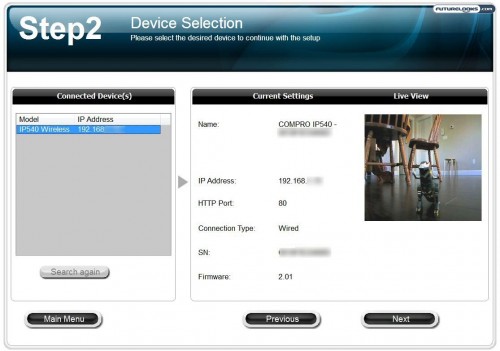
The wizard will automatically detect the new camera on the network, getting you to choose it (and showing the live view, as depicted above). From there, you can enable the Seedonk P2P service, which I’ll describe in a moment, and configure the wireless connection.
It does not work with hidden SSIDs, so you’ll need to temporarily make your SSID visible if you want to use that network. After it’s setup, you can hide your WiFi access point again, but I found the wizard to be a little finicky with that connection during the setup process. Thankfully, when it’s all kosher, the IP camera will detect and connect to your preferred network automatically.
Browser-Based Interface
You don’t really need to install any new software on your computer. If your computer is on the same network as the Compro IP540, you simply dial into the camera’s IP address in your web browser, put in your login credentials, and be on your merry way. I should note that while this works just fine in Internet Explorer, you do need a VLC plugin to work with Chrome.
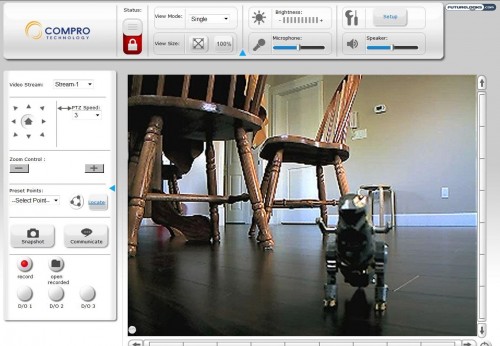
As far as the browser interface is concerned, you get relatively easy to understand controls that are robust enough to do everything you need it to do. If you have multiple cameras on the network, you can switch between them. You can also choose to view the size as 100% of the actual resolution or stretched to fit your window. What’s unfortunate is that if you want a “megapixel” resolution, you have to accept just 15fps. Getting up to 30fps bumps you down to VGA (640×480) at best.
From this main interface, you can control the pan and tilt a couple of different ways: there is the 8-way controller on the left side, as well as the vertical and horizontal bars that surround the video feed. You can also zoom, take a snapshot, communicate (open up the two-way audio), and record.
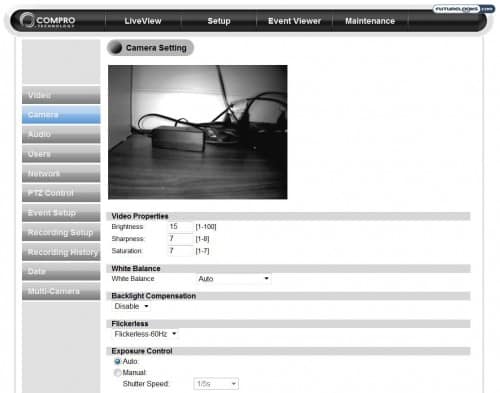
All of the setup stuff can also be accessed through this browser-based interface, including little adjustments to the camera for brightness, sharpness, saturation, white balance, and so on. It is also here that you can control the activation of the infrared LED lights for low light viewing, as well as setting up recording events and so forth.
It’s all very robust, but most users won’t dive too far into all of these different options. Having the recording events can be very useful though, since you can set the camera to automatically record during the times when you aren’t around to keep an eye on your business.
The Seedonk Instant Messenger
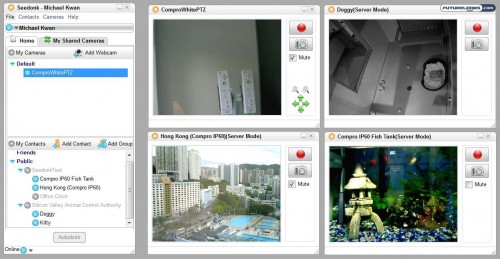
One of the newer changes to the Compro family is the company’s partnership with Seedonk. The software expands on the functionality of the Compro IP cameras, since it allows you to more easily share your video feed with your friends. This is done primarily through the Seedonk Instant Messenger.
You set up an account, just like you would with any other service, but then you are able to share cameras on the fly. This works with regular webcams too, but the network-connected nature of the Compro IP540 means it can work without a computer. It also makes it very easy for you to view your own camera, even when you’re not at home or in the office.
What’s more, there is an iOS app that allows you to view the camera right on your iPhone, iPad, or iPod touch. That really comes in handy for situations like nanny cams, since you might not have a computer on hand, but you always have your smartphone in your pocket.