
The past few months, Thermaltake has been launching more of the products we saw at CES 2010. At the event, we saw a demonstration that involved the Frio versus a Zalman CNPS9900A which is a very common, performance cooler still in use by many enthusiasts. With the Core i7 screaming at 4.4 GHz on a pair of ASUS motherboards, the system with the 9900A eventually blue screened due to very high temps, whereas the Thermaltake Frio kept things cool enough to run for the length of the entire demo.
Some this was a “hand-picked” special demo model with some kind of behind the scene improvements. Others say that someone handpicked the CPU underneath the Frio. All we know is, we wanted to see if the Frio is really that good.
Features and Specifications
Let’s cover the technical information first and start un-complicating a litt bit of the complicated. Weighing in at roughly 1,042 grams, the Frio is one of the heavier tower heat sinks we’ve tested. The heat sink is fabricated mainly from Aluminum fins and attached to copper heat pipes and base. This alone accounts for most the weight of this heatsink.
The Frio is designed to expel up to 220W of heat generated by any CPU and is designed to work with the following CPU sockets:
- Intel: LGA775, LGA1156, and LGA 1366
- AMD: AM2, AM2+, and AM3
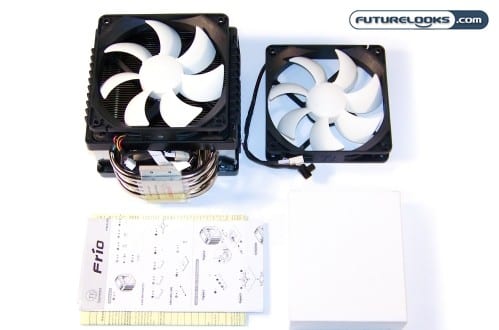
The Frio ships with two 6-12 volt 120mm VR Controlled 120mm fans. While only one fan installed at the start, a second one is included for additional performance. The VR control allows you to control the fan speed from 1200 to 2500 RPM. This translates to a noise range of 20 to 43 dBA for those extra RPMs. At the highest speed, you can expect a whopping 100+ CFM passing through the heat sink.
The Frio is available now and is available for around $59.99 at NewEgg.
What’s In The Box?
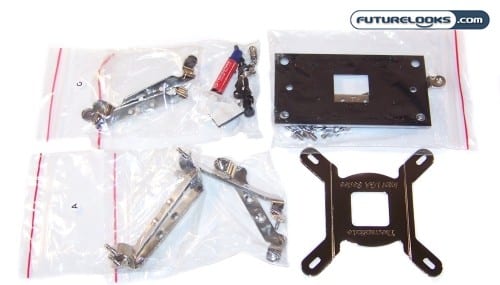
Inside the box there are different packages with labeled letters on them. Each labeled package is suppose to coincide with the instructions in the manual. Our particular sample unfortunately did not correspond to said labels. It would appear someone at the factory had problems with the English lettering, or was very far behind on the production line and needed to make up time.
Fortunately, the manual includes relatively good pictures that will make it easy to figure out installation. Just match the washers and screws with the pictures and you’ll be fine.
Also in the box are four rubber fan stand offs. These replace legacy fan screws are actually quite nice. Users just have to slide them on to the extra fan shroud and pull through the fan till it doesn’t pull back out easily. It really cuts down on fan vibrations.
Closing in on the Frio
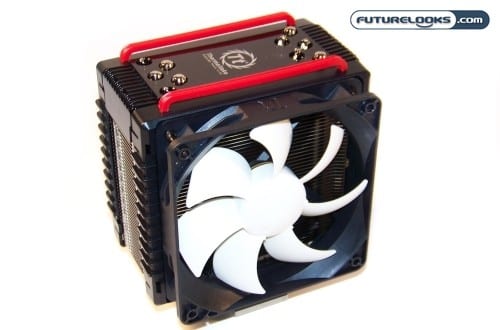
While not much bigger than other tower coolers, adding the extra 120mm fan suddenly gives it some mass that covers a very big portion of the motherboard. The Frio’s design is quite simple and is only partially shrouded by fan frame and a smokey, clear cooler cap. You will recognize the cap due to its two sporty red rails. These rails have no other purpose other than looks. It does at least go well with many of the black and red motherboards and cases on the market.
The white 120mm fans should look sharp with any UV lighting. The included 120mm fans don’t require screws to mount as all you are the rubber fan stand offs to attach them.