
The LAN party. These gatherings of gamers and geeks can be big or small, but one thing is always a constant, and that is the need to portage you computer from its permanent resting place at your home to some house or hall in your vicinity. The few LAN parties I’ve attended have demonstrated to me the importance of having a small, portable computer that can house a large collection of high performance hardware. NZXT also recognized this as a benefit, and their latest case may just fit those requirements.
The Panzerbox manages to combine three features that are are usually mutually exclusive into a unique design. This includes the ability to install a large amount of hardware, well managed temperatures, and portability. This is all packed into a tidy little package.
Features and Specifications
Due to its unique layout the NZXT Panzerbox looks like it can easily contain a fully spec’d out gaming rig, complete with dual video cards, big HSF, and fast CPU. Although there are a lot of features on the product home page here are a few that we thought warranted further investigation:
- Mid Sized, Extreme Performance: Fitted with dual high performance 150CFM controllable 190cm fans and a dual radiator bracket to provide the best performance, the Panzerbox offers high performance for a mid sized case due to its unique layout.
- Removable Motherboard Tray: A removable motherboard tray makes upgrading easy and painless.
- Pure Aluminum: Build in all aluminum, the Panzerbox is light and luxurious, perfect for traveling and showing off at LAN parties. Compared to similar products with high airflow and ATX expandability, the Panzerbox is almost 25% smaller and 50% lighter.
- Full Expandability: Room for high performance 10.5″ cards, over sized heatsinks, even larger dual radiator solutions.
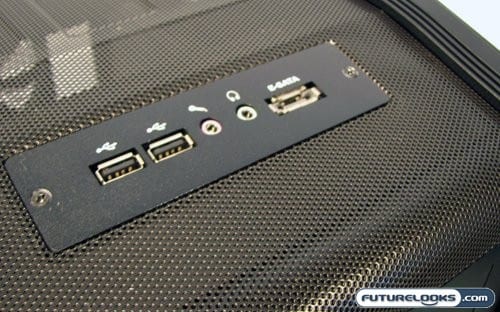
- Top mounted USB/Audio/ESATA Ports
All this is compacted into a box that isn’t more then 18″ tall, making it a fair degree smaller and lighter then most cases you might see at your local LAN. Looks like this could be a contender for the ultimate LAN party case. Guess we’ll have to dig deeper to find out.
Putting the Parts Before the Case
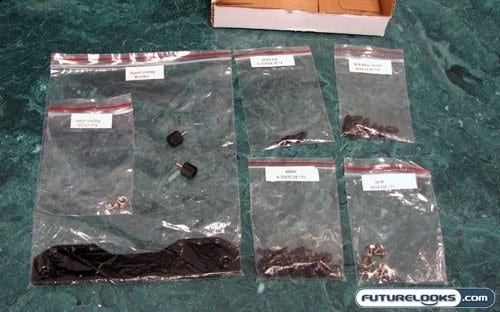
Before we take a close look at the innards of the NZXT Panzerbox, it’s important to take a peak at the accessories that comes with the case. I had mentioned that NZXT used thumbscrews throughout the case, and for the most part that’s true. The accessories included are basically just the extra screws you’ll need, plus the brackets for an optional dual radiator if you intend to install a water cooling system. The drives, side panels, and motherboard tray are also held in place by thumbscrews.
NZXT went one step further in maintaining the aesthetics of the Panzerbox by including matte finish screws specifically labelled for the power supply, as opposed to silver which obviously clash. As for documentation, NZXT has included a detailed and concise manual to help you through setting up a system in this unique case.
All Around the Exterior
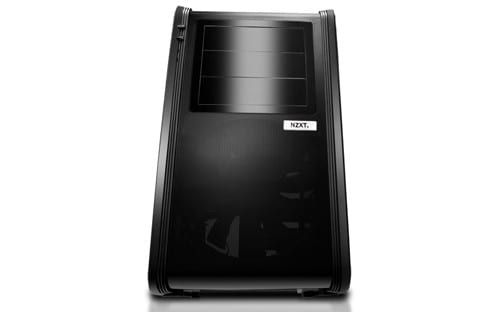
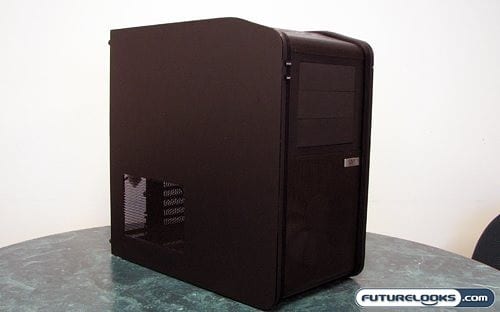
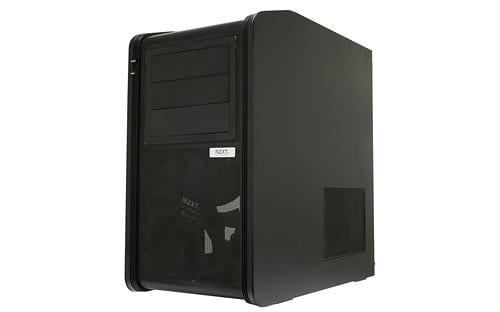
From the beginning you’ll notice the Panzerbox is a rather short, fat case. It’s not unlike a tank, which I’m sure served absolutely no inspiration what so ever for the name of this case.
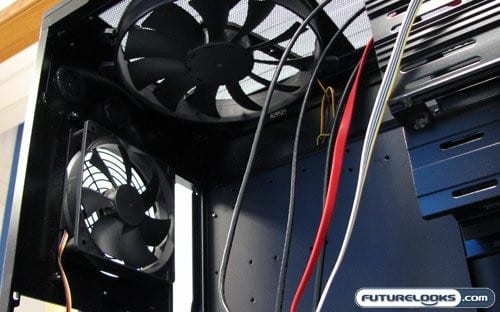
Sarcasm aside the reasons for the wide stance on this case are two-fold; it has very big fans and a non-standard power supply mounting point. The fans themselves are 190mm wide, and produce 150 CFM of airflow at full speed. They are actually rather loud at full tilt. Thankfully these fans are 3-pin models, so if you have a controller that can handle the amperage required (most modern fan controllers can do so without issue) you can dial these fans down.
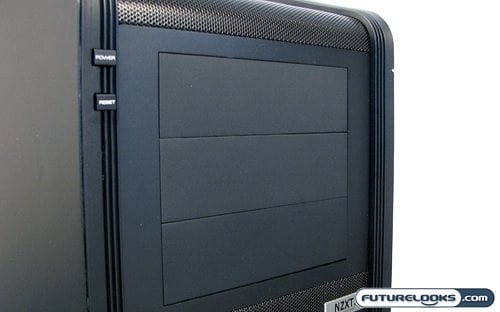
As for the height of the NZXT panzer box, that is attributed to both the now seemingly popular power supply mounting location and keeping the number of drive bays low. It’s actually been a while since I looked at a case that didn’t have at least four 5 1/4″ drive bays. In other cases that might be a bad thing, but in the Panzerbox its nothing but good. This is meant to be an portable LAN box, and as such only needs a few external drive bays. You can still easily fit a two drive optical array, or a single drive and huge fan controller.
Either way the case gives you enough expansion for most needs, with more available on the inside.
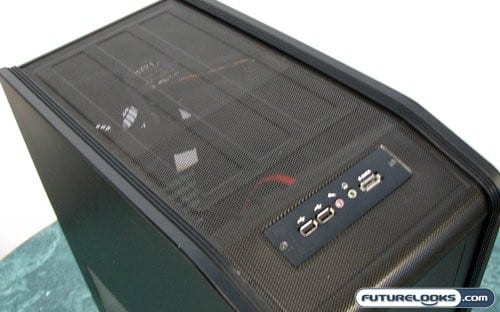
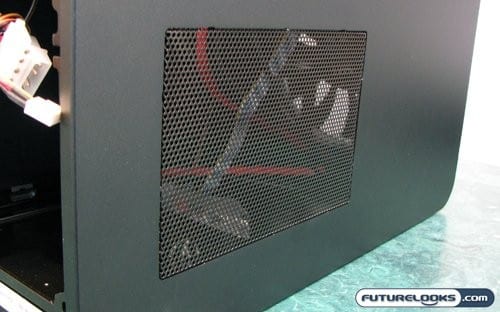
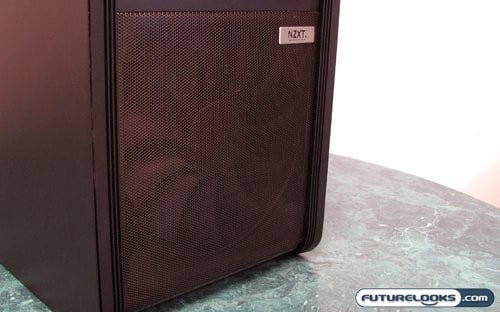
The top of the case isn’t very exciting, except for the fact that it isn’t a solid piece of aluminum. Instead NZXT decided to take the same mesh that allows the front fan to have so much air to flow, and cover the entire top of the case in it. This of course has the same air flow enhancing effects on the top of the case, but also gives a birds eye view to the interior of the case and to components within.
You could actually pull off a very neat effect with this case by installing a couple cold cathode lights and letting the ambient light shine out of all the vents and mesh.
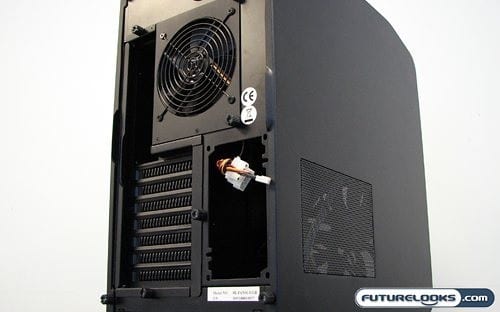
The back of the Panzerbox finally reveals this power supply mounting location that everyone is talking about. This case accepts standard ATX power supplies, but they are mounted in a way that is both retro and modern. Since a contradiction in terms like that requires explanation, I’ll refer you back to the original ATX cases that started trickling out in the late 90s.
The “standard” at the time (it was more of a loose guideline) was that the power supply was mounted directly above the CPU socket. This saved loads of space, but caused loads of headaches as CPUs required more cooling and heatsinks and fans got bigger. A new standard emerged, and power supplies started being mounted at the top of cases above the motherboard. The rest is history as far as that’s concerned. This new power supply mount seems inspired by those old cases, and the extra cooling provided by the power supply fan would seem to help airflow.
A Series of Tubes
Now I had mentioned that the top of the NZXT Panzerbox can support a dual fan radiator in lieu of the installed 190mm fan. Well this just shows that like many other enthusiast cases, the Panzerbox is primed and ready to have a full watercooling rig installed.
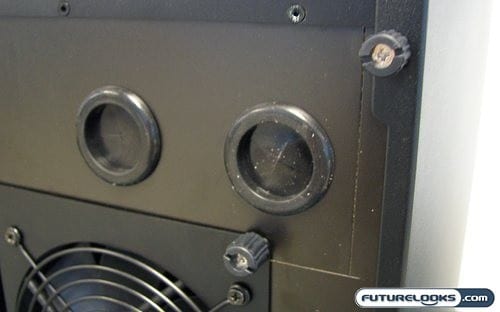
There are two rubber-grometted ports on the rear of the case, above and to the right of the 120mm fan. These are of course to accommodate tubes from a watercooling rig, and are great if you need to mount an external…anything really. Now unlike other enthusiast cases, these ports are actually quite big. I was able to get my middle finger (arguably the fattest of my fingers) all the way through to the base. I don’t know how that translates into OD and ID of tubing. However, I do know that it’ll prevent you from wanting to flip off someone in anger as you curse the size of your watercooling tubes.
Moving Inside
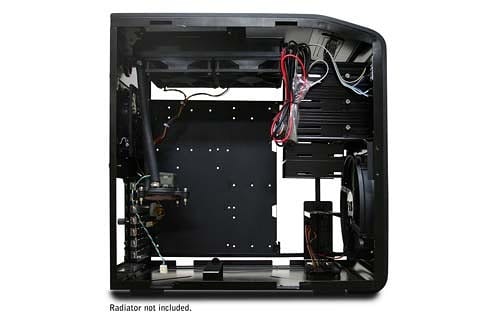
Now both myself and NZXT have gone on about how roomy this case is. It is roomy, but the interior is helped by a few features and design considerations. The first and foremost is the removable motherboard tray.
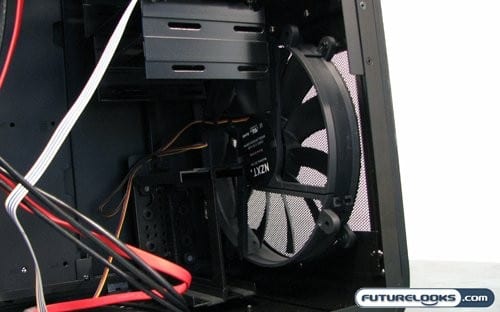
With the wide stance of the Panzerbox, the optical drives interfering with components on the motherboard shouldn’t be an issue. However inserting a full ATX motherboard might be an issue, if it wasn’t for the removable tray. Johnny Hou, NZXT’s design guru, was also paying attention to the design of the mobo tray, as he and his team decided to include the 120mm fan with the tray when it slides out. This allows you to install your mega-huge CPU cooler outside the case, without worrying about being able to get it back in. The tray and the expansion cards are all held in using thumbscrews, adding another level of ease to installation.
The 5 1/4″ drive bays also use thumbscrews, which are pulling double duty by holding in the black drive bay covers when they don’t have anything in them. I actually got a good read on the quality on the materials used in the Panzerbox from the drive bay covers. They are made of the same aluminum as the case, which is quite thick compared to many other high end cases. It reminds me a lot of NZXT’s original ADAMAS case which could hold a man standing on it.However, you don’t want to stand on the Panzerbox as the mesh will buckle under your girth.
Since these drive bays don’t use any clever rail system, installation of your 5 1/4″ drives will require removal of both side panels and a little bit of extra work positioning everything.
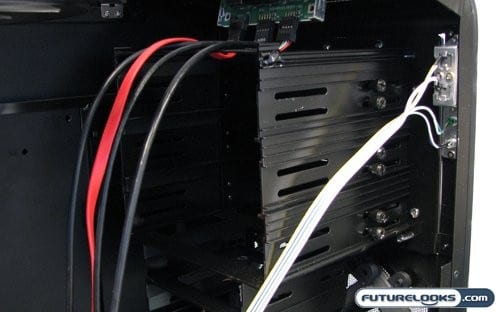
Now I had said that some may have issues with the “low” number of 5 1/4″ bays on this case. Really, if you’re building a LAN box, you want lots of hard drives. A nice mix of the fast, for loading games quickly, and the cavernous, for…other activities, is usually preferred. NZXT has placed four 3 1/2″ drives inside the Panzerbox, and positioned them in way that ensures they get the most cooling while still staying out of the way. This does lead to a rather odd orientation.
The two upper bays end up only catching the upper most bit of airflow from the front fan, while the lower two bays end up standing right in front of the fan. The means the front drive in this rack takes most of the cooling while the rear drive sits in it’s shadow. While this will definitely require some strategic drive placement, the amount of air being moved should mitigate any cooling problems.
The Test System
To put the NZXT Panzerbox through it’s paces, I installed my current test rig. This system is also (most of) the rig that will be following me to Fragapalooza this year. The component roll call looks something like this:
- AMD Phenom II X4 955 Black Edition CPU
- GIGABYTE GA-MA790FXT-UD5P AM3 790FX Motherboard
- Corsair XMS3 DHX 4GB DDR3-1600 Dual Channel Memory Kit
- GIGABYTE GV-R489-1GH-B Radeon HD 4890 Video Card
- Kingston SSDnow V-Series 128GB Solid State Hard Drive
- Thermaltake SpinQ Heatpipe CPU Cooler
- Lian Li MAXIMA Force Extreme PS-A650GB 650W Power Supply
The benchmarks performed on this case consisted of placing a fair degree of load on the system, and measuring the temperature of some key components and the interior of the case. We used OCCT to place the required amount of load on our test rig. We also measured the acoustic properties of the case, since how loud a computer is tends to be important to a fair number of people. We’ll get to those benchmarks soon, but first…
System Installation

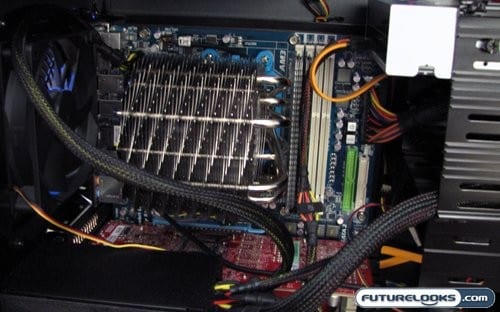
Despite it’s compact size, it was fairly easy to install a full system into the NZXT Panzerbox. This is most likely due to its layout, as well as the features implemented. The removable motherboard tray does make installation of the major components a simple affair as you are able to install the motherboard, CPU, RAM, expansion cards, and a monster CPU cooler all outside of the case. Once that’s done everything just slides in.
Since this is a smaller case with a unique layout, there still is a method to installation that you’ll want to follow. Still things are pretty straight-forward. I didn’t once consult the included user manual, but it does have some tips in it should you get stuck. With all that being said, things aren’t all completely rosy.
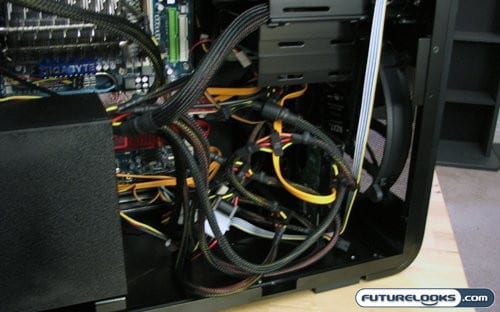
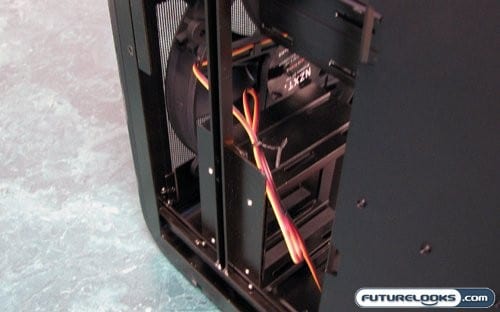
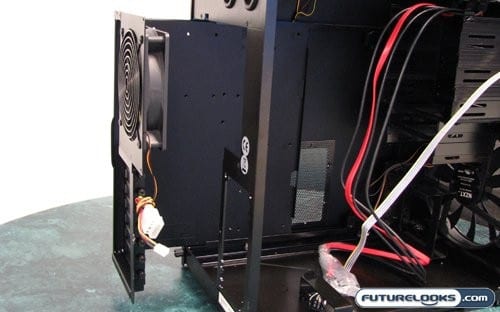
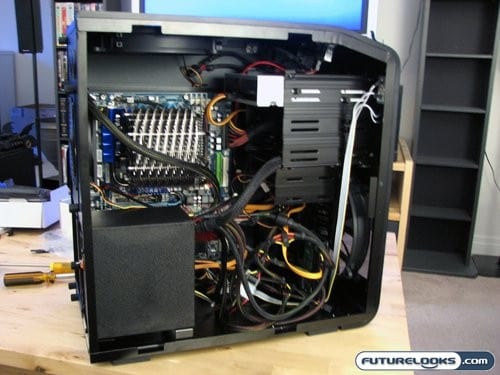
The one big thing to be aware of with the Panzerbox is cable management. Due to the shape of the case and the position of the power supply, you’ll want to have plenty of zip ties and other types of cable tie down handy. Now my efforts were rather rushed, resulting in what you see pictured. However with every power supply having it’s cables exiting from the same approximate location, you are still left with a big bundle of power cables shooting out right in the middle of your case.
I would strongly recommend using a modular power supply with this case; a tip I confirmed when I switched to a NZXT Precision Power 1000W power supply to support the rest of the components going in this LAN rig.
Obviously things aren’t all bad with the interior of the Panzerbox. Even with all your components installed, you’ll still have a good amount room to work around the CPU and RAM. You will need to remove the power supply to access expansion cards, but you can also simply slide out the motherboard tray. The Panzerbox does truly hold an impressive amount of hardware for it’s size.
The New Hotness or Just Hot?
Testing for the NZXT Panzerbox basically consisted of two areas of focus; thermals and noise. As you can probably guess, we started with thermal testing. For this we used the program OCCT to both simultaneously push the system to 100% load and measure the temperatures while under load. The system was left idling from 30 minutes to let temperatures and activity stabilize. Once that was over, temperatures were taken and OCCT was started to push the CPU to 100% and place stress on the RAM and video card. After 60 minutes of this, the temperatures were taken again.
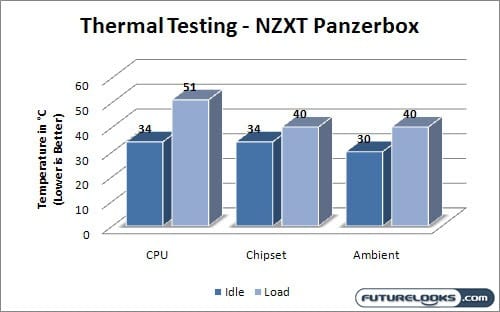
The results were a little high compared to some other case/cooler combos we’ve reviewed in the past. The TT SpinQ cooler we used is as yet untested in our suite of benchmarks. Luckily a quick browse around the internet shows only one of two other sites who reviewed this case is actually doing thermal tests (WTF guys?), but those that did showed numbers very similar to what I’m getting with similar hardware.
The performance gap between idle and load on the CPU is a little worrisome at 44%, but it’s also the hottest component. The other two points of focus are well within reason, and all three scores should give enough breathing room for a decent overclock.
Noise Levels
When it came to noise testing, our methods were much more simple. Noise testing was performed using a DB Meter, first measuring the ambient noise in the room with everything silenced and turned off. The meter was then pointed at the case in three different locations. The directional microphone was aimed on centre, and was perched on a tripod 6 inches away from each target. The room was brought to a silence, and the DB Meter was given a minute to stabilize. This was repeated for each test location.
- Ambient Noise: 45.9 dBA
- Front: 55.6 dBA
- Left Panel: 54.7 dBA
- Right Panel: 56.1 dBA
Now these results are a fair degree higher then any other case I’ve reviewed, and it showed when I was using the system I built with this case. The noise generated by this was quite pronounced in my now quiet office, and when I powered my very large and power main rig back up this system still managed to drown that out. This may be lost in the din and noise found at most LAN parties, but in the home it’s definitely noticeable.
The 190mm fans are 3-pin models, and quite adjustable, but you’ll still need a decent fan controller of some type. I wouldn’t recommend hooking up the 190mm fans to motherboard headers, as that size of fan may not get enough power from the mobo and burn out the fan header. So I think it’s easy to say that the Panzerbox takes care of business when it comes to cooling, but it really doesn’t do so quietly.
Final Thoughts and Conclusion
The NZXT Panzerbox delivers on what it promises. The case is nice and compact, and very light. It’s essentially the perfect case for a schlep to your local LAN event, and across the country to meet people you only know online. It lacks any significant compromises, allowing you to install a full complement of hardware to ensure your victory over most in whatever online battlefield you call home.
The case does also lack a couple very beneficial features. The first is decent cable management. Some extra accessories to help with winding all that cable through the diminutive enclosure would have been greatly appreciated. Also the fans on the Panzerbox are rather loud, something that is actually rather surprising considering the larger the fan the less noise it is supposed to make. A fan controller is almost a required purchase should you want to run this at home. Since the fans are an odd 190mm width, you also just can’t go and replace them with something quieter.
In the end, I still like this case. It does have some short comings but it’s also very good at the one thing it one bought for; portability without compromise. I have access to a large number of cases, and I’ve chosen this one to be the enclosure that houses my components for this year’s Fragapalooza event. The price is also right, with the Panzerbox being able to be found for $120 USD online. Compared to the price of other aluminum cases using this thickness of aluminum, that’s a good deal. That plus the innovative design makes the Panzerbox a great case from the gamer on the go.
Pros
- Good cooling performance
- Unique design, excellent focus on portability
- Excellent water cooling support
- Easy to install and setup
- Good price
Cons
- Cable management a bit of a mess
- Loud fans, can’t be swapped out
- Placement of one hard drive rack blocks airflow
Overall Rating: 8.5 / 10.0


Loved This Review? Hated This Review? Sound Off Here!
NZXT Panzerbox Classic Series Aluminum ATX Case Photo Gallery