

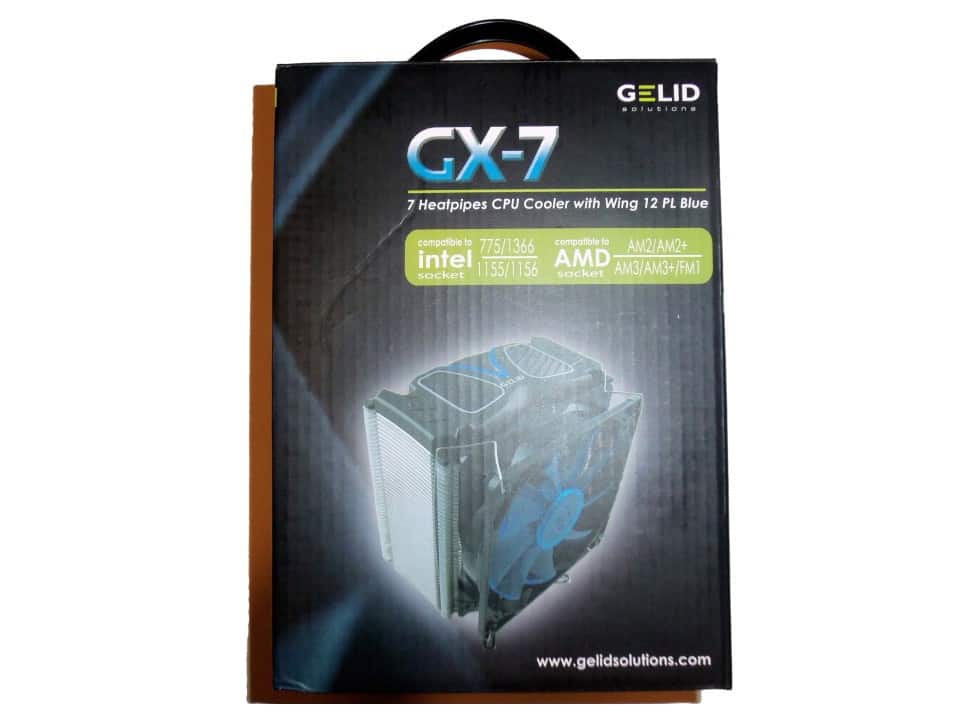
CPU coolers are an interesting section of the PC market. It is one of the few categories where, barring size restrictions, there is often a clear king of the mountain. Many PC enthusiasts spend hundreds on top contenders, but they often overlook the fact that they don’t need the premium performance nor do they need to pay a premium price. In the middle of the category you will find a small selection of relatively inexpensive coolers with near premium performance. One of these is Gelid Solutions GX-7 which can be found retailing for as low as $64.99 US. Let’s check it out!
Whats in the Box?
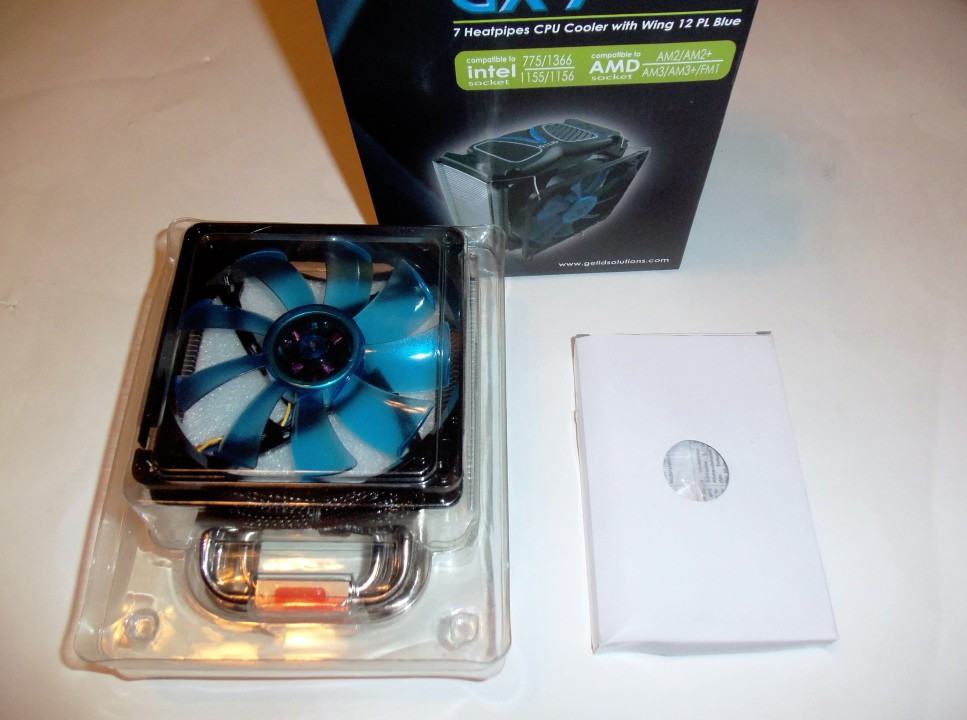
The Gelid GX-7 is very much like any other universal CPU cooler when it comes to contents in the box. The first thing you will find is a small white box which contains all of the accessories. We will get around to those in a moment. Underneath you will find a molded plastic container with the CPU cooler and Gelid 4-pin PWM 120 mm fan. These are both held in place by the molded container and separated by a piece of foam to prevent damage during transport.
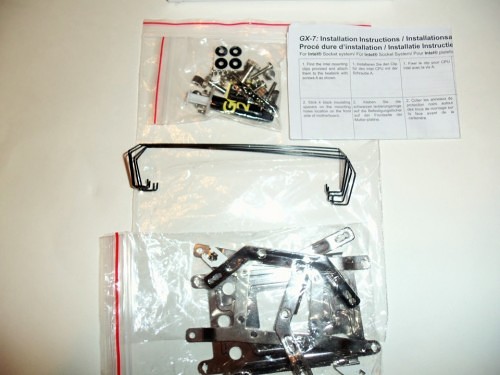

Once I had moved the GX-7 aside, I opened the white box with the accessories. This included two braces for the cooler, one universal back place, Gelid case badge, and a tube of GC2 thermal grease which is really quite good (reviewed here). You will also find four mounting screws, small tension springs, spacers, screws for the cooler braces, and fan retention arms. There are even two additional fan retention arms in case you want to use two fans.
First Impressions
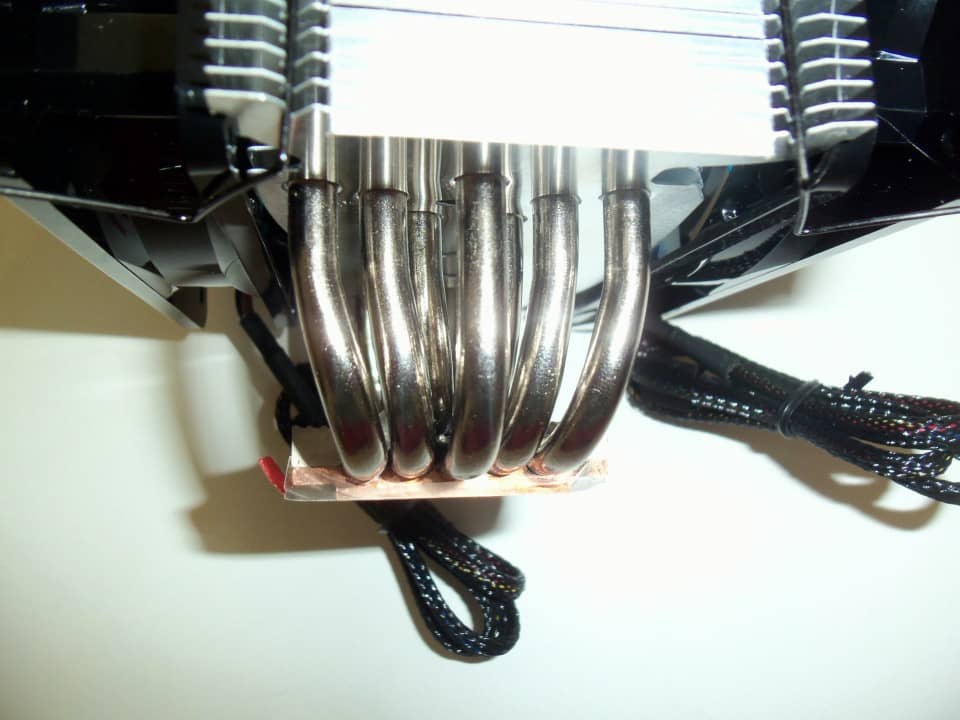
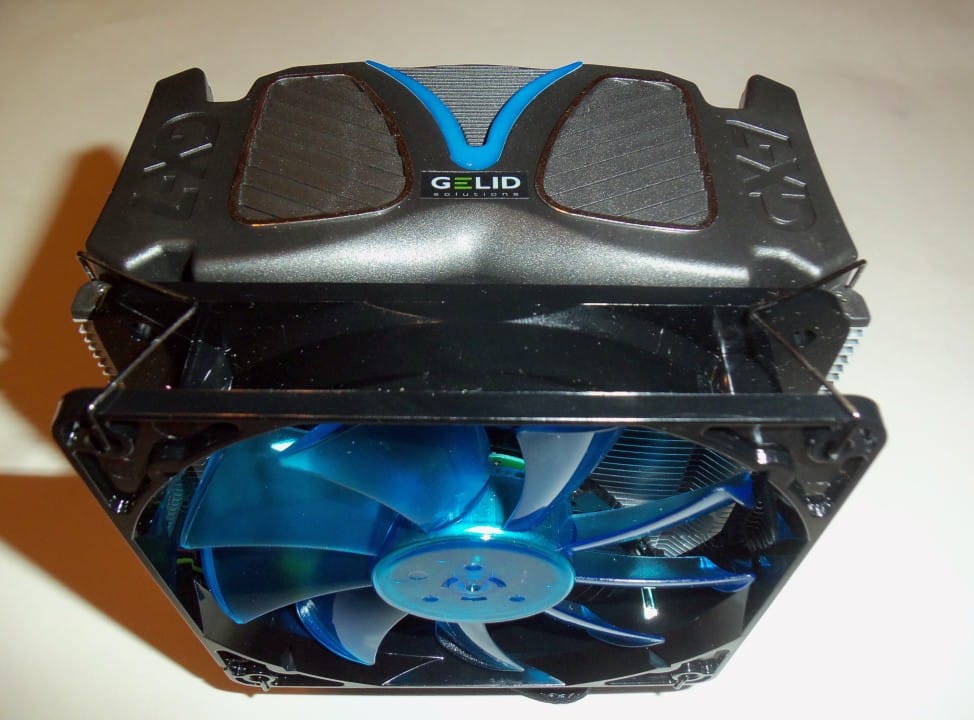
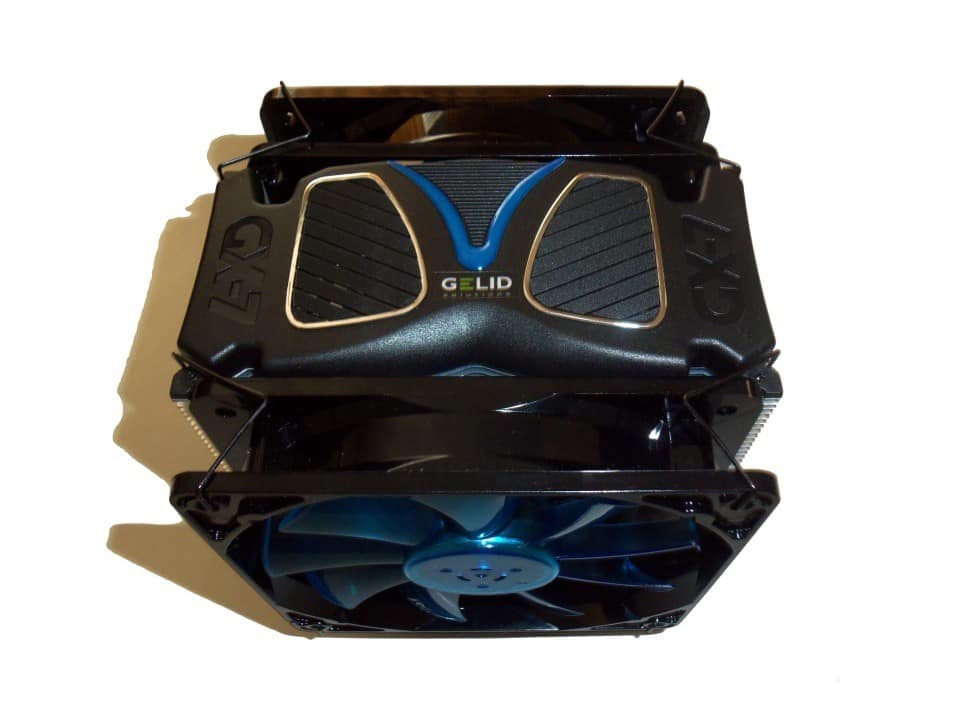
There is a point when you first open a box for a new product you purchase when you decide if this is something you will enjoy owning, or if it was something to just fill a requirement. I was not sure what to make of the Gelid GX-7 as it seemed to go against some basic principles I normally attribute to high end coolers. Coolers such as the Scythe Mugen II I and the Noctua NH-D14 that I normally use for my test setup are large, heavy, and spread out their heat pipes as far as possible. The GX-7 is very light weight, only about 50 mm wide, and has more heatpipes than both previously mentioned coolers (totaling seven). It was not discouraging, just different.
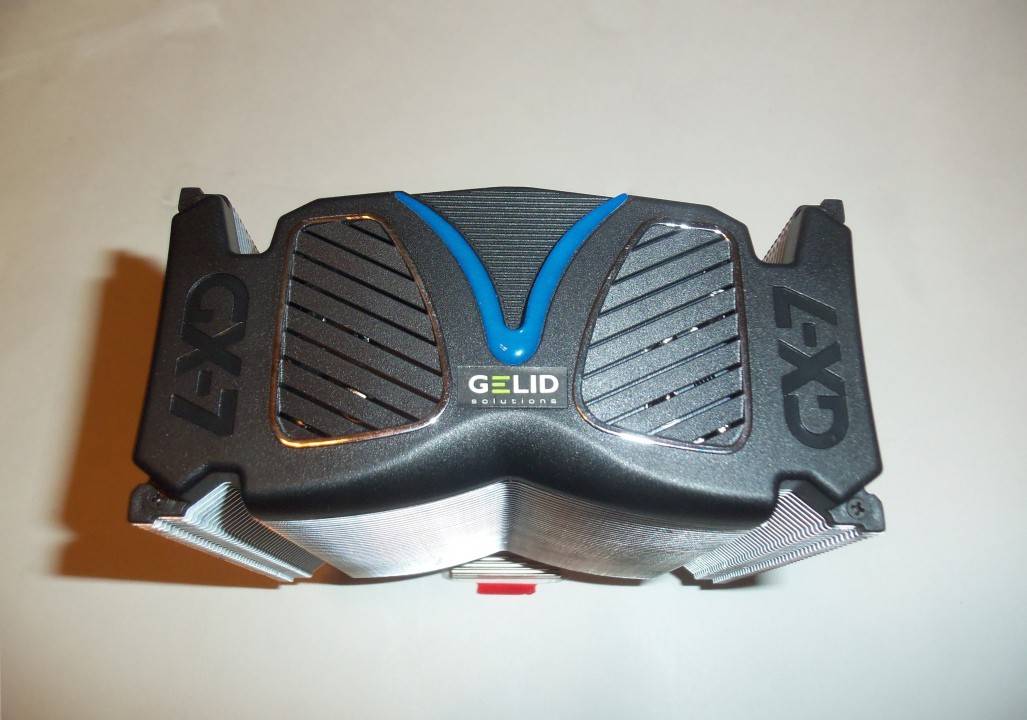
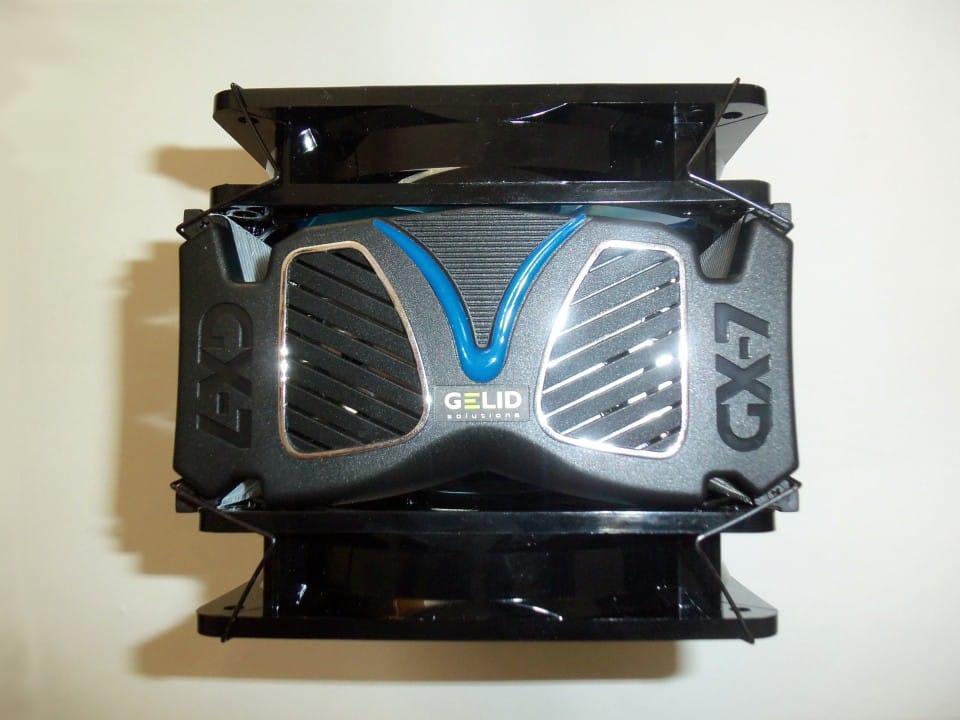
As I examined it a little more I notice the GX-7 also has a very distinct shape complete with some small “V” shaped cutouts in the cooler fins. The fins themselves have the tips bent to provide constant spacing between each and are thick enough to resist being accidentally bent during installation. Finally the top cover is a black plastic piece with chrome accents and Gelid logo. It is exactly as tall as any attached fans and should not increase the size of the cooler like some designs heatpipe end tips. Overall the Gelid Gx-7 is distinctly shaped with a unique approach of increasing the number of heatpipes, but not the size of the cooler itself.
Test System Setup
In order to assess the ease of installation of the Gelid GX-7, a system using the following components was assembled.
- CPU: AMD FX-8150
- CPU Coolers Tested: Noctua NH-D14, Scythe Mugen 2 Rev B, Gelid Solutions GX-7
- Motherboard: GIGABYTE GA-990FXA-UD5 AM3+ ATX
- HDD: Samsung F4 500 GB 7200 RPM & WD Blue 2 TB 5400 RPM
- RAM: G.Skill 8GB (2 x 4 GB) 2133 MHz @ 1866 MHz 9-10-9-27
- GPU: HD 5850 DirectCU
- Audio: ASUS Xonar DG 5.1 PCI card
- PSU: Antec High Current Gamer Pro 850W
- Case: Rosewill Thor V2
- OS: Windows 7 Professional 64-bit
Instead of testing the Gelid GX-7 on an open air testing bench, we will be testing it inside an enclosure. I believe this should give us a better idea of what practical impact this CPU cooler will have on performance as well as any changes in noise inside the system. The hardware will be a little different than my regular benchmarking setup due to the use of a different GPU, HDD, and the addition of a discrete sound card. Let’s see if any issues came up during the installation process.
Installation Notes – You Should Remove The Motherboard
This is one of those installations where it is all about the approach. While most motherboards have a large cut out to facilitate installation of coolers, it really didn’t help the Gelid GX-7.

Initially, I chose not to remove the motherboard from my case but found out later that this would have been much easier. Following the instructions, step three has us installing retention springs and long capped nuts. While this design does ensure even pressure across the CPU, you need to get one of your hands below the cooler to hold the pieces in place while securing them. While most cases have a huge cut out to assist in the installation of most coolers, it really wasn’t useful with this particular cooler due to the issues above. To be fair, this is likely not the only cooler on the market that uses this method of installation but a little fore thought can lead to less cussing.
While switching back to another test cooler, I did attempt an install of the Gelid GX-7 one more time with the motherboard outside of the case first. It was definitely much easier for all the reasons above. One thing of note is that the retainer arms that attach to the bottom of the cooler can be turned 90º, giving you control over the direction of the airflow in either a horizontal or vertical fashion. This is much easier to accomplish with the board out of course.
Installation Notes – Finishing Up
Once the retention springs/capped nuts were in place, four cut-out spaces in the top of the cooler allow you to get a long screw driver down to the mounting screws. If you have a long necked screwdriver, you can wait until after installing the motherboard and attaching the fan(s) to finish tightening the screws. If you do not, then you can do this before installing the motherboard with the screwdriver at a slight angle prior to installing the fans.
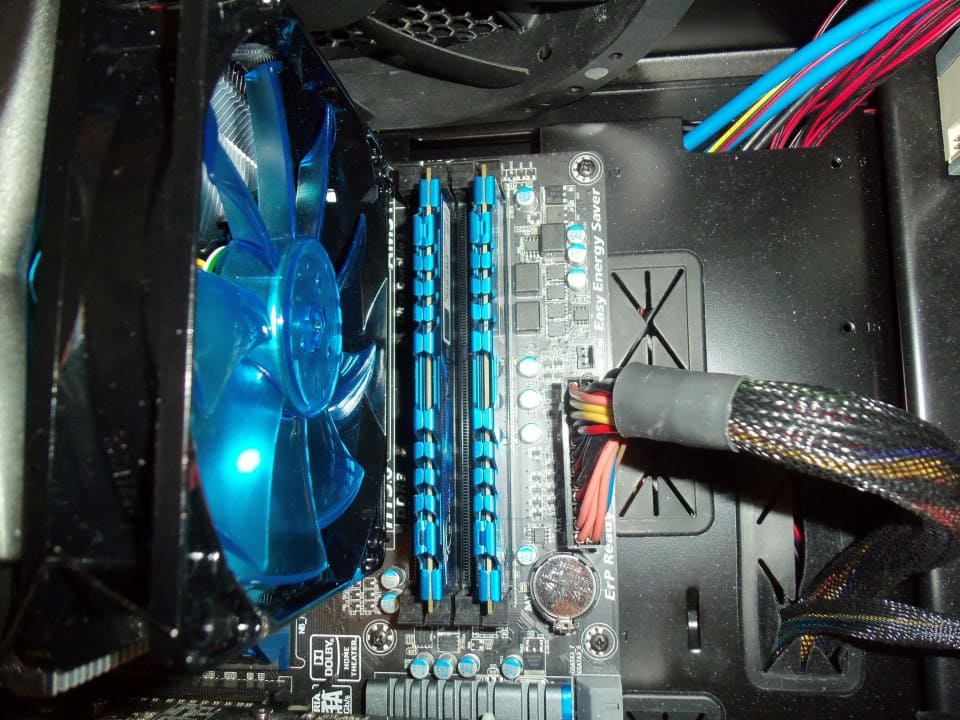
Another thing you should note is the GX-7 with a front mounted fan does not obstruction RAM heat spreaders. The cooler’s heatpipes sit the fins high enough to hover over most RAM coolers. In addition to that, the fan stops just millimeters short of the first RAM slot on my motherboard. While it may look a little cramped, there is actually just enough space to install the RAM while the cooler is in place.
How We Tested
In order to test the Gelid GX-7 CPU cooler, the following software was used to produce a load that the cooler would have to fend off…
- AMD Overdrive 4.0.5
- AIDA64 Extreme
- OCCT
Testing will be done in this closed system with the stock fans set to low speed. This should reflect a real world scenario as I am after the results that users should expect when used in their cases. As this will be for all coolers tested, any help or hindrance provided by the Rosewill Thor V2 will be the same for all three tested coolers. Keep in mind these results may vary with your system configuration.
Thermal Performance
Now we can get into the primary function of a CPU cooler which is heat dissipation. I will be using the temperature numbers from AIDA64 Extreme. Its numbers were identical to the OCCT software, but 11ºC lower than the numbers shown in AMD Overdrive 4.0.5. First let us look at all the coolers at stock speeds for the FX-8150.
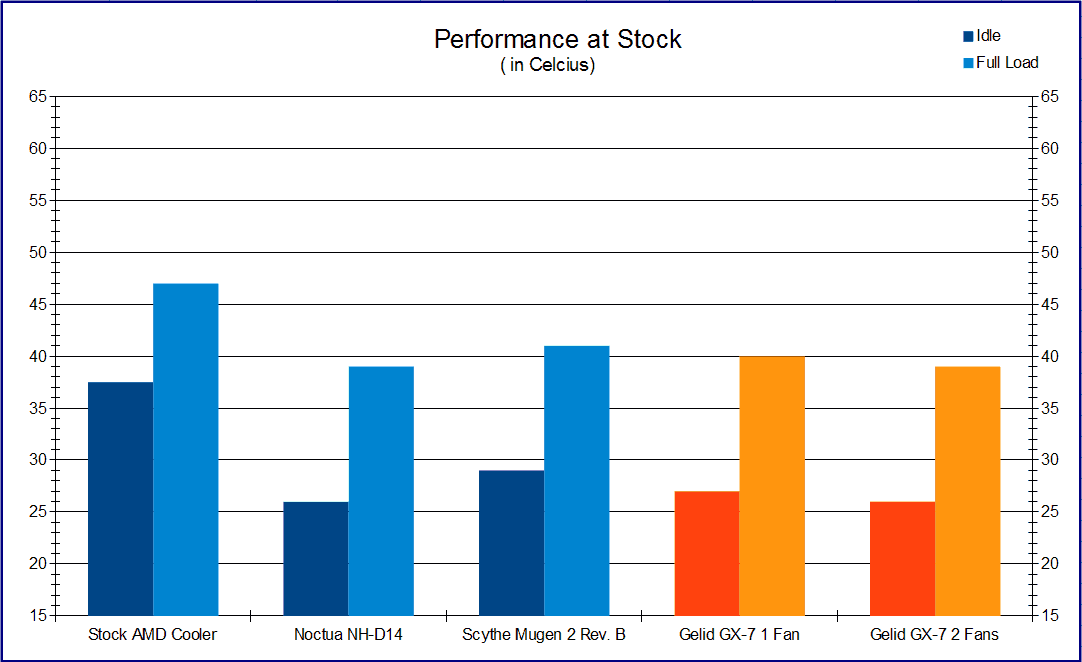
As you can see the Gelid GX-7 with one fan falls between my Mugen and the Noctua NH-D14. Installing a second fan in the pull position does improve performance up to 2ºC. This brings the Gelid GX-7 to the same performance level as the Noctua NH-D14 which is more fair as the NH-D14 uses two fans as well. Lets see what happens when I turn the dial up to 10 on my FX-8150.
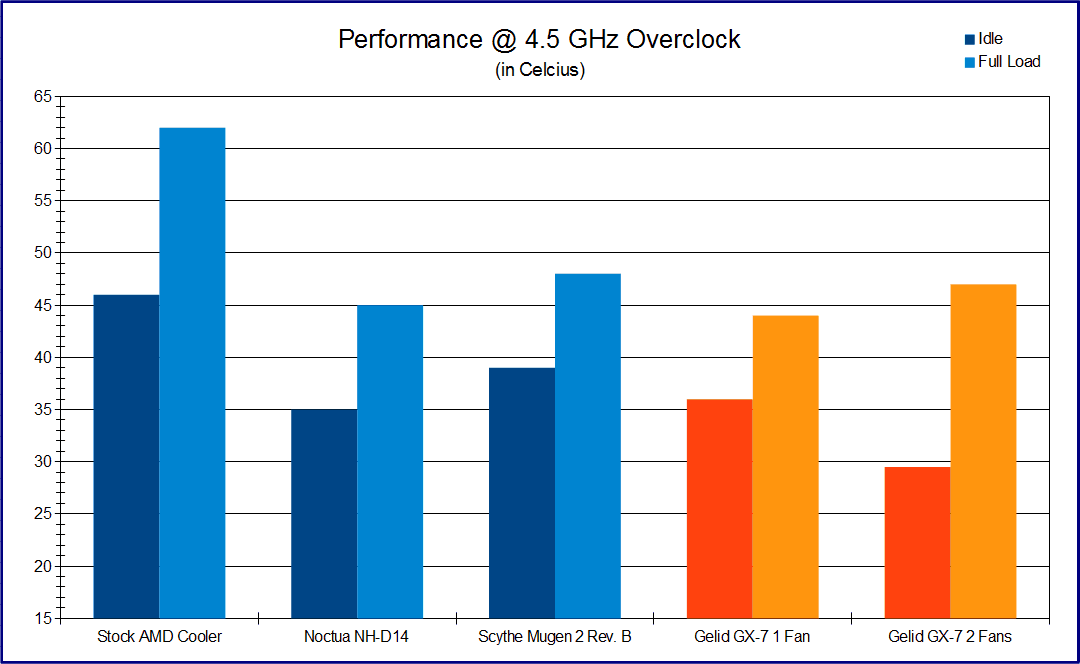
First I would like to say I believe the temperatures in AMD Overdrive 4 are more accurate. During testing with the stock cooler, the FX-8150 only held the 62ºC for a few seconds before it was forcibly down clocked by the built in thermal protection. I honestly should count it as a failure, but I wanted to just show why overclocking requires an aftermarket cooler.
These results are mostly determined by the top speeds of the fans each cooler comes with. The Noctua NH-D14 maximum allowed fan speed is 1200 RPM, the Mugen II’s is 1300 RPM, and the GX-7 fan goes up to 1800 RPM. There also seems to be some differences in the PWM design. I attached the secondary fans of the NH-D14 and GX-7 to my motherboard’s system fan PWM header which resulted in the D14’s fan idle speed of 350 RPMs while the GX-7’s fan was 950 RPM’s.
You will notice performance is better with only one fan installed on the GX-7, but this was an error. After double checking this anomaly and realized the secondary fan was not changing speed, I figured out this was because the system fan PWM header is regulated by the motherboard’s temperature which was held constant by the Thor V2. This can easily be corrected with a Y Spitter and attaching both fans to the 4-pin CPU header. I did test this and it brings the performance closer to the Noctua NH-D14, but I did not include those figures since you would have to buy a Y-Splitter separately to achieve those results.
Acoustic Performance
This section I would like to a litter differently than just throwing around numbers and showing your charts. I want to simply discuss the GX-7 and its noise level from the perspective of a daily user. I will still including tested numbers as a point of reference.
A PC is only as quiet as the loudest fan being used. This is usually a case fan as they are closer to holes in the case where noise can escape. To me this means the best component fans are those that produce less noise than your particular case. If you recall from the review of the Rosewill Thor V2, with the fans on low it produces approximately 36 dBA of noise. Even with the FX-8150 overclocked to 4.5 GHz and two fans installed on the GX-7 I could never hear it above my case at idle. There was a distinct difference in the noise at full load, but it was not loud enough to be distracting at only 42 dBA.
As I stated before, I did the test on the GX-7 with a Y Splitter. This changed the entire attitude of the cooler as both fans would idle at around 600 RPM’s and both would speed up during full load to around 1500 RPM’s. This did push the noise level up to around 47 dBA which is just loud enough to notice, but only when the FX-8150 is overclocked. In it’s stock configuration with only one fan and the FX-8150 at stock clocks, the GX-7 was never loud enough to overpower the case fans.
Final Thoughts
Let me start off by saying I am impressed with the performance of the Gelid GX-7. This cooler is available for $64.99 US or less and manages to come in just short of the current king in our test scenario: The Noctua NH-D14 at $89.99 US. This is when fully configured properly with two fans. The only issue with this feature is that the GX-7 does not come with a Y-splitter which we found was really needed to give this cooler the performance it deserved. My results showed just connecting it to the system PWM fan header will actually attenuate air flow when at full load on an overclocked system.
While raw performance is pretty good, the fact this is achieved with a much more compact design is what pushes it over the top for me. Unless you are using RAM with extremely tall heat spreaders, you don’t have to worry about obstructing the RAM slots with the Gelid GX-7, making memory upgrades down the road very easy. The only thing that wasn’t totally effortless was the installation. If you have tiny hands, you might be OK installing it in the case, but we did find that the effort of removing the motherboard from the case made it easier.
If you are in the market for a high performance cooler, but don’t have the money to spend on something like the top tier Noctua, then you will not be disappointed with the Gelid GX-7. Just remember to pay that extra few dollars for a 4-pin Y splitter if you decide to go with the two fan configuration for your overclocking needs. Not to mention, it’s a whole lot smaller than many monster coolers, making your LAN party rig a little lighter and less likely rip the socket off your motherboard. What more could you ask for from a CPU cooler?
Pros
- Does not block RAM slots
- Impressive Performance
- Low Noise Most of the Time
- Versatile Universal Installation System
Cons
- Can be difficult to Install in Existing Systems
- Does not come with Y Splitter
- Blue fan LED may not Match Every System
Overall Rating: 8.5 / 10.0


Help Us Improve Our Reviews By Leaving a Comment Below!