

In the realm of the power user, there is a subset of people whose eccentricities go beyond that of their peers. Not simply satisfied with having the latest and greatest components in their hands every 6 months, they then have to constantly tinker with that component and experiment with it to experience every facet of every feature. This means they need to open their cases even more frequently then their “normal” power user brethren, making the standard ATX enclosure somewhat of a hindrance. It is for this group of users that Antec’s latest case was made for.
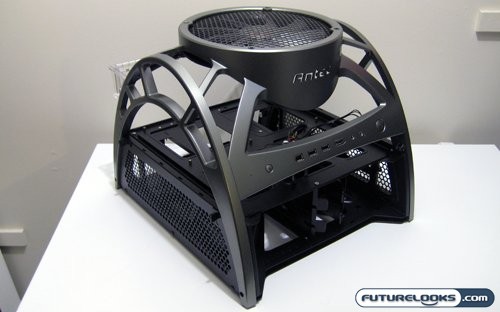
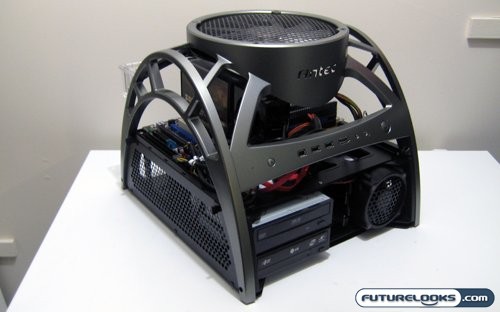
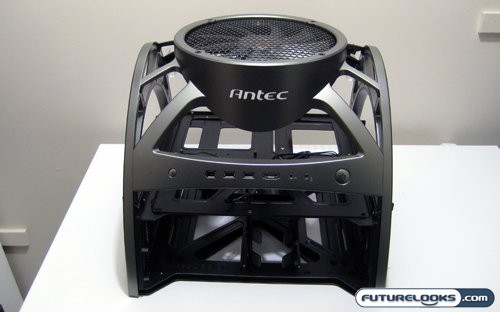
The Antec Skeleton is Antec’s entry into the rather diminutive market of open air cases. Futurelooks first saw this product at COMPUTEX 2008 earlier this year and had high hopes for it once it hit our labs. Antec does claim this is “the world’s first open-air enclosure”, and though we do find that claim highly dubious, it does sport features and design elements not found in other open air cases. The Skeleton has enough space to store a full computer system, including two 5 1/4″ drive bays, two 3 1/2″ drive bays, and enough room to contain a high wattage power supply. All this is found in a unit that, rather than consisting of a couple shelves, actually has a full frame and structure, as well as an active cooling system in the form of a speed adjustable 250mm fan on top. For the full list of specifications, they can be found on the product home page.
Premium Features at a Premium Price
The Antec Skeleton is priced slightly higher than other open air cases. At $180 USD, you may be wondering what you get for the extra scratch. Well many of the other open cases I’ve seen feature mostly plastic or acrylic construction. The Antec case is mostly steel, with only the gun-metal grey pieces being moulded plastic. You also get the extra cooling, and some aesthetic finishes which we’ll take a look at in a few moments. First I want to talk about the additional parts that come with the Antec Skeleton.
What’s In The Box?
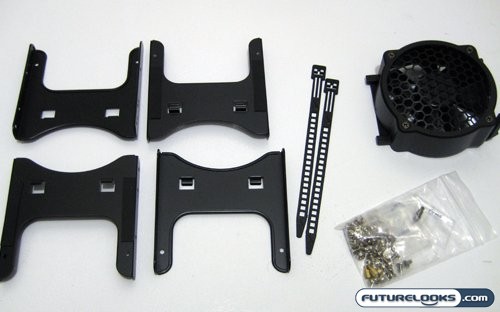
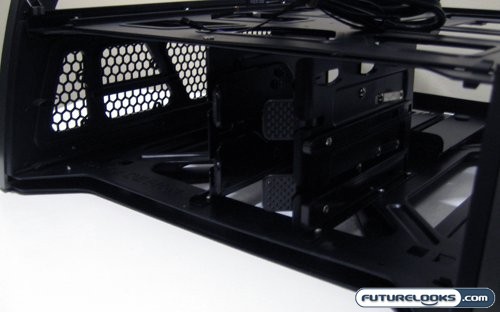
Antec includes a decent collection of doo-dads with the Skeleton “enclosure.” There is of course the standard collection of screws, stand-offs, and washers. They also thought ahead and included some reusable cable ties. Then there’s the structural accessories that come with the Skeleton. Not content with placing a huge 250mm fan on top for cooling, Antec also includes a pre-mounted 92mm fan that hooks onto the front for cooling the hard drives. And should you need to mount more hard drives then the built in two, there are four racks to hang hard drives off the side. You’ll see how those come into play as we go through our visual inspection.
Real-Time Price and Stock Check – Find More ANTEC Products
First Impressions
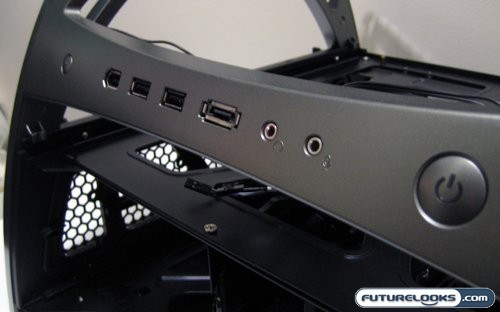
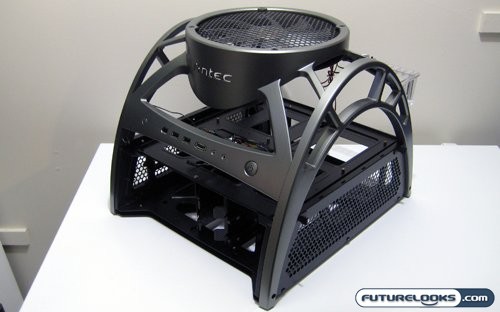
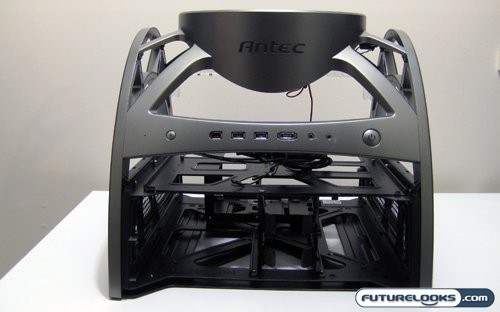
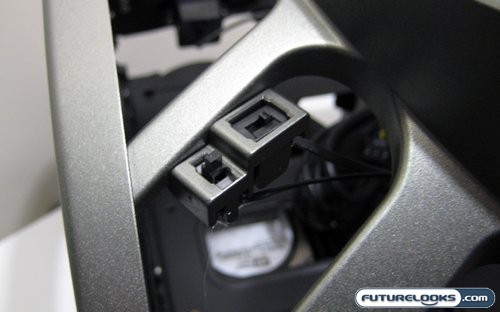
First we turn to the front of the Antec Skeleton, mainly because that’s where you can find what are now my favourite features on and open air case. They are the features that I long for with my use of the HSPC Top Deck, even though that case is very practical. Well the Antec Skeleton has what the formerly mention case lacks, a full selection of front mounted ports. This include a FireWire port, two USB ports, an eSATA port, and thankfully a set of front panel audio jacks. Why are these so important? Anyone who has had to work with SoundMAX chipsets, and their output selector, should understand. Basically it makes my use of both speakers and headphones much easier, and allows me to configure them seperately.
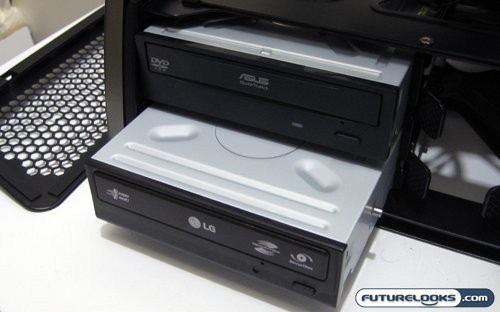
The lower portion of the front is where you’ll find the drive bays. As noted, the Antec Skeleton can support two 5 1/4″ drives and two 3 1/2″ drives. This should be more then enough for most builds. Even my overly spec’d test bed only features two hard drives for comparative testing, and two optical drives for DVD reading and DVD writing respectively. They are mounted using a rail system that does require some screwdriver work, but once they are installed they aren’t sliding anywhere.
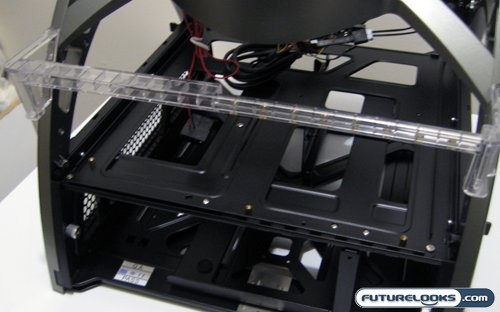
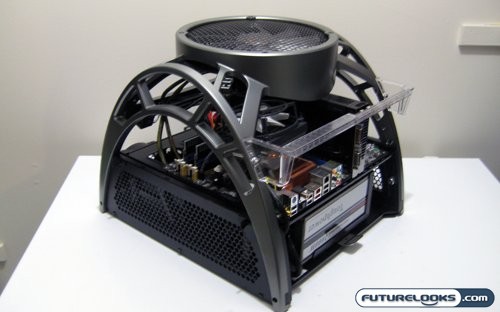
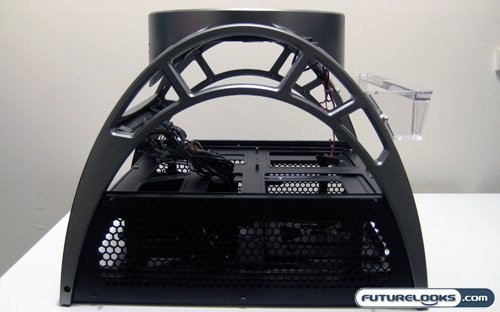
The rear of the Antec Skeleton holds even more promise for the computer gear-head. Hear we get to see where the motherboard, expansion cards, and power supply are mounted. The motherboard tray itself is big enough to mount a full ATX motherboard, and it still has holes for cable routing. The expansion cards are held in place using a plastic rail, with thumbscrews holding the cards down. As for the the power supply, it’s mounted sideways under the rear of the motherboard. This is most likely done to ensure that any power supply can fit regardless of it’s length.
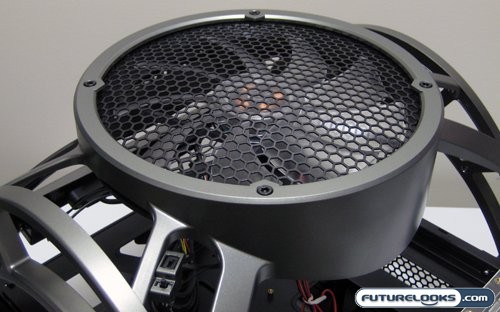
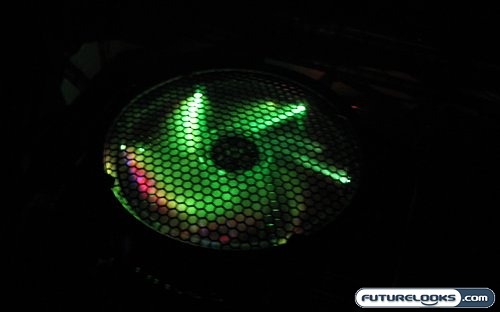
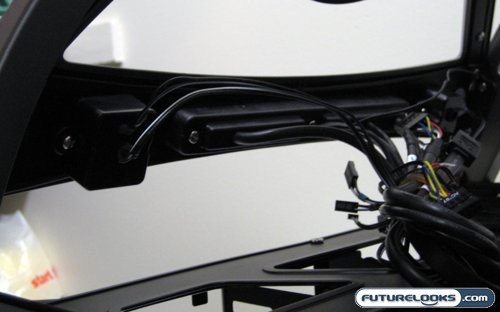
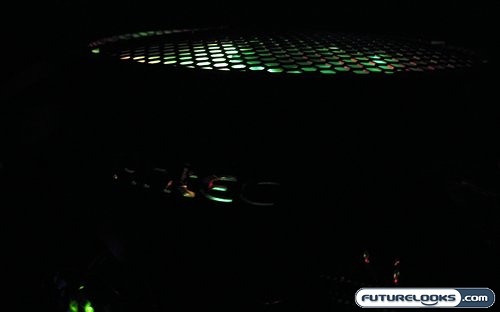
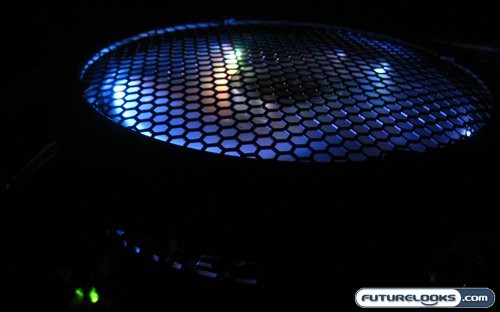
Cooling the entire rig is a huge 250mm case fan, blowing air from the top of the case down. Granted most of that cool air will be caught by the motherboard, but that’s where the hottest components tend to reside. The fan itself is a specialty Antec model, with a mutli-colour LEDs mounted around the rim to illuminate the fan blades. It has three speed settings, as well as different lighting settings, both of which are controlled by the two switches next to the fan.
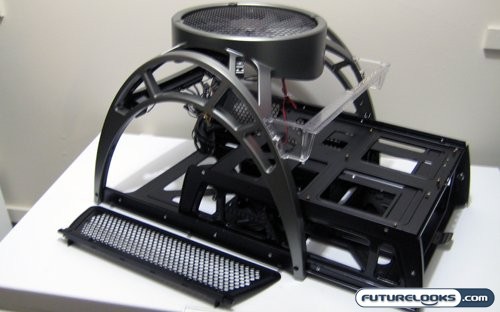
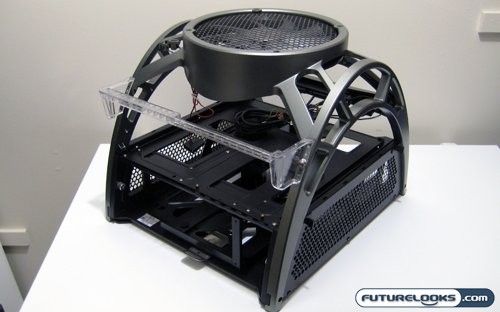
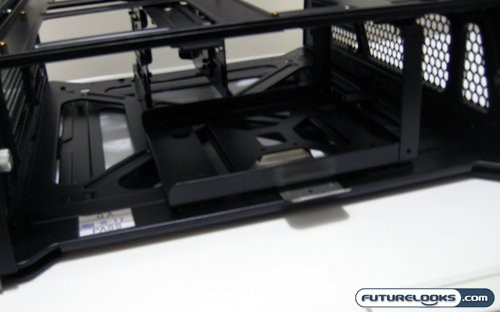
Before getting to the installation, we take one final stripped down look at the Antec Skeleton. As you can, the tray simply slides out for the main structure of the case. What isn’t pictured is that this isn’t some cheap base metal on plastic slide. Antec actually went the distance and installed sliders like what you’d see on a drawer or cabinet. Speaking of easy removal, the mesh side panels can easily be removed to further aide in the cabling side of things while sliding the motherboard in and out. The plastic bar that holds the expansion cards in place is actually removable. I simply forgot to stage that for this picture. Anyhow, lets get a test bed into this case and see how it stacks up.
Real-Time Price and Stock Check – Find More ANTEC Products
Our System Setup
To test the Antec Skeleton, I installed my standard test bed into it and documented the process. My current test bed consists of the following components.
- AMD Phenom 9850 2.5GHz Quad Core CPU
- Asus M3A32-MVP Deluxe/WiFi-AP 790FX Motherboard
- Corsair Dominator DDR2 4GB PC2-8500 RAM Kit
- ZOTAC GeForce GTX 260 AMP! Edition Video Card
- Western Digital VelociRaptor 300GB 10000rpm SATA2 Hard Drive
- Western Digital Caviar SE16 640GB 7200rpm SATA2 Hard Drive
- GELID Silent Spirit Quad Heat Pipe CPU Cooler
- Thermaltake Toughpower 1000W Power Supply
A couple of additional simple tests were then performed. Over and above the experience of installing a system into this case, we also tested the thermals and acoustics of this enclosure. Thermal testing was done using OCCT to place stress on the CPU, and acoustic testing was simply done using a dB meter.
Installation and Assembly
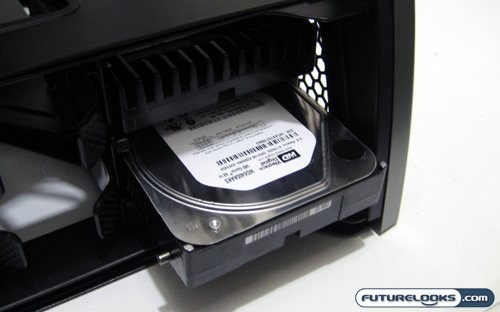
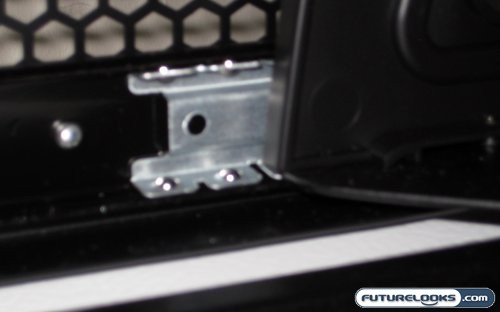
Drive installation was this first thing on the list that needed to be done, and it also proved to be the easiest. As noted earlier, the drives are mounted on a rail system that still requires some screwdriver work. That is because the rails are only made effected by the installation of a screw-on bolt that fits within the rail. The drive is fairly snug, but you can then further secure on the other side with some included screws. The 5 1/4″ optical drives are installed in the same fashion.
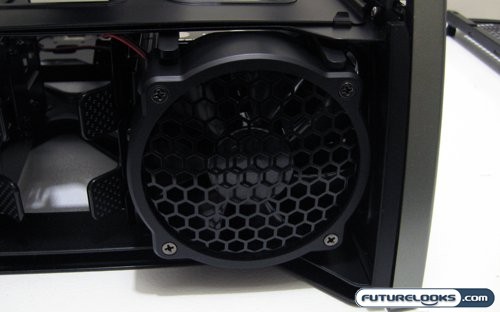
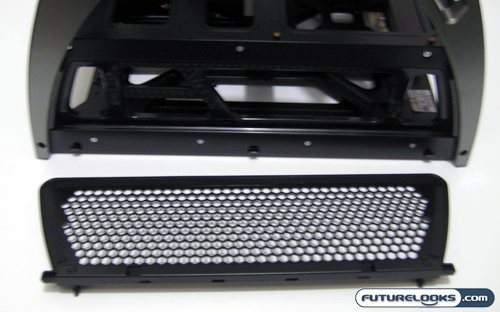
Once the hard drives are nestled into their racks, you can then install the fan that will be cooling them. This 92mm unit promises to be as silent as the 250mm big brother on the top of the case, though it lacks the latter’s 3-level speed adjustment. Still, once everything is installed it’s fairly secure and the case can be easily moved without risk of losing parts along the way.
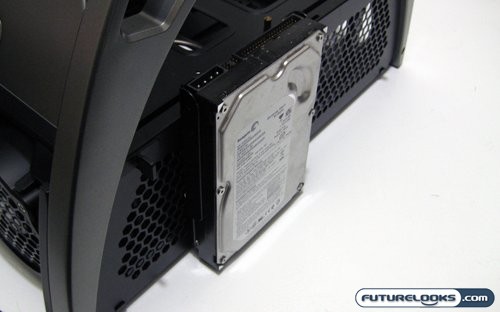
For those that want to install more then two hard drives into their Antec Skeleton, Antec has provided four additional hard drive racks that hang off the side of the case. They literally just hand there on little hooks, without any screws or anything to hold them in place. This is great for a temporary solution (like those still unfortunate enough to need to still quickly us a floppy drive), but it quickly becomes worrisome should you need to move the system.
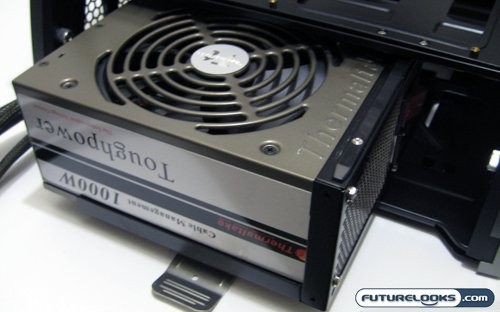
The power supply placement at the rear of the case is another example of a good idea with a minor caveat. Mounting the power supply this way does lead to some problems with cabling. Specifically, it’s difficult to plug in the wall cable to power socket on the power supply, meaning Antec should look into the inclusion of a right angle adapter. Also the extra depth of a high wattage PSU makes for some cramped quarters for the cables connected to it. A modular PSU is strongly recommended with this case. Still, the mounting of the power supply in the Antec Skeleton is preferable to the alternative, which would require the case to be much bigger front to back.
Real-Time Price and Stock Check – Find More ANTEC Products
A Few Setup Annoyances
The installation of most of the components still went of without a hitch. Even with the cramped quarters below, I was still able to easily route cables topside for the motherboard. Install of the motherboard also went over easy, with the sliding tray being of a great benefit. Still, it would be nice to see a more tool-less design in a future release of the Antec Skeleton. The mounting of the motherboard required the standard compliment of screws, which would be frustrating when one was to swap of coolers or other components that require removed of the motherboard.
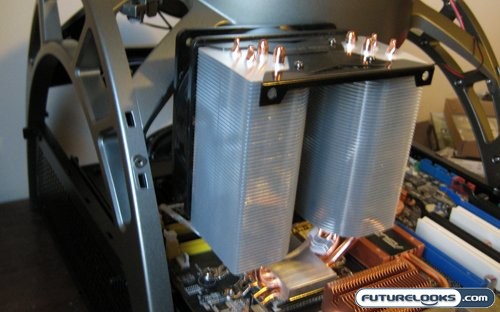
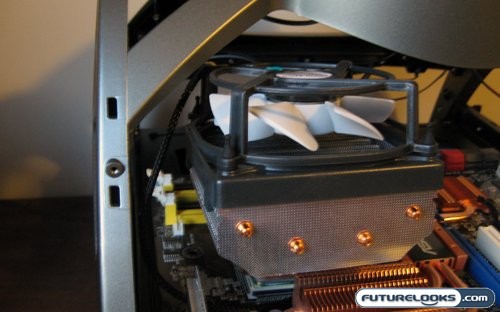
Speaking of coolers, you may want to be picky in the selection of the unit that keeps your CPU cool. This was a concern that was voiced in our forums, and was one of the things foremost on my mind during assembly. My standard Cooler Master Hyper 212 wouldn’t fit under the structure of the Skeleton. I’m sure the Thermaltake DuOrb would fit, but it blocks use of my favoured Corsair 4GB RAM kit. I had to turn to the as yet unreviewed GELID cooler to get a proper fit. A review of this cooler is coming up shortly so stay tuned in the weeks ahead.
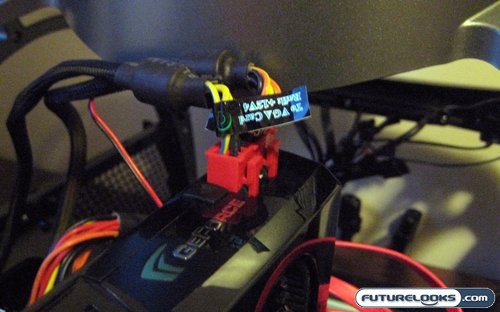
I had some problems with connecting power to my video card prior to bolting everything back together. I usually connect everything before buttoning it up and powering it on, but I discovered that the height of the GPU power connectors were blocking the motherboard tray from sliding back into the shell. I had to unplug them and then, once everything was slid into place, I then finagled them back into their power sockets. Once that was done, it was clear sailing towards the completion of this system build.
The Final Results
Though there were some snags in the build, but I still found the case easy to use. It was nice to have full access to all my components. Once thing to note though is that if you have full access to the components, so does everybody and everything else. This is a situation where anything from a single paper clip, to an errant can of pop, to the curious explorations of a toddler or family pet (sometimes one and the same) can mean the end of your system. There’s also the dust factor. Though no computer is immune from collecting dust, a completely open computer like this can collect it that much easier.
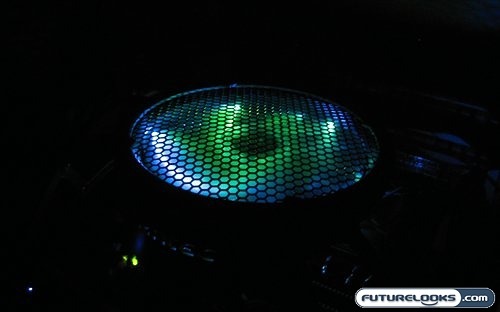
Still the case isn’t without its charm, both in design and the fact that you get to see everything working. Also the LED fan on top adds some extra pizzazz to the system. The fans themselves don’t seem to add to much to the acoustic profile of this case. It was a couple decibels quieter then the NZXT Tempest we last reviewed, and on par with the Antec P182 is terms of noise. Ramping up the speed on the 250mm fan only registered an additional decibel of noise, and that was on the highest setting.
To test the thermals of the Antec Skeleton, we took some measurements of CPU temperature at load and idle and compared those results to what we saw in the NZXT Tempest during that review. The NZXT Tempest represents a nice cross-section of performance cases that have a high rate of airflow and manage to maintain good ambient temperatures, so they make a natural competitor for any case with an open air design. Even in the face of such stiff competition, the Antec Skeleton manages to eke by. At idle the temperatures were 1°C lower then the enclosed case, and 2°C lower under load. While the inside of an enclosed case heats up and drives up temps, the openness of the Skeleton means that only ambient room temperature (something that’s fairly stable) affects the CPU temperature.
Real-Time Price and Stock Check – Find More ANTEC Products
Final Thoughts and Conclusion
You know, it’s actually rather hard to figure out where the Antec Skeleton sits in the grand scheme of PC cases. Antec’s entry into the open air case market certainly isn’t the first, but it seems to be the most interesting thus far. The case is definitely not for the mainstream. It’s meant for über power users who are consistently swapping components and tweaking their systems, or for those that don’t leave the cover on their computer to begin with, or both really. The price is a little steep, but as I just said this is a specialty product, and it can be found cheaper if you compare prices.
There are some concerns as to its function as a case. It definitely doesn’t fit the classification of an enclosure, and thusly doesn’t protect your components from external threats. There’s some minor fit issues with certain oversized components, so you have to be really picky with what components you are installing. It’s not quite as open and practical as the HSPC Tech Station you see so regularly used here at Futurelooks, but tech journalists are a market within a market within a market. Still it has many features that’ll be appreciated by the tinkering crowd, and it’ll be interesting to see how well it does when it hits the store shelves in sufficient quantity.
In the end, Antec has done something impressive here. Though the Antec Skeleton receives cautious praise from us, it shows that some companies still have the guts to put out an experimental product for a niche crowd. The Antec Skeleton is an updated and innovative entry into the minute market of open air cases. It suits a purpose, and looks like nothing else out there while doing so.
Pros
- Unique open design
- Large quiet fan enhances cooling
- Easy to remove and replace components
- Front panel connectors are a welcome sight
Cons
- No protection from dust, debris, and domestic creatures
- Cabling and fit issues
- Need to be picky with components
- A little overpriced
Overall Rating: 7.5/10.0


Discuss This Review in the Futurelooks Community Forums
Real-Time Price and Stock Check – Find More ANTEC Products
Antec Skeleton Open Air Case Photo Gallery


Real-Time Price and Stock Check – Find More ANTEC Products