


- 5 Drive Bays
- Easy Setup thanks to DSM
- Quad-Core Intel CPU
- No 10Gb Ethernet (or abilty to add one)
We recently talked about Synology launching one of their latest DiskStation their latest DiskStation units the Synology DS1019+. Well today, we get our hands dirty one of them! For those who might not know, Synology is a manufacturer of Network Accessible Storage solutions, more commonly known as NAS. These types of devices can range from pieced-together computer components that sit on a floor in a closet somewhere to fully enclosed units that can sit on top of your desktop without taking much room. In terms of Synology, they have to types of NAS solutions, the DS or DiskStation and the RS, or the RackStation. If you are a home or small business that wants a no-fuss, easy-to-use, small footprint NAS solution that is essentially ready-out-of-the-box, then this may be the product for you! If you are a home user, looking for an easy, no-fuss storage device that can also be made use of in other forms such as streaming entertainment, backing up of personal files and more, then the DiskStation, or DS, units from Synology may be the ticket. Let’s jump into what the Diskstation DS1019+ offers!
Features and Specifications
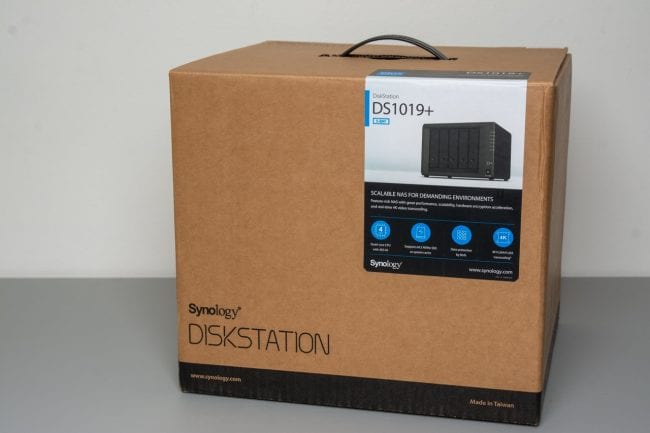

The Synology DS1019+ is a 5-bay Network Attached Storage (NAS) solution that has replaced the older Synology DS1517+. The DS1019+ has an upgraded Intel Celeron quad-core J3455 CPU with an ability to upgrade the RAM to 8 GB. The upgrade in CPU will ensure it can transcode 4K video on the fly if needed.
-
- Intel Celeron J3455 at 1.5GHz (burst to 2.0GHz and 64-bit)Hardware Encryption
- Hardware Transcoding Engine
- 4 GB DDR (expandable to 8 GB)
- 5 Drive bays capable of up to 70TB (hot-swappable)
- 2x M.2 (NVMe) Slots (for SSD Cache feature)
- 2x Gigabit Ethernet (Link Aggregation and Failover)
- 2x USB 3.0 Ports
- 1x eSATA Port
You can read the full specification list here
What’s in the Box?
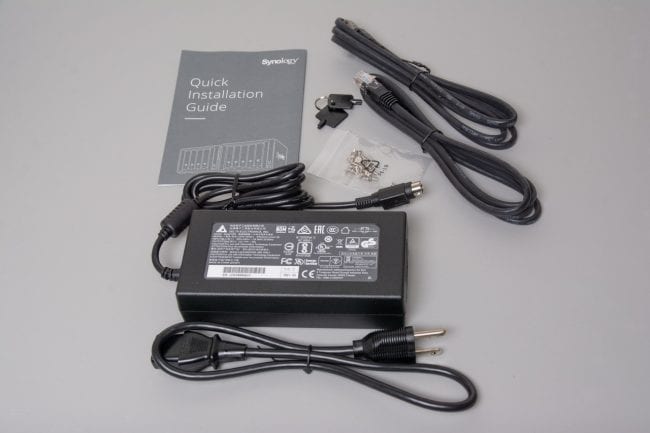
When it comes to a full-enclosed NAS solution, there usually is not a whole lot in the box. When you do open it though you will find the following:
- 1x DS1019+
- 1x Accessory Pack (mounting screws and 2x drive bay keys)
- 1x AC Power Adapter + AC Cord
- 2x RJ-45 LAN Cable
- Quick Installation Guide
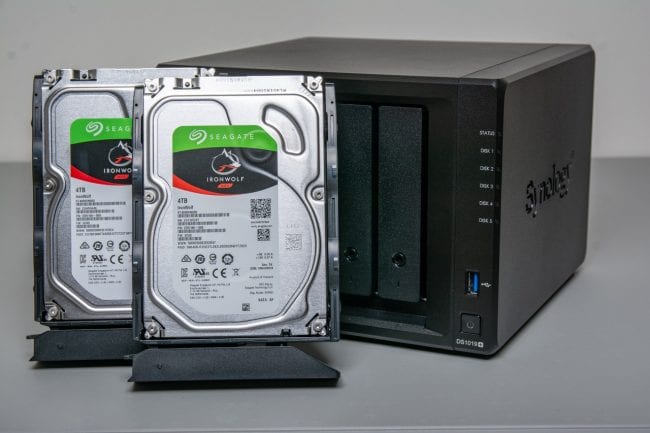
As with other Synology units, and other NAS devices on the market, drives do not come with them. You have to source your own drives based on what your needs are. A special thanks to Synology and Seagate for providing two 4 TB IronWolf NAS drives for this review. A reminder, when working with NAS equipment, you do typically need to start with 2 drives but the nice thing is you can add more as your needs grow.
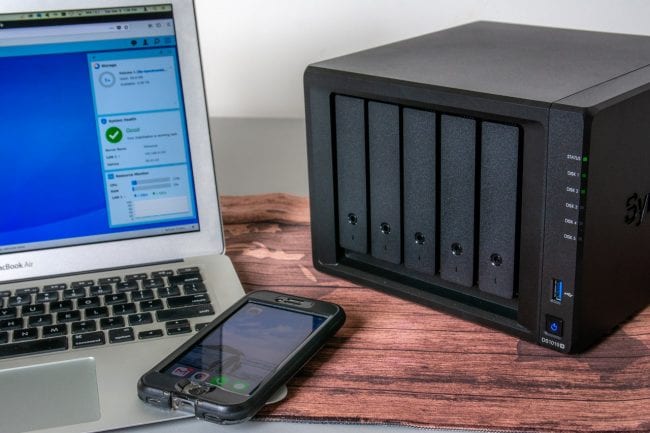
First Impressions
If you are familiar with Synology and their DiskStation products, then you will feel right at home with the Synology DS1019+. It has a similar look and feel of their other models that are 4 drive bays and larger.
As like their other models, the exterior of the DS1019+ is of a textured black plastic, which to me does not take away from the aesthetics of this design. With its relatively small footprint, it would still look good in pretty much any home or small business office setting.
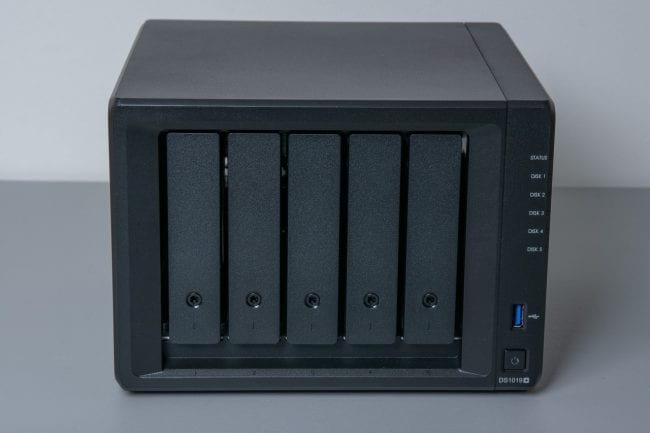
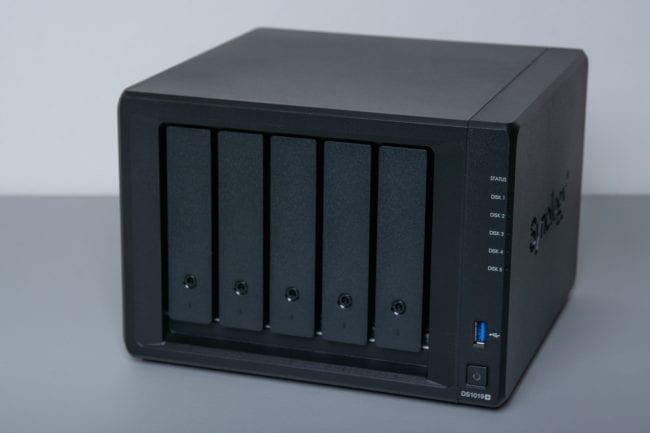
You can clearly see the 5 drive bays, along with the status LEDs, the USB 3.0 port and the power button.
Each drive bay can be locked with the provided keys, though they are not designed to stop really determined thieves. The locks are more for a deterrent or even a little bit of a safeguard to ensure no one walks by and somehow accidentally pops open a drive bay that could be in use.
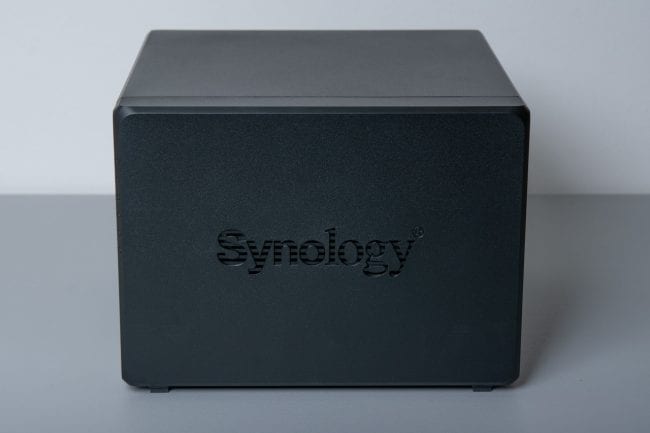
The right and left sides of the DS1019+ have the Synology logo displayed as a vent. These can collect a fair amount of dust as I’ve experienced in previous models but it helps keep the air flowing over the drives when in use. Of course, there are dual exhaust fans for venting out the heat.
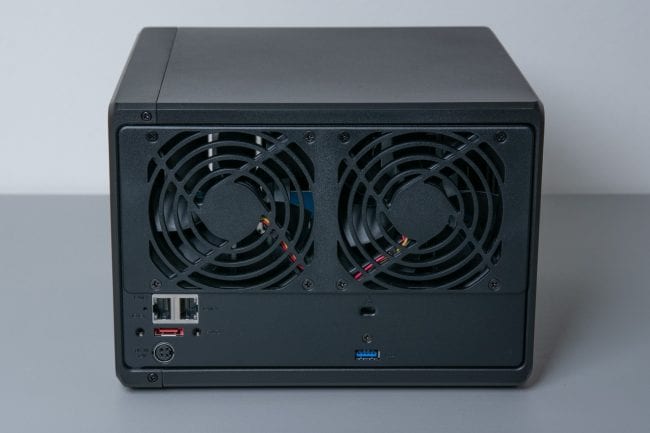
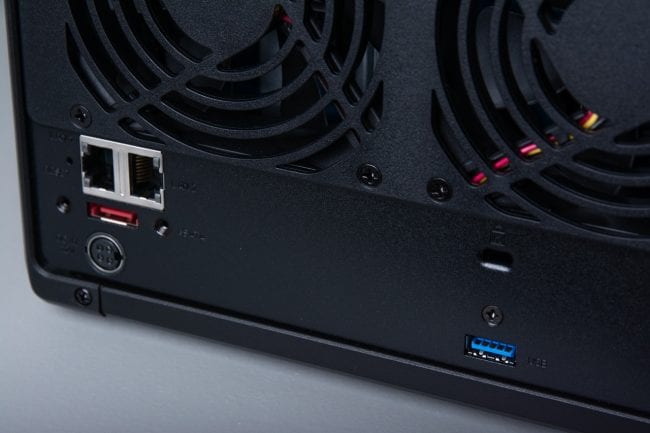
The back of the Synology DS1019+ shows the dual exhaust fans, the dual Gigabit Ethernet ports, eSata port, Kensington Security lock slot, USB3.0 port and of course the power input. I’m not a big fan of the 4-pin power cable as I have seen similar cable pins’ become bent or broken off.
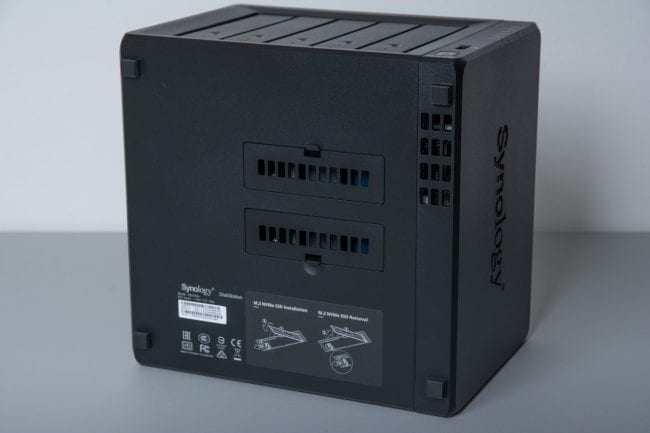
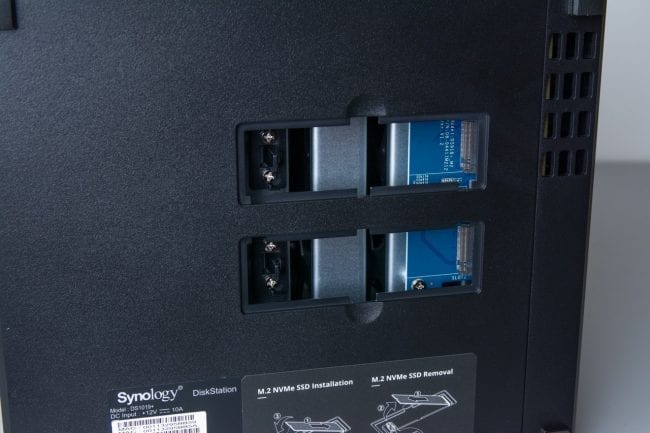
A unique feature of the Synology DS1019+ is the SSD Cache. When you flip the unit over to look at the underside, you can pop off the two covers and install two (or one) M.2 NVMe SSDs and then log into DiskStation Manager (DSM) and enable the SSD Cache. With SSD Cache, you can help offload some of the more frequently requested files to an SSD which of course is faster than NAS-type hard drives.
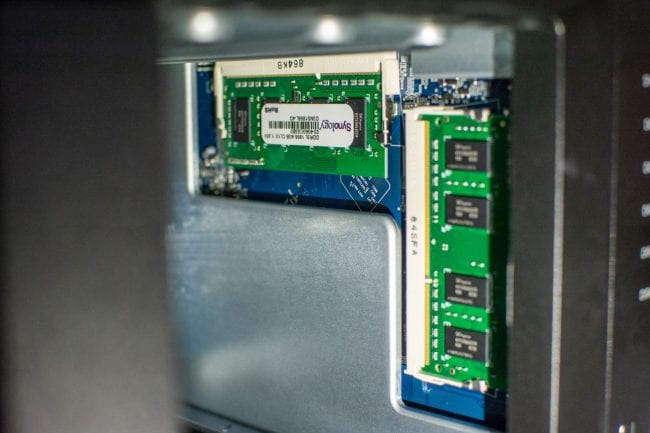
When you remove the drive bay caddies you can peer into the side where the RAM is located. The Synology DS1019+ comes loaded with 8 GB (2x 4GB) DDR3L memory which is the maximum amount of memory the Intel Celeron J3455 CPU can handle. Previous models I have looked at have had smaller amounts of RAM installed but some of them have had the ability to be upgraded. This DS1019+ so far has the most RAM I have personally used in a DiskStation unit.

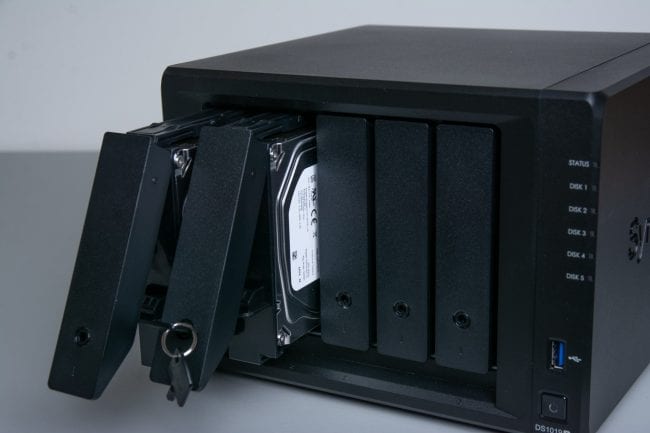
With some of the drive bay caddies removed, peeking around you can see one of the installed 4TB Seagate Ironwolf NAS drives connected to the SATA header board. The caddies just slide right up and are tucked in nice and snug.
Setting Up the DS1019+
When you first purchase a DiskStation from a retailer, chances are you will need to install the drives yourself. With receiving the unit from Synology directly, the two 4TB Seagate IronWolf NAS drives were pre-installed. One less thing to have to do! Though, if you do need to install the drives yourself, it is really straightforward and does not require any tools for 3.5-inch drives. Pop the side rails off, pop in your hard drive, then pop the side rails back in. Slide the drive caddy back into the DS1019+ and you are golden. If you are using 2.5-inch drives such as SSDs, you will be required to make use of a screwdriver and use 4 screws per drive caddy. Do not worry, Synology gives you a little baggy of screws!
Find.Synology.com
When you have plugged in the DS1019+ into your network you utilize the URL http://find.synology.com. This sends out a request out into your local network and any new units will respond. You do need to have some sort of network setup as the DiskStation units will send out a DHCP request to any router listening when it powers up. It would be nice if you could access the unit directly, but it should not be too troublesome to plug it into your network in the beginning.

When I powered up the unit, all one has to do is click on the “Set up” button and follow the screens. The process takes no longer than about 5 minutes.
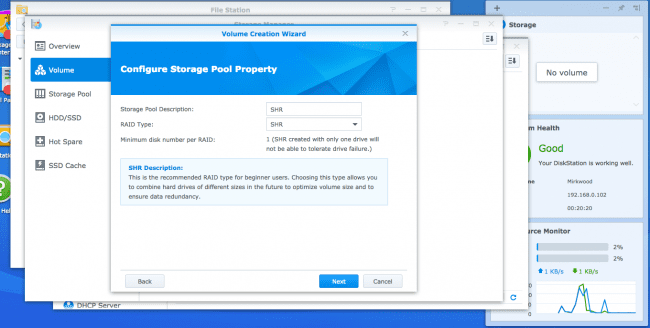

When you start from a new setup with new drives installed, there is no volume. You need to first set up a volume (or more depending on your need). For the purpose of this review, I kept it simple and created 1 volume with SHR or Synology Hybrid RAID. Synology attempts to make the deployment of their DiskStations as easy as possible. You can, of course, choose your own RAID configuration based on your needs and number of available disks.

For the filesystem, I just went with Btrfs, actually, I think I have converted my other DiskStations to Btrfs when it was made available.
Once your volume is created you can then dive into the world of DiskStation Manager or DSM. Set up your services, applications and share folders.
We won’t go over DiskStationManager or DSM because of the large selection of applications and services, but it is one pretty amazing system. You will just have to take out word for it.
Usage and Performance
Usage with this sort of Network Attached Storage (or NAS) device will vary based on one’s needs. With Synology’s DiskStation Manager or DSM, you have a large library of applications and services you can install on to a DiskStation. I have Git Server installed so that I can make use of source code control when I am working on small programming projects without having to rely on a public cloud-type service such as GitHub. I have Synology’s Photo Station installed and running. This service allows me to keep our smartphone photos backed up and easily accessible. I also make use of it for exporting of my photography so that I can access my photos when I am away from the house. I also have an instance of Plex Server running. I can have Plex serve movies or TV Shows to a Sony PS4, Sony PS3 and a Roku3 without having to ensure that I have originally transcoded them to a format either of those remote devices is capable of.
Adding or Expanding Storage Capabilities
If you are looking to add new drives to increase your existing storage space, the Synology DS1019+ supports hot swapping. If you have an empty slot, just pop a new drive into the enclosure and then log into DSM and add the newly added drive to the storage pool as needed. Simple!
You can also make use of a Synology DX517 expansion unit if you need more physical drives. The DX517 just attaches to the DS1019+ via the eSATA port. You can go from 5 drives to a total of 10, hence the 10 in DS1019+ name.
Networking with DS1019+
The network performance of the Synology DS1019+ is limited to the 1Gbps Ethernet speeds. Mapping a drive out in Windows, we can easily utilize a file transfer test between a desktop and the DS1019+.
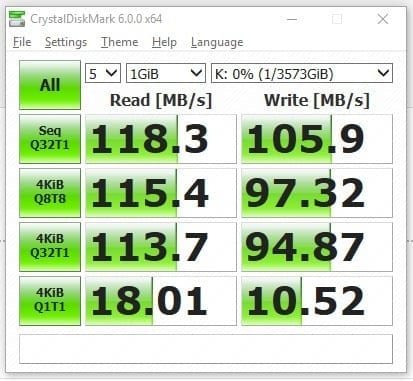

As you can see from the above screen capture using CrystalDiskMark, the read and write speeds are close to the theoretical limit of Gigabit Ethernet. 1Gbps = 125MBps. Accounting for some things out of our control such as overhead and we are pretty much right where it should be in terms of transferring files over the network. To overcome the network bottleneck, one would have to utilize something such as Link Aggregation or 10GbE. This is where the DS1517+ would come into play, the DS1019+ is a replacement unit for the older DS1517+, but a big feature of the DS1517+ is that it has a PCIe expansion slot that would allow one to add a 10GbE adapter card. Of course, the network would have to fully support a 10GbE network to utilize those speeds. Perhaps all future DiskStation models with 4 or more drive bays will come with a PCIe expansion slot? It would help increase scalability for sure.
Video Transcoding of the DS1019+ with Plex
Since we max out the network test due to the 1Gbps Ethernet bottleneck, we can look at how well we can transcode multiple videos to multiple streams without sacrificing performance on the DS1019+ itself. To do this little test, we will make use of Plex and some higher quality digital videos that will need to be transcoded and streamed to a couple of devices.
For this test, we will utilize a 4k video file that has been encoded with h.264 codec at a resolution of 3840 x 2160. The remote playing options are set to a maximum of 1080p with 10mbps to force transcoding.
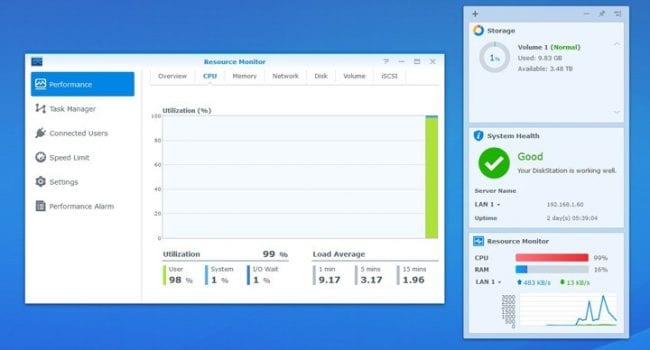
By default, Plex will make use of software transcoding. This, of course, can put a strain on the DS1019+’s CPU which will ultimately limit how many streams you can have playing and what else the DS1019+ may be doing.

![]()

Result: CPU on the DS1019+ was pinned at 99% for two transcoding streams (even pinned for 1 stream), one streaming to a laptop and the other streaming to a smartphone. With the CPU pinned at 99%, any other services running on the DiskStation will suffer a great performance loss. This could potentially hinder other users abilities to do their work on the DS1019+ while the video streams are transcoding.
If you subscribe to Plex’s Premium package, the Plex Pass, you can then enable Hardware Transcoding as the DS1019+ supports this. This will offload a significant amount of the work needed by the CPU so that not only can you have multiple streams running, but other services or actions running on the DS1019+ are not affected.
![]()

![]()

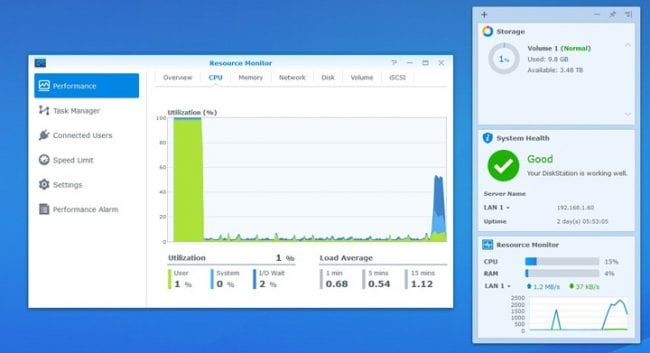

Result: CPU on the DS1019+ dropped to ~15% when hardware transcoding was enabled. Though, there can be a quality degradation when hardware transcoding is enabled.
A side note: While looking for 4k video files to work with, we found that Plex currently cannot handle transcoding from a source of WebM or VP9 codecs which is the Google Open Source 4k video encoding. Once a standard is more set in stone, it will be nice to see what Plex will support in the future.
Final Thoughts
We have looked at a few of the Synology DiskStation units over the past few years and each year we enjoy looking at what Synology brings to the table for an easy-to-use NAS. The DS1019+ is no exception and offers good performance without breaking the bank. If you are a home office or small business looking to add some additional storage or add some extra needed services, the DS1019+ offers a small footprint, with room to grow and some extra power when needed.
Network performance is typical of a Gigabit Ethernet setup. Not many home or small businesses would need the bandwidth of 10GbE speeds so the DS1019+ will keep up to the task for a while. Perhaps an optional PCIe expansion slot would be an option for the next model, as it would help ensure that the DiskStation would grow and scale while the network it was on grew as well.
The 5 drive bays offer good size for storage and the DS1019+ does have the ability to add an additional 5 more drive bays via the eSATA and the DX517 expansion unit. You can make use of a variety of RAID configurations based on your needs or just stick to the SHR or Synology Hybrid RAID mode. The DS1019+ also supports hot-swapping of drives so you do not need to power-down the unit when you need to add or replace drives.
Transcoding is a more specialized operation and the DS1019+ supports hardware transcoding thanks to the Intel Celeron J3455. This allows you to stream high-quality videos to multiple devices without impacting those doing other tasks on the DS1019+ itself.
The Synology DS1019+ proves to be capable of handling the various daily tasks someone might throw at it. The ability to expand up to a total of 10 drives allows for storage growth as your needs increase. The hardware transcoding is very useful to those who wish to stream multiple high-quality video streams to remote devices. The 8GB of RAM is pretty good for a NAS unit of this size, though that maximum is controlled by the Intel Celeron J3455 architecture so you are not able to go above that. The tasks done with the DS1019+ have not seen the RAM usage go higher than 10%.
Overall, if you are looking for a small foot-print, easy-top-setup and maintain Network Attached Storage solution for your home or small business needs, take a look at the Synology DS1019+!