


When you look back more than 5 years, picking an enclosure for your computer was a rather simple affair. You had beige, and beige, oh and maybe some off-white thrown in just to spice things up. Today beige is a thing of the past, and the market is flooded with every type of box imaginable to contain your parts. NZXT, you keep releasing a constantly refreshed supply of new cases that focus on all aspects of the market. Today we’re looking at their latest gaming case, aimed specifically at those who want a case with the looks of a sports car and the budget of an econobox.
Features and Specifications
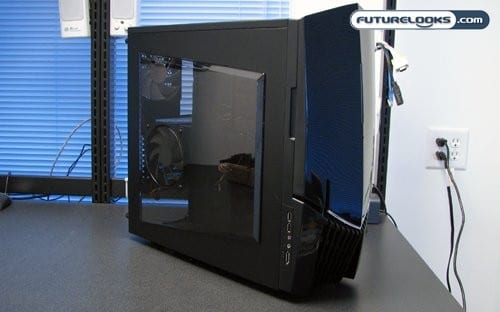
The LEXA S is the gaming case we’re talking about when it comes to the mix of budget and style and for those familiar with NZXT’s products, you might recognize the name. The LEXA name has appeared on two previous NZXT cases; the LEXA and the LEXA Blackline. Whereas those two cases are similar looking versions of the same case, the LEXA S is a less expensive rendition with a similar interior and newly designed exterior. However, being less expensive doesn’t equate to being less of a case.
The LEXA S still has some interesting features and design qualities which include:
- 4 external 5¼” drive bays, 7 internal 3½” drive bays
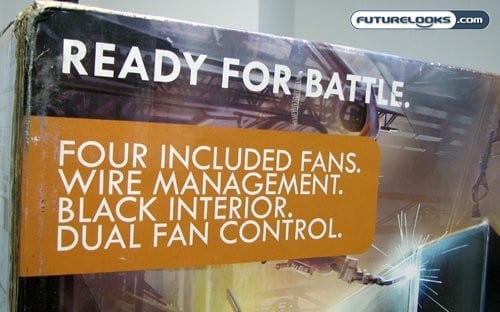
- Excellent airflow, with three 120mm fans and one 140mm fan
- Built in dual channel fan control with front mounted controls
- Black on Black interior and exterior with smoked clear window
- Pre-drilled water cooling holes, with mounting for dual radiator at the top
- High end graphics card support to fit longer 10.5″ cards
- Rubber Grommet for wire routing
Full details and more can of course be found on the product home page as we’re hear to tell you new stuff, not regurgitate other people’s stuff.
As I noted, the LEXA S is actually cheaper than the other cases with the LEXA moniker. Taking a look at Newegg shows that the LEXA S is about 2/3 the price of the original LEXA, ringing in at $79.99 USD. Since this case has a similar feature set to the original LEXA, it may be just as good in function. I guess we’ll find out soon enough!
What’s In The Box?

NZXT has attempted to include all the accessories you would need to make this case as toolless as possible when a system is installed. You are unfortunately going to need a screwdriver to install a power supply and any expansion cards, but we won’t hold it against NZXT. There’s enough thumbscrews included to take care of the front facing 3½” and 5¼” drive bays. The side panels also attach with thumbscrews.
As for the hard drives, they are all mounted on vibration dampened rails. Should you have a couple Solid State Drives kicking around, NZXT has included a special plastic adapter that can install two 2.5″ SSDs into a single 3.5″ hard drive bay. As for instructions they are there, and they cover the basics and some of the quirks of this case. Just have your Google ready if you have any questions with install a computer into a case.
Let’s Start Taking A Look

Any particular feature of this case is a good place to start, so we’ll just start with the front. The reduced price of this case comes down to the materials used in construction; a point driven home on the bezel of the LEXA S. Where as the first LEXA was an all aluminum affair, the LEXA S is made of steel with a plastic bezel. That’s not necessarily a bad thing, as the bezel and the door on it are very study and polished to a mirror black finish.
Opening the Door

Behind the door on the front of the NZXT LEXA S case we of course find the drive bays; four 5¼” bays and one 3½” bay to be exact. While the drive bays are obvious, there’s a couple of nice surprises in the form of two built in fan controllers. Each dial is a single channel, but together the two dials can be used to control all the fans within the case. As for fans, one of the four included 120mm fans sits in the front of the case behind a build in metal grille.
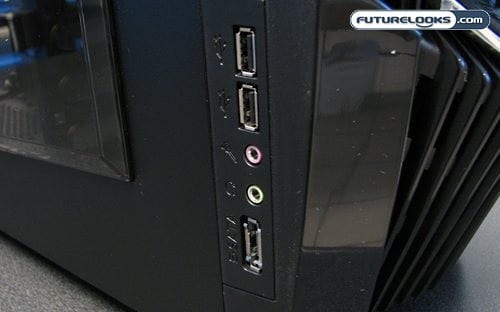
Moving around to the side to the left of the front fan you see the external ports NZXT has installed. As I noted earlier cases have come a long way, and ports like this used to be a luxury. Now there almost ubiquitous to the point where a case is criticized if it doesn’t have external ports. NZXT has provided a decent selection, with only an FireWire port missing. FireWire isn’t as widely used as some of the other ports shown (hate mail from FireWire supporters in 5, 4, 3, 2…) so the lack of one up front isn’t surprising.
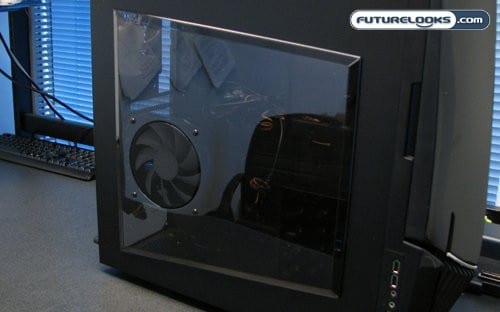
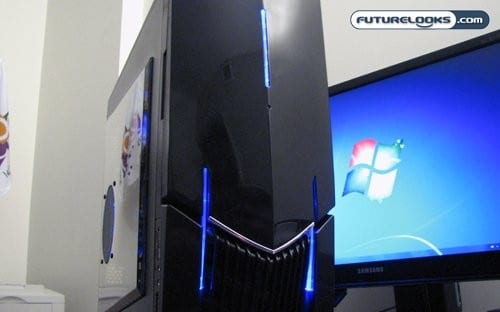
The side panel on the LEXA S has an acrylic window built in, with a side mounted 120mm fan. Rather then perfectly clear, the window is smoked a dark grey. This masks the interior a fair bit, until you turn on some lights if you have them install. Once lit up the window becomes much easier to see through. The fan mounted on the window shares the same specifications as the other fans on this case, with added aesthetic treatment in the form of blue LED lighting.
Back In Black
Opening up the case, we find that the interior on the NZXT LEXA S is not the usual grey you come to expect from many sub-$100 mid-tower cases. NZXT have notched up the visual aesthetics by painting the interior black to match the exterior. The motherboard tray also has a large access hole in it, so you can have access to the rear of your motherboard for removal and installation of any aftermarket CPU coolers. There’s plenty of ventilation for hot running components, with vents below the fans and all the expansion slot covers being made with a metal mesh.
Cool Runnings

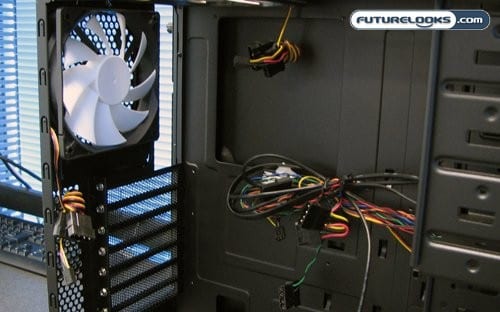
When it comes to active ventilation, NZXT also made selections with an interest in keeping things as cool and quiet as possible. There are three 120mm fans found within the case; one in the front, one in the rear, and one on the side. The roof of the case sports something a little bigger; a 140mm fan. The fan mounts on the roof will also support 120mm fans, though the spacing between them may make mounting a water cooled radiator (I know some of you were think about it) rather difficult.
Speaking of water cooling, there are two holes drilled in the rear of the case for routing water cooling hoses through. Why didn’t I picture them before? Well because while they are visible from the rear of the case, they are blocked by the fans in their default configuration. If you want to mount a radiator out the rear you’ll have to move the fans around.
Power For The People
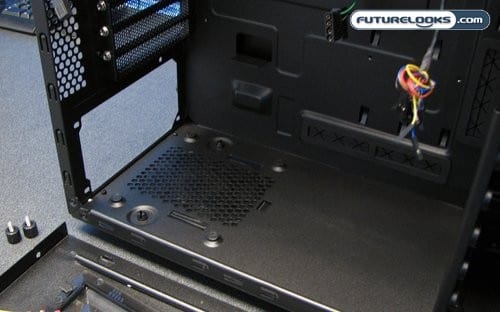
The bottom of the case houses the power supply mounts, as well as our first peak at the wire routing built into the motherboard tray. The PSU is mounted on four rubber posts; another attempt to keep the system as quiet as possible by dampening vibration through the isolation of parts that can potentially vibrate. For PSUs with bottom mounted fans there’s an additional vent with a removable washable fan filter in place.
The mounting of most PSUs with unfortunately partially block part of the low cable routing holes. Only some of the thinnest wires will be able to squeeze through here. Since the lower half of the mobo is usually occupied by such headers as USB and front panel, this shouldn’t be too much of an issue.
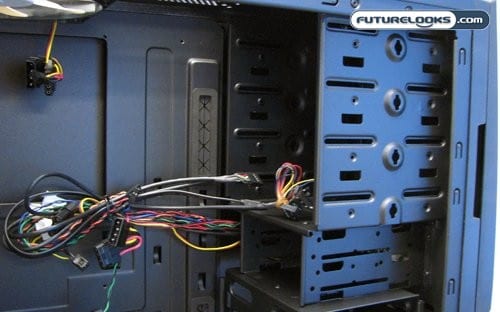
The thing I didn’t like about the mounting holes is how narrow they are. Most of the beefy connectors found on high end power supplies look like they won’t fit through, though we’ll have to confirm that when we install a system into this rig. As for drive mounts, there lots of room to mount plenty of gear in the LEXA S. The four external facing 5¼” bays are secured using the included thumbscrews, as is the one internal and one external 3½” drive bays. The four side facing hard drive bays all use rails for mounting; something else that will be showcased in installation.
Test System Setup
To put the NZXT LEXA S Crafted Series Black Steel mid-tower case through its paces, we decided to reach back and utilize some of the hottest hardware Futurelooks has ever reviewed. This was done with the idea of making the ultimate stress test rig. The list of components we pulled from days gone by looks something like this.
- AMD Phenom 9850 Black Edition CPU
- Asus M3A32-MVP Deluxe/WiFi-AP 790FX Motherboard
- OCZ 4GB PC2-8500 Gold Edition Dual Channel DDR2 Kit
- Sapphire ATOMIC Radeon HD 3870 512MB Video Card
- Western Digital VelociRaptor WD3000GLFS Hard Drive
- HighSpeed PC Top Deck Tech Station
- Mushkin XP-650 650W SLI/CrossFire Ready ATX Power Supply
- Thermaltake SpinQ Heatpipe CPU Cooler
The Tech Station is there for comparison, as I wanted to showcase the difference between open air cooling (ambient temp, best case scenario) and cooling within the closed environment of a case. As for benchmarks they will performed by placing a fair degree of load on the system, and measuring the temperature of some key components and the interior of the case. We used OCCT to place the required amount of load on the CPU, and 3DMark Vantage for the GPU. We also measured the acoustic properties of the case, since how loud a computer is tends to be important to a fair number of people. The results are next.
Installation Notes
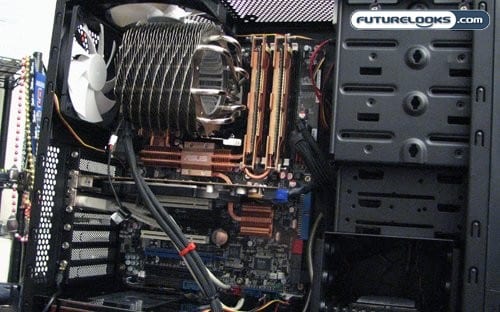
Installing a system into the NZXT LEXA S mid tower case is a fairly straight forward affair. The case does lack a removable motherboard tray, but there’s still plenty of room to mount a standard ATX motherboard. Sliding the mobo into position isn’t hindered by any weird drive bay placements. As for the mounting hole for CPU coolers I mentioned earlier, it does help tremendously when installing coolers that normally need motherboard removal. I was able to swap out backplates for the cooler in our rig with the OEM cooler without issue.

As for wire routing, my initial concerns were confirmed. The pre-punched cable routing holes are rendered too small by the rubber grommets installed in them. This means I wasn’t able to route the modest sized cables on my Mushkin PSU; instead having to take advantage of other gaps in the case to clean things up as best I could.
I was able to route smaller cables like SATA and header connectors, but those are only a fraction of the cabling inside a computer. Even without the grommets to holes appear to still be rather small, though I was unable to remove them to find out. There are PSUs on the market that use cables with similar sizes like the ones made by CORSAIR or Ultra Products. Perhaps NZXT had these PSUs in mind when designing this case.
CPU Temperature
Testing for the NZXT LEXA S started with the thermal results on the CPU of our test system. Ambient temperature in the room was a slightly warm 23.5°C. The idle numbers were polled after letting the system run for 30 minutes after boot up.
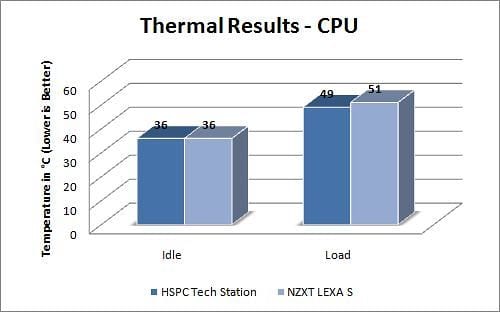
The LEXA S managed to post a temperature the same as our open air test bed. This may look strange, but it means that the LEXA S is moving enough air to keep the CPU at the same temp it would experience while sitting in the open air with only it’s CPU cooler to keep things moving. This is a good thing. The enclosed environment of the case did catch up to itself when we put the CPU under 100% load.
GPU Temperature
Moving right along, GPU temperature is getting to a point where it can affect game performance, and having a case that keeps your GPU(s) cool under pressure is becoming very important.
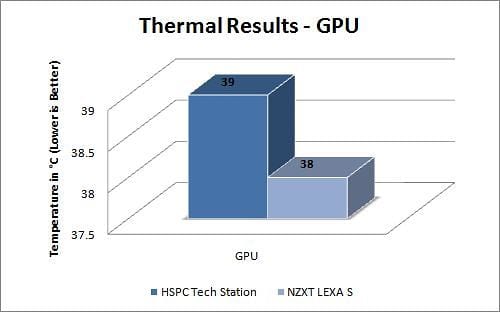
The LEXA S does manage to 1-up the open air test bench by 1°C on average. Once again this isn’t significant, but it does demonstrate that the LEXA S can perform as well as an open bench.
Noise Levels
Noise testing was performed using a DB Meter, first measuring the ambient noise in the room with everything silenced and turned off. The meter was then pointed at the case in three different locations. The directional microphone was aimed on centre, and was perched on a tripod 6 inches away from each target. The room was brought to a silence, and the DB Meter was given a minute to stabilize. This was repeated for each test location.
- Ambient Noise: 41.2 dBA
- Front: 48.3 dBA
- Left Panel: 50.5 dBA
- Right Panel: 51.5 dBA
When you factor in noise from video cards and CPU coolers, there numbers aren’t too horrible. The din from the system installed in the LEXA S was still noticible in a quiet environment, but it does qualify as “quiet.” When sitting under a desk it will be hardly noticeable. These numbers were of course pulled when the fans were cranked up to full blast, so if it gets to be too much you can turn down the speed on the fans and regain some quietness without loosing too much cooling performance.
Final Thoughts and Conclusion
The NZXT LEXA S Crafted Series Black Steel mid-tower case definitely delivers on what one would expect from such a case. It’s quiet, looks great, and can hold a lot of hardware. Thermally it has decent performance, managing to keep pace with an open air setup that has the whole room as it’s heatsink. Should you need more cooling you can add an extra fan, or mount a water cooling rig.
With a system installed, there’s few complaints the one could lobby against the aesthetics of the LEXA S. Some people don’t have gripes with “pre-modded” cases, especially since they are so abundant and many can look garish. The LEXA S maintains a nice aesthetic all the way around. The all black colour scheme combined with the smoked side window make for a nice look rig, and due to the smoked side window what little lighting present is fairly subdued. The front lights aren’t overly bright, and add to the overall look of the case.
The only two major complaints I would have with this case relate to how hardware is mounted in it. First is the major oversight in where the water cooling holes were placed. They are easily blocked by installed fans, making it difficult to mount an external radiator should you wish to. The other is the wire routing system, which is too small to accommodate most wires. I couldn’t us it to run the power cables going to my drives.
In the end, I would still call the LEXA S a great value. When it comes down to the basics the case performs admirably, and its price point is hard to beat. It should as a great case for almost any consumer and enthusiast level rig you throw at.
Pros
- Excellent looks
- Good performance
- Great value
- Easy to install
- Lots of hardware mounting options
Cons
- Wire management not able to handle most wires
- Water cooling mounts blocked by air cooling
Overall Rating: 8.5/10.0


Love This Review? Hate This Review? Leave a Comment!