


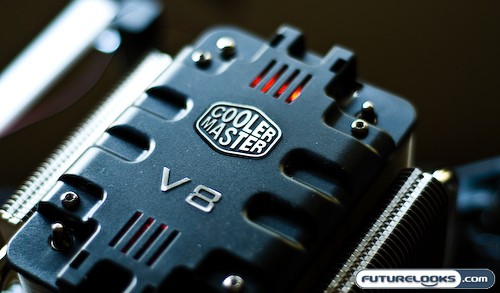
It’s no secret that the market is absolutely flooded with CPU coolers, from your water cooled varieties to your air cooled varieties. Some are good. Some are bad. But to the unwashed masses, they look pretty much all the same. Well, this is a heatsink that doesn’t look like the others. CoolerMaster’s V8 gives the CPU cooler a new burly persona. Resembling a big block V8 engine, does the CoolerMaster fire on all cylinders, or is it just all show? Let’s find out.
Features at a Glance
Under the hood, the CoolerMaster V8 sports some defining features which include…
- Four sets of modular aluminum fins
- Eight heatpipes
- Mirror Finish Base
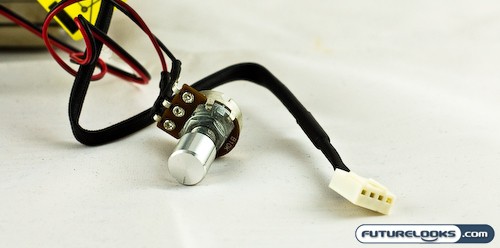
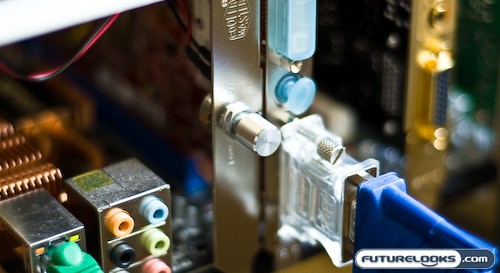
- Precision Fan Controller
All these features add up to a heatsink that gives you up to 180 Watts of heat dissipation which is perfect for overclocking that stubborn Quad Core or simply adding stability in thermally challenged environments. Fine tuning of the fan from 800 to 1800 RPM is accomplished using an included fan controller that can be mounted using a PCI slot bracket. A machined mirror-finish copper base allows you to take full advantage of the heat transfer compound of your choice.
The CoolerMaster V8 fits all modern desktop CPU’s from INTEL and AMD and weighs over 1.91 lbs. For more detailed specs, head on over to the official product specifications.
What’s Inside The Box?


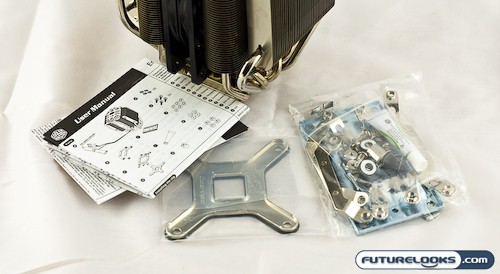
Inside the box, you get a whole bunch of stuff used to mount this beast to the motherboard and CPU of your choice. All of the contents were well packaged and came out easily from the well designed box. I’m pleased to see them dropping the whole white and purple motif and adopting a more masculine red and black color scheme. There’s nothing more masculine than a V8.
A tube of heatsink paste is provided for you so that you can apply it properly on your own. Gone are the days of pre-installed thermal paste, especially on high end heatsinks like this. The manual comes in pretty much all dominant languages spoken on the planet, though it makes heavy use of pictures versus verbal installation instructions. Everyone gets pictures and pictures are definitely more universal than funky “Engrish”.


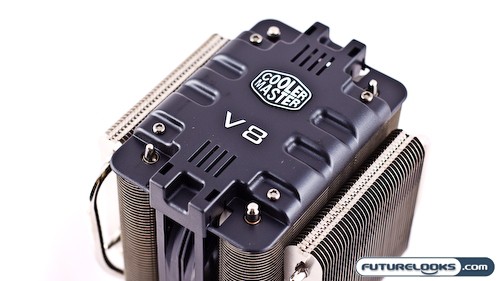
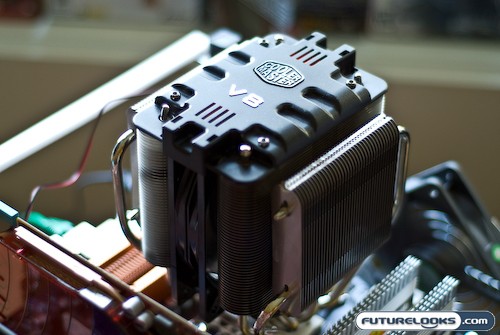
Finally, we lift the big bad CoolerMaster V8 from the plastic casing in the box. It just looks plain intimidating and rightfully so as it’s not tiny. In fact, most of the package was heatsink and its one of the larger boxes that I’ve come across. Let’s give it a good looking over and then setup for some performance testing.
Real-Time Price and Stock Check – Find More CoolerMaster Products
First Impressions


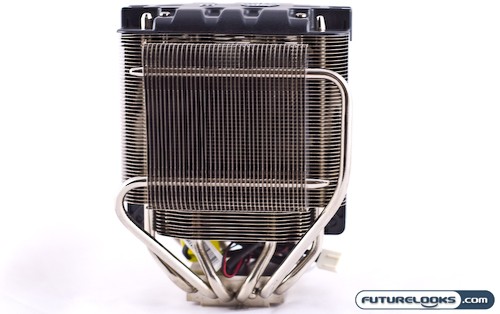
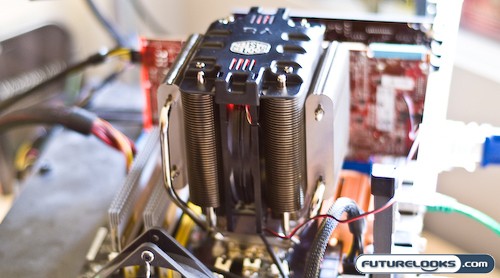
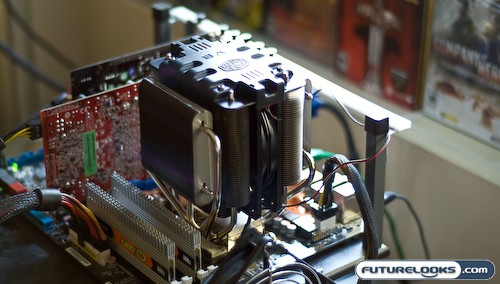
As mentioned, the CoolerMaster V8 sports eight heatpipes hence the V8 designation. They extend up from the copper baseplate to the four seperate aluminum heatsink panels.


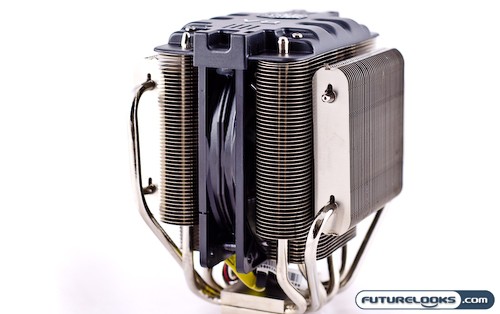
These heatpipes then extend into the four aluminum finned heatsink panels (two on each side) that resemble automotive radiators. No doubt done on purpose to perpetuate the V8 motor design angle.

Sandwiched between the two pairs of aluminum finned heatsinks is a 120mm fan. The fan spins from 800 – 1800 RPM and is controlled by a precision fan controller, offering you the opportunity to set it to your liking within the RPM range.


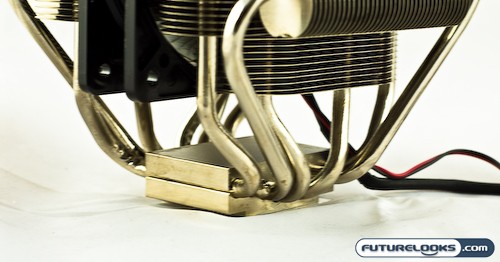
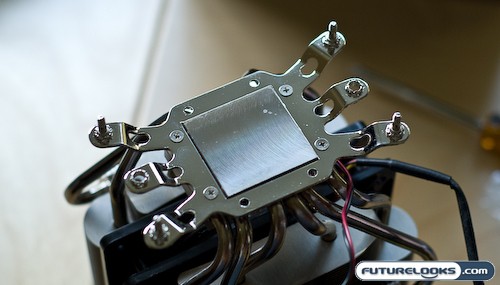
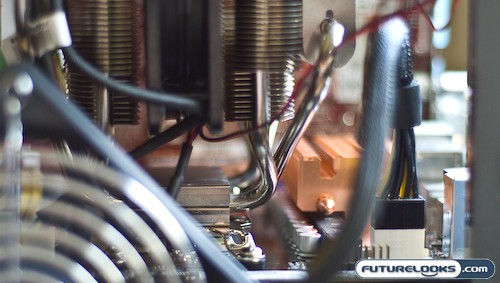
Finally, the CoolerMaster V8 is nicely finished off with a machined copper base. The based is definitely smooth, but does show evidence of machining marks. I really would have liked to have seen a totally flat surface but don’t suspect that it will affect overall performance too much. Those that are anal may resort to lapping it glass smooth. Just don’t forget to remove the protecive plastic sheet before starting.
System Setup
In order to test out the performance of the CoolerMaster V8, we put together a system with the following components:
- AMD Phenom 9900E 2.6GHz Quad Core CPU (Provided by AMD)
- Asus M3A32-MVP Deluxe/WiFi-AP 790FX Motherboard (Provided by ASUS)
- CORSAIR XMS2 DHX 4GB DDR2-800 Memory Kit (Provided by CORSAIR)
- Western Digital Velociraptor WD3000GLFS Hard Drive (Provided by Western Digital)
- HighSpeedPC Top Deck Tech Station (Provided by HighSpeedPC)
- ANTEC Quattro 1000 Watt Power Supply (Provided by ANTEC)
Our operating system of choice was Windows Vista Premium 64 bit. All tests will be run with a healthy dose of Prime 95 toasting up the four cores of our engineering sample AMD CPU that has a propensity to get quite toasty at moderate loads. It’s not an overclocker and just likes to get hot so its perfect for testing the muscular V8 cooler. Let’s run through some of the setup points and then go on to BBQ’ing this thing.
Real-Time Price and Stock Check – Find More CoolerMaster Products
Setup and Installation
To some, the bag of assorted nuts and screws can look like a huge sadistic puzzle. Luckily, thanks to years of pointing and giggling by North American media about the “Engrish”, CoolerMaster has kept the wording simple and the pictures detailed. This combination makes the installation far easier than the mess of parts makes it out to be.


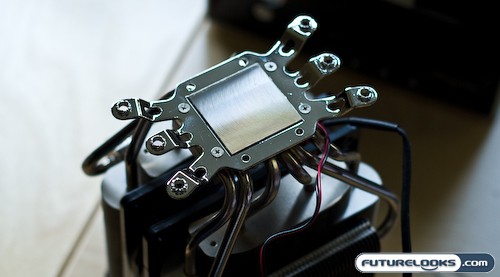
The assembly of the heatsink starts with the base. Two sets of mointing plates are provided for either AMD or INTEL installations. Since we’re installing on an AMD Phenom CPU, we’ve chosen the AMD CPU plates and have attached it with the included screws. Another set of mounting bolts (not shown) are then reverse threaded into the appropriate holes from the top down, to allow the heatsink to be bolted to the board. In the case of the AM2+ based processor, the four outside holes were used. Vibration damping donuts are then applied to the bolts to keep things quiet. Just a quibble, but the mounting screws for the plates didn’t have any loctite applied. You may want to apply a small amount to the screws to ensure that they don’t work loose at an inopportune time, like during a heated LAN party.
Whether you’re installing the CoolerMaster V8 on an INTEL or an AMD processor, the stock mounting mechanism will need to be shelved for a sturdier version. Since the heatsink weights nearly 1.91 lbs, this is not such a bad thing. I’ve used to bitch and moan about having to completely disassemble my system to install a heatsink, until one day, one of my older systems with a large heatsink, snapped off the clips from the stock plastic cradle. Since that day, I’ve believed that this is a necessary evil with heavier heatsinks.


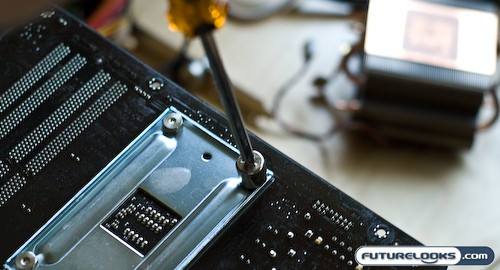
Once you’ve slathered on your favourite heatsink compound (Gelid Solutions GC1 was our choice), or used the included stuff, I found it easiest to flip the heatsink upside then, and then just plop the motherboard on top of the base, lining up the mounting bolts that we installed previously. This should get the heatsink base plate square to the CPU. You can then pop the mounting plate in place, and proceed to bolt it down using the included socket head. It’s actually not really a socket, since the backside is just a phillips head, but it works well nonetheless. The criss cross “put your tire on” tightening pattern is recommended to provide uniform pressure across the four corners. Don’t overtighten.
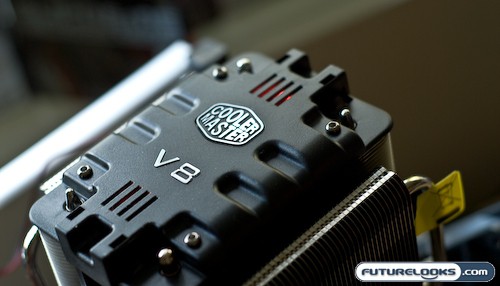
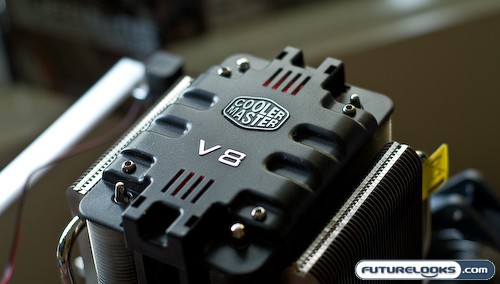
A couple of quick notes on this part of the assembly that may help, is to make sure that you center the bolts in the holes before throwing down the plate. Then that way, the heatsink will sit square to the CPU, rather than being twisted. Finger tighten first, then take the socket tool and tighten it down. One thing that is a bit of a typo, or rather, Photoshop-O is the orientation of the heatsink in the manual. It has the heatsink facing the wrong direction with the logos facing upside down. Doing this will have your fan yanking air from the back of the case, and expelling it back into your system. Obviously you don’t want this. Make sure you install with the logos facing up when looking at your case window. It will also look better when you’ve got it mounted inside a case with a plexi side window.


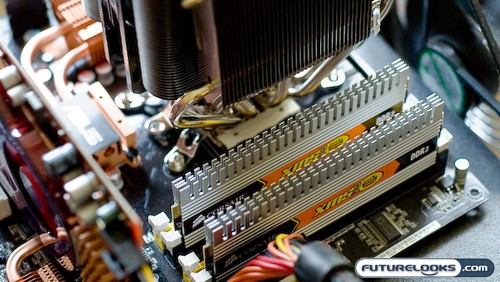
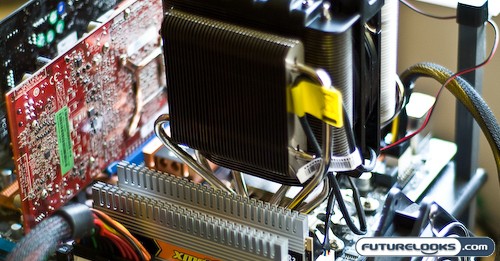
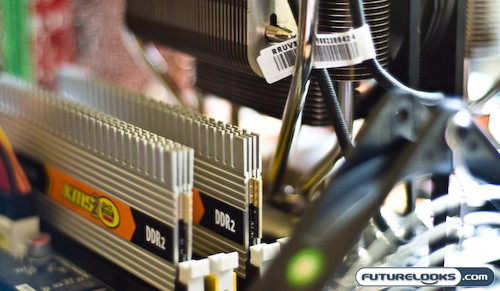
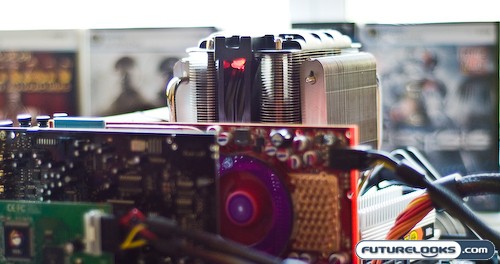
After everything was tightened down, we noticed no problems with the heatsink clearing any of the motherboard components. The mounting mechanism simply took over where the footprint of the old plastic cradle was. The other thing that was nice about the CoolerMaster V8 was the fact that the heatsink did not impede any of the RAM slots in our motherboard. We could easily use any combination of slots on our board easily, without finger gymnastics, thanks to the clearance provided. However, due to the concessions made to make the heatsink clear the RAM modules, the heatsink is quite tall as you can see. This may cause problems with folks using shallower cases.
Real-Time Price and Stock Check – Find More CoolerMaster Products
Performance
We mark our heatsinks in two areas: Thermal performance and noisel levels. No one likes a loud heatsink and no likes a heatsink that doesn’t dissipate heat.


Since the CoolerMaster V8 has a fan controller, we took readings of noise and temperature at full blast and at minimum RPM. Readings were compared against the fairly high quality stock copper heatpipe cooler that is shipping with most AMD Phenom processors these days.
Idle conditions were established by waiting 30 minutes after logging in to the Vista 64 desktop while load conditions were established using 30 minutes of CPU torture under Prime 95. We used AMD Overdrive Software to take core temperature readings and a noise level meter to measure…well…noise levels. Ambient temperature was 24C during all tests and the room was dead quiet with the exception of the running test system.
Under idle conditions, the stock AMD Phenom CPU Cooler gave us an idle temperature of 44C across the board and noise level readings of 52dB. The CoolerMaster V8 threw down an impressive 29C at the highest fan setting and equalled the noise level of the stock cooler at 52dB. That’s a drop of 15C! At the lower fan setting, noise levels dropped to 48dB, but temperature rose to 31C at idle.
When put under load using Prime 95, the stock cooler got toasty at over 63C celsius. There was no change in noise levels. The CoolerMaster V8 put down an impressive 37C under load, giving it a 26C drop in temperature across all cores. Even at the lowest fan setting, the CoolerMaster V8 still managed to provide a constant 42C under load. If you’re running at stock clock speeds, I’d run the cooler at the lowest fan setting, but you do have the option to bump up the cooling power if you’re going to do some overclocking, or if it’s a particularly hot day.
Final Thoughts and Conclusions
At the beginning of the review, I was a little concerned that the CoolerMaster V8 wouldn’t be able to bring the muscle that would be a credit to its namesake. That concern was unfounded. The CoolerMaster V8 absolutely blows away the quality stock cooling solution provided by AMD. It also outperforms its other burly sibling, the CoolerMaster 212 CPU Cooler by a pretty impressive margin.


Besides the performance, things I really liked about the CoolerMaster V8 was the ability to adjust the cooling fan to match the conditions. People who value stability and quiet cooling will also be happy with the fan speed cranked down. I was also impressed with the fact that CoolerMaster ensured wide compatibility by engineering the cooler to provide ample access to RAM slots and not get in the way of surface components. Instructions were also very well laid out and I found no faults with installation for the most part.
The only thing that may be an issue with the CoolerMaster V8 could be the height. It’s quite tall and with some shallower cases, clearance issues may present themselves. Overall though, there really isn’t anything that would keep me from recommending this CPU cooler. It looks great, performs well, and with a burly disposition and a cool red LED glow between the fins, it’ll even dress up a drab chassis interior.
Pros
- Comes with the “UN” of instruction manuals: clear and easy to understand
- Excellent compatibility with most motherboards due to small footprint
- Exceptional cooling performance
- Fan speed controller actually affects cooling performance and can be set to low speed at expense of a few degrees of cooling for low noise or to high for maximum cooling with a noise penalty.
Cons
- Small picture mistake in manual can lead users to orient the cooler in the wrong direction
- Disassembly of system required to install


Real-Time Price and Stock Check – Find More CoolerMaster Products
CoolerMaster V8 CPU Cooler Photo Gallery


Real-Time Price and Stock Check – Find More CoolerMaster Products