

A few days ago, our hearts sank a little when we did a spec for spec virtual build of our windows version of the new Apple Mac Pro. When the dust settled, we were surprised by the significant different in price, in favour of the new Mac Pro. At $9600 US for Apple’s flagship build with all the hardware options, it would cost us about $11,530 US to merely match it. But not without some compromises and uncertainty on a few of the parts selections. Of course there are ways to provide similar performance with alternate hardware. But for the same hardware, I’m afraid Apple did win this round.
But that was at the top end of the spec. And where PC DIY can be uber competitive is often at the entry level, where the strength of the platform is easy upgrades, lots of component choices, and great value for the dollar. So we decided to do this exercise again, but we’ll be targeting the entry level $2999 US Apple Mac Pro this time.
Our Challenge – The Entry Level Apple Mac Pro at $2999 US
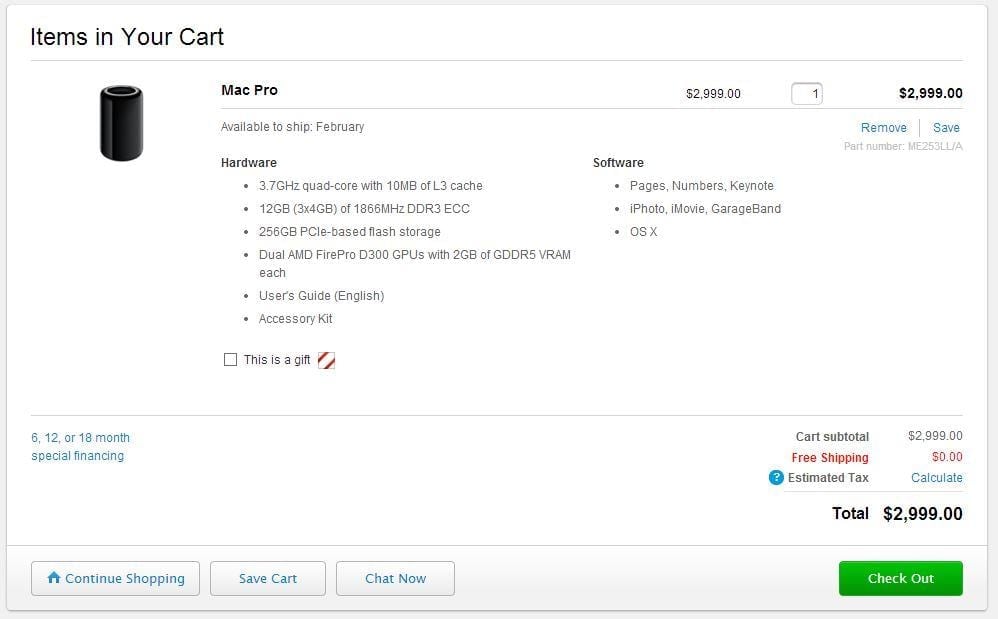
With its 3.7GHz quad core Xeon processor, 12GBs of ECC DDR3 memory, a 256GB PCI-e SSD, and dual AMD FirePro D300’s (W7000’ish), there’s a lot more we can do at this level than we could with the maxed out top spec Apple Mac Pro at $9600. For starters, we can decide to go with an LGA1150 socketed Xeon, or choose a single more powerful graphics card instead of two less expensive ones, to potentially save money, if we wanted to. There’s just a lot more we could do with the wide range of available DIY hardware when we aren’t already at the top of the spec.
But to remain true to what we set out to do in the other article, we’re going to try to get as close as we can with PC spec components that are available today, to the general PC DIY public. That means that OEM hardware is out of the questions because you would lose the longer warranties associated with retail components, which gives many PC DIY builds an advantage over pre-built systems from manufacturers. Plus, you and me aren’t buying 1000 pieces at a time so any pricing they would get, we would not get. However, traditionally, most PC DIY projects do end up often cheaper than having it built for us.
This time, we’re also going to ditch trying to go small, and just focus on matching spec. Even if it might cost us a few dollars more (but hopefully less). Let’s see what we can do here!
Enclosure/Power Supply – Corsair Carbide 200R Compact ATX
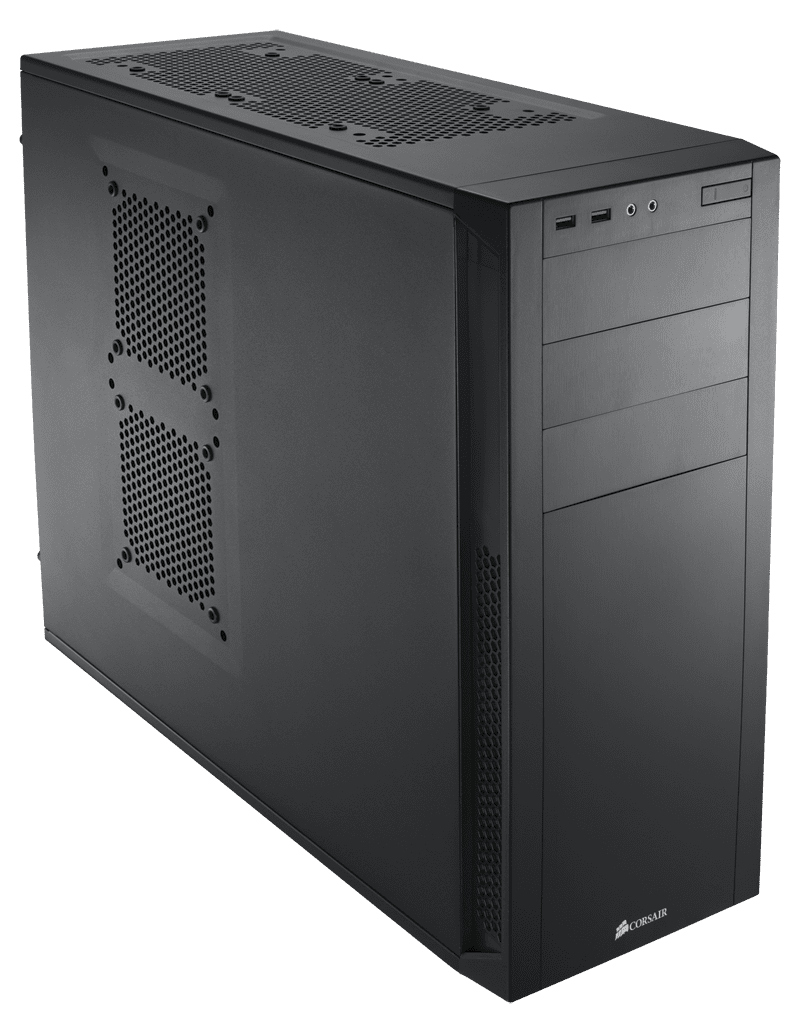
The Corsair Carbide 200R is one of the smallest ATX cases you can find that is capable of handling longer graphics cards. Originally, we wanted to use the Rosewill Rise, which was an ATX enclosure that completely removed all drive bays on the front of the case, opting for SSD placement behind the motherboard tray, making it quite small. But since that case is still not on the market, we opted for this one instead which retails for around $59.99 US.
For the power supply, we decided to pick out the Silverstone Strider Gold S 850W (80PLUS Gold) power supply. It’s small size (150mm depth) and modular design fits the bill for around $159.99 US. So already, we’re doing pretty good, saving a few dollars over our previous build.
Motherboard – ASUS P9X79 WS
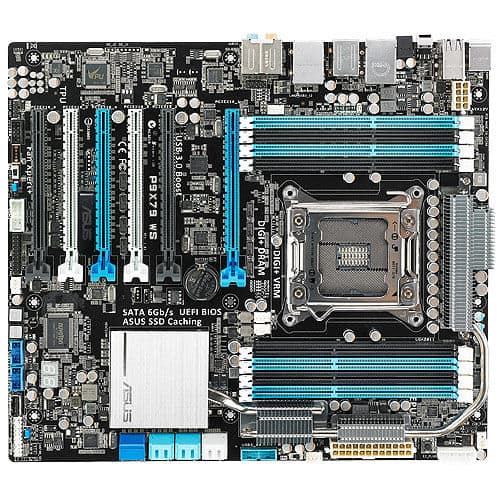
There’s no point in trying to match the Mac Pro’s highly modded enclosure. We found out how futile that was when trying to go with an mATX board. We lost verified compatibility with the 12 core Xeon and we could no longer use ECC memory, not to mention, less of it. So we’re going to try to match this machine spec for spec instead and the ASUS P9X79 WS is a great foundation with support for all Xeon processors and ECC memory with 8 DIMM slots to spare. We also get enough PCIe slots to mount two workstation GPUs and room left for the PCIe SSD that we ran out of room for in the previous top spec build. Unlike some of the dedicated workstation boards on the market, which are great by the way, you get many consumer oriented features in software and hardware that makes the user experience a little nicer.
The board will cost you around $379.99 US and is well verified for use with a wide range of professional level components.
Option: For additional cost savings, one could go for a workstation board based on an LGA1150 socket and an E5 series Xeon Quad Core CPU with the same clock speed. Keep in mind that this does limit you to quad core upgrades only and for the forseeable future. If you want more cores, you should stick with LGA2011. On the board alone, you’re looking about $100 saved, but you lose that upgradeability to more cores.
Let’s start plugging parts into our board and enclosure.
CPU – Intel Xeon E5-1660 v2 3.70 GHz Processor
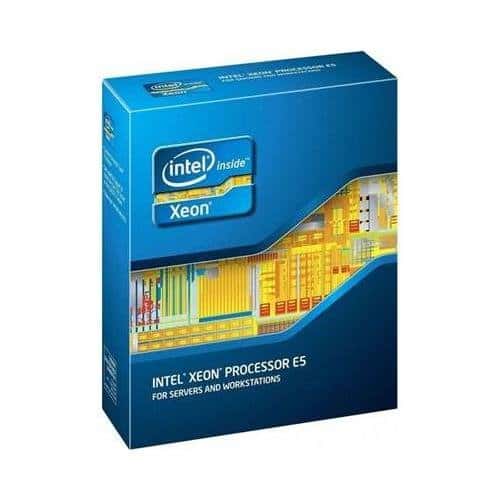
Compared to the Intel Xeon that comes on the low end spec of the Mac Pro, this processor is actually available for retail sale and it has just a little bit more cache (10MB vs 15MB) than the chip that Apple specs. But it’s very expensive as the going price for this CPU is around $1,234.75 US. The one that Apple specs is actually a tray model (E5-1620V2) that is only available to OEMs like Apple, which likely helps them shave of dollars on their BOM (Bill of Materials) cost and maintain their legendary margins. Keep in mind though that in the recent past, Apple has purchased special versions of CPUs that have the thermal cap removed (Update: We now know it isn’t delidded). So even though the CPUs appear to be socketed, you might still have issues with off the shelf upgrades on the Mac Pro itself. Or you may have to void CPU warranties and remove the lids yourself.
And of course, there is no CPU cooler with Xeons, so you’ll have to strap a cooler to it. We’d probably go with the NZXT Kraken X40 which uses 140mm fans, but mounts in a 120mm hole if needed and will cost around $89.99 US and is one of the best all in one liquid coolers in its size/price. Air coolers are also great and there are many under $60 that can do the job well too.
Graphics Cards – AMD FirePro W7000 4GB GDDR5 GPUs
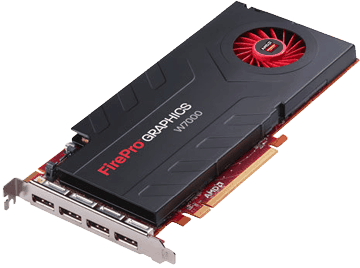
The closest match for the dual GPUs inside the entry spec Mac Pro is the AMD FirePro W7000. It matches all the major specs, with the exception of two things: The clock speed (we’re almost certain due to performance numbers) and the amount of memory. We think that the D300 GPUs inside the entry level Mac Pro are downclocked W7000 GPUs as all the other specs match up. The other difference was the amount of memory where the D300 gets half the amount as the W7000.
These graphics cards are available for $699.99 a piece and we’ll need two of them. As we mentioned in the last article, if the machine is for Adobe Creative Suite and using Adobe Premiere Pro and After Effects, the suite now supports all sorts of consumer grade graphics cards. So that means you don’t have to use the professional cards. It’ll even do multi-GPU rendering with as many GPUs as you can shove into it which is very cool.
And that’s the nice thing about PC DIY. The fact that you aren’t forced to buy the professional products at hundreds to thousands more. In fact, GTX 760s with 4GBs of memory sell for around $300 in various clock speed upgrades. And since the suite now supports multi-GPU rendering, as mentioned, you can buy two cards for less than one of the FirePro W7000s. Most importantly, you have a more versatile system because now it can also game as workstation cards are notoriously horrible at games. Plus, you’re not stuck with a particular company’s GPU choice because often times, the best GPU for the job, can change.
Memory – Crucial 1866MHz DDR3 ECC Unbuffered 8GB Memory Modules
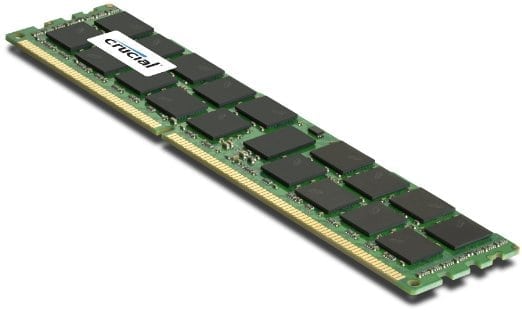
Buying memory the way that Apple’s site is laid out makes it more costly to upgrade in the future. For example, if you want to upgrade your memory, you’ll need to toss out the 3x4GB config and add 8GB modules. It’s actually better to start with the largest modules you can afford so we’re going to give our virtual build two 8GB 1866MHz ECC DDR3 modules courtesy of Crucial Memory. Although these are designed for Mac, we know it’s all marketing.
Normally, you’d pay an “Apple Tax” on these too, but it appears that the cost is comparable or less than pure PC components and we’re OK with $109.99 US per module. And we’ll take two of these for an even 16GBs, making our PC DIY machine slightly ahead, but competitive with the 12GBs that Apple sells at the entry level.
SSD/Storage – ASUS ROG RAIDR Express PCI-E 240GB PCIe 2.0 x 2 MLC SSD
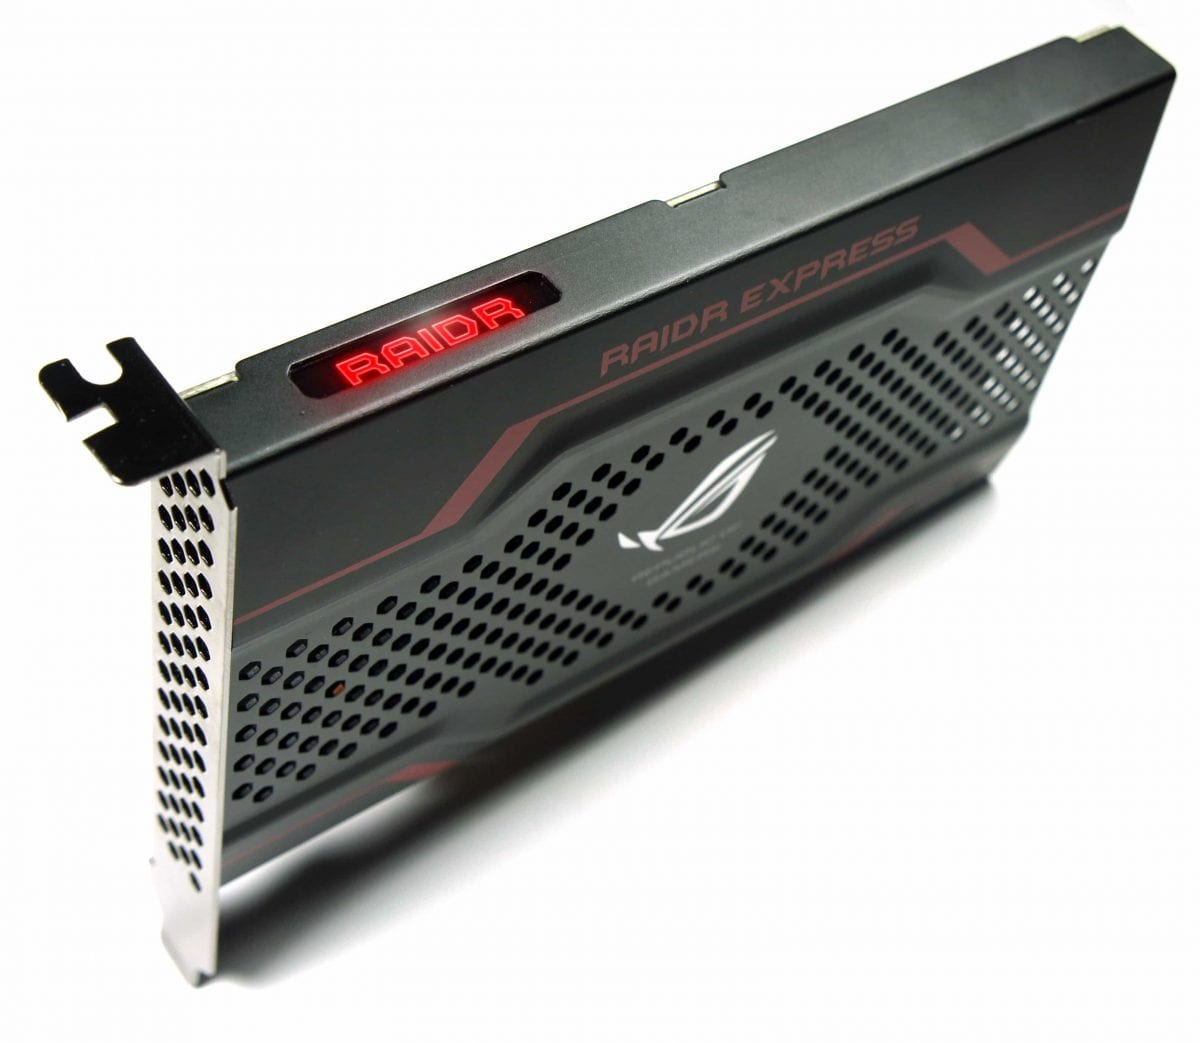
Unlike our original build where we tried to get things as small as possible with an mATX board, we know have a full sized ATX workstation board and an extra card slot for this. The ASUS ROG RAIDR is the company’s first PCI-E solid state drive solution for the consumer market. Originally announced at CES 2013, this product features 240GBs of storage, which is 16GBs less than the Mac Pro’s 256GB PCI-E SSD, but puts out very high performance with read and write speeds well above 800MB/s real world. It sells for $349.99 US and should work great in the ASUS workstation board we’ve chosen.
Although we could still run two smaller SSDs in RAID0 on the SATA3 channels, we wanted to come as close to the Mac Pro as we could and this is the way we do it. But it is worth noting that we could save quite a bit by picking up a couple of 128GB SSDs instead. And of course we’d have internal SATA3 channels to spare for additional drives internally as needed. Which would be great for scratch/cache and wouldn’t suffer the odd occasional drop outs that externally connected devices seem to give us once in a while.
OK. Let’s see how we did this time!
So Can We Build a Better Entry Level Mac Pro (Cheaper) than Apple Can?
So here we are again. We’ve researched and taken our best parts that match the Apple Mac Pro’s entry level configuration, spec for spec, and have come up with our final totals. After tabulating everything, from the enclosure, to the operating system (add another $99.99 US for Windows 8 Pro), we have managed to achieve a total of $3994.65 US using today’s prices at retailers that actually stock the hardware. Although it isn’t quite as horrible as the defeat we were handed when trying to spec for spec build out the top end Apple Mac Pro DIY style, as a percentage, we did much worse on the low end, giving up over a grand to the entry level Mac Pro at $2999.99 US. However, we did accomplish the second order of business which was to build it better.
In our spec, we have better workstation graphics cards, the AMD FirePro W7000s, clocked higher, and with twice the memory per GPU (2GB vs 4GB). We also have 16GBs of ECC DDR3 memory using very easy to upgrade 8GB modules, vs the 3x4GB modules that Apple would have sold you. And one thing I’m quite happy with is that instead of trying to make the system as small as possible, we were reasonable, using a very compact chassis (Corsair Carbide 200R) and a robust workstation grade ASUS X79 motherboard. The extra space gives us more options to expand our storage internally, and we’ve got additional slots leftover for video capture cards, sound cards, and other hardware that creative professionals need.
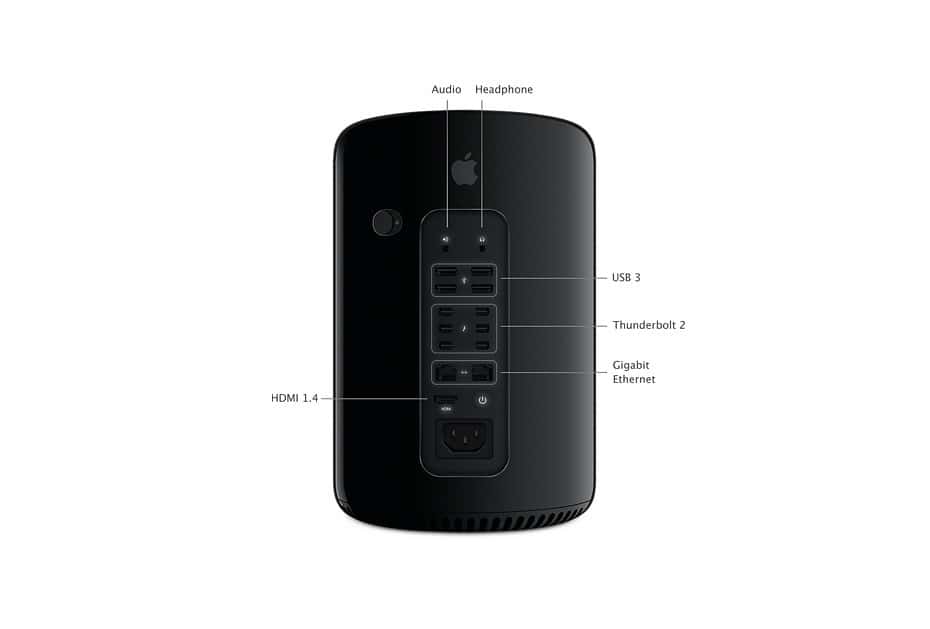
What about Thunderbolt and Wireless capability? Triple antenna 802.11AC cards can be had for around $99.99 US and offer better performance. And Intel is already implementing a Thunderbolt upgrade program, should your needs require it. And when USB 3.1 or 4 arrives, the PCI-e slots in our DIY system are ready and waiting.
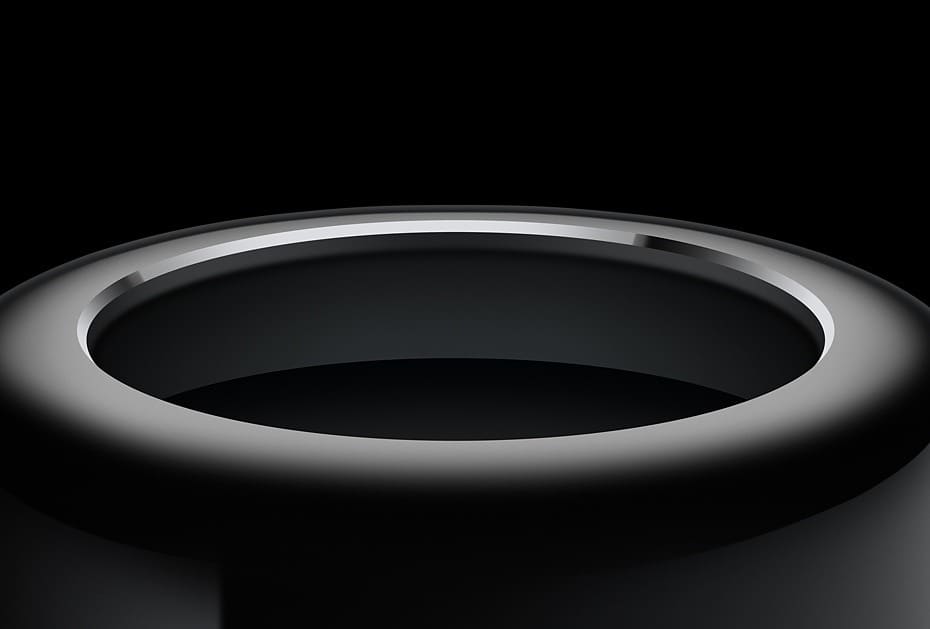
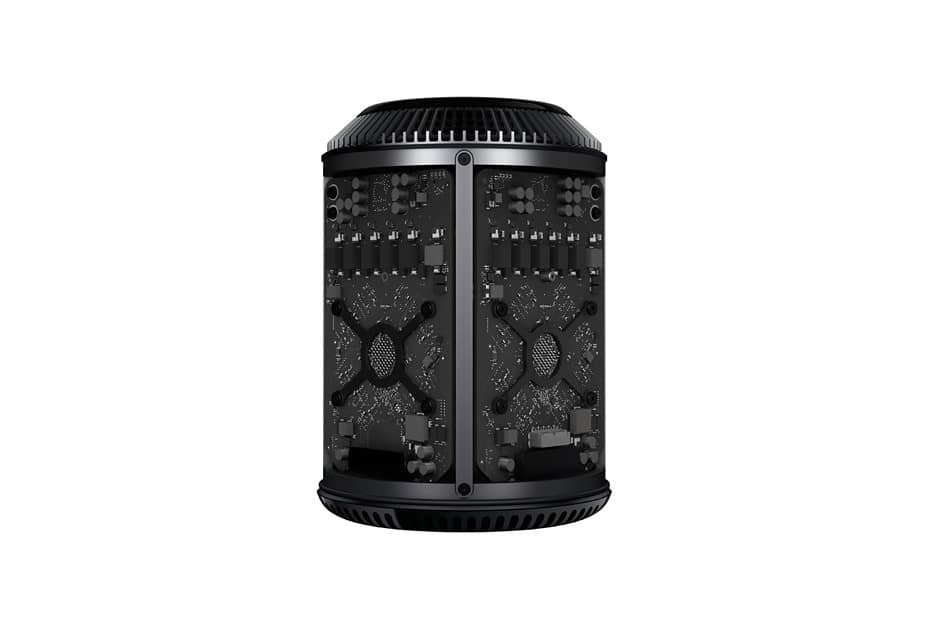
That’s not to say that Apple did a bad job. In fact, overall, I think the Apple Mac Pro, whether you like the look of it or not, whether you like Apple or OS X or not, is an extremely highly modded, and optimized PC that has very high end professional hardware, that fits in a space that is no bigger than some of the larger drink sizes at 7-11 in the US. But that’s also where we see some weaknesses, from the lack of internal upgrade-ability, which will make you spend more money to make the transition to the new platform, to the additional heat generated, leading to design compromises like underclocked GPUs. You simply can’t take the hardware you’ve invested in with your previous generation Mac Pro, that you’ve kept alive well past its prime with industry standard upgrades from the PC world, and migrate into this generation.
Long term, because the GPUs are not industry standard, and the likelihood that Intel has yet again supplied Apple an “uncapped” CPU, even if not soldered in, makes your upgrade path, more like a trade in path (UPDATE: The CPU can be removed and the cap is intact). You’ll need to buy a new machine to get the latest GPUs and CPUs and there is no slowing down of the innovations that are coming our way in this space. And that’s why the higher price of the PC DIY build starts to fade away in saved money and increased upgradeability down the road. You get to keep your machine at a high level of performance longer, versus letting it degrade in performance over time, which can be money/time saved in that long run. And if you are into making your system specialized for specific applications, the lack of choice for GPU brands is also a downer as the competitors do flip/flop in position from time to time.
However, if you are a long term Mac fan and you’re invested in OS X in some way, then it might be difficult for you to switch over. Or maybe you don’t even want to. Or have apps that are crucial for your professional life that you have no Windows alternatives. In that case, Apple’s new Mac Pro still offers an extremely compelling pricing offer, both at the low end, and at the top end, that no longer carries the traditional “Apple Tax” and in fact, is quite a good value when you compare part for part/spec for spec, with a PC DIY build counterpart.
But if you are open to change, and want a machine that lasts a longer time, just like the original Mac Pros that were very much inspired by their PC DIY brethren, then you can also have the same hardware, but at a bit of a “PC Tax”. But for this price premium, and it’s really weird saying that, you’ll get a machine that hangs with you for a much longer time, at a much higher performance level throughout its useful life, with CPU and GPU and RAM upgrades down the road. There’s no need to buy Thunderbolt peripherals/drives to store your stuff, and you can, mostly likely, plug in many of the expansion cards and hardware that came out of your Mac Pro, the generation before this one. You can even add Thunderbolt 2 ports later if you need them.
Let’s not forget, that in the PC DIY world, there’s always more than one way to get the performance that you want, at a much lower price. From overclocking components, to using alternate non-professional grade components, we could easily drop the ECC memory, Xeon processor, and workstation grade cards, and come up with a system that is literally HALF the price of what we’ve priced it out at, with similar or greater performance. And that’s where the value of PC DIY comes in because at the end of the day, no one will know whether you made your masterpiece film on a Mac or a PC (unless you tell them). Then you can even take a break from professional apps and play games with it.
But you will be pocketing more money from the royalties because you’ve spent less in both the long run and the short run by building your workstation yourself, upgrading along the way, or even, built it with alternate components that give more bang for the buck. Plus, most PC components themselves carry warranties longer than the one year Apple warranty (2 years in Australia), when you purchase the retail versions of DIY components. For example, the CPU has a 3 year warranty, most motherboards have a 3 – 5 year warranty, and some graphics cards have a lifetime warranty, as an example. While with Apple, you will need to purchase Apple Care to get any satisfaction after the warranty period is over. Remember to make an appointment.
At the end of the day though, I’m still impressed by what Apple has accomplished with the new Mac Pro, which is to erase one of the biggest criticisms of their hardware, and that’s the “Apple Tax”. With a careful selection of components that give them an advantage in pricing, the new Mac Pro stands out to be one of the least expensive ever. Well played Apple.
What are your thoughts on Apple’s new Mac Pro?
To have a look at how our top end build turned out against the new Apple Mac Pro, you can have a look at our original article right here.
To see what is likely upgradeable (or not) in the New Mac Pro check out this article right here.
UPDATE: At CES 2014, we caught up with Other World Computing (OWC), who is the leader in DIY upgrades for the Mac ecosystem. We spoke directly to their CEO, Larry O’Connor, and in our exclusive interview, we cover exactly what is (and isn’t) upgradeable on Apple’s New Mac Pro 2013. You can check it out here.