
- Great build quality
- Easy to install
- Great variety of product offerings
- All-in-one Water Coolers not available in Canada (yet)
- PM02 Case needs a rear removal option for PSU
Computers are forever changing, but at the same time, they can be quite the expense to keep up. It’s not always viable to spend money on the more significant components such as a new Motherboard, RAM, Video Card, or perhaps switch from a mechanical hard drive to a solid-state drive. Do not worry, as there are other parts of a computer that you can upgrade, such as the case or chassis, CPU cooling to even the power supply. Perhaps your current machine is a bit boring and sitting in a typical black case tucked under your desk somewhere? Today’s trend is to show off your computer and its components, put the desktop back on the term desktop.
With the help of SilverStone, we take a look at breathing new life into an older computer. In this review, we will take a look at 3 of the many products that SilverStone offers; a Primera Series case the PM02, a CPU cooler from their Argon Series the AR07 and a 700W Power Supply Unit (PSU) from their Strider series the ST70F-TI.
Now for a little bit of background. It has been a while since I’ve taken a computer entirely apart and put together back together, and I honestly miss doing it. I wanted to take a machine that was sitting on the floor doing nothing and make it look new and more exciting than it used to be. I also wanted to see how well I could create a somewhat clean install. Before the SilverStone PM02, my cases have not had easy ways to route cables and make them look neat. For those wondering, the specifications of the computer I am rebuilding are the following:
- Intel i7-3770 (stock Intel cooler)
- ASUS Z77-A Motherboard
- Corsair 32GB DDR3 RAM
- Kingston 120GB SSD
- EVGA GTX 1050 Ti
- Corsair CX600 PSU
- Corsair Case
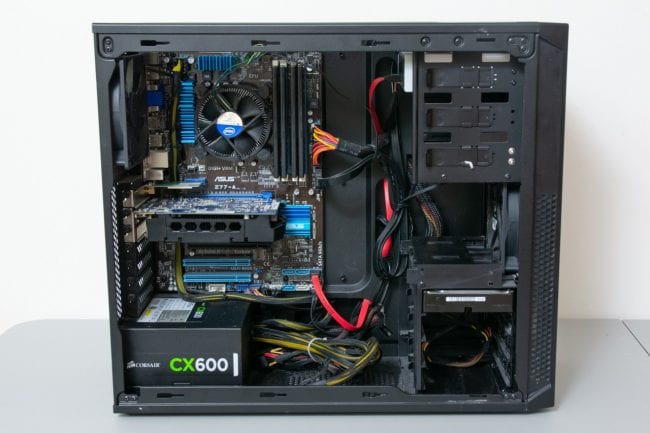

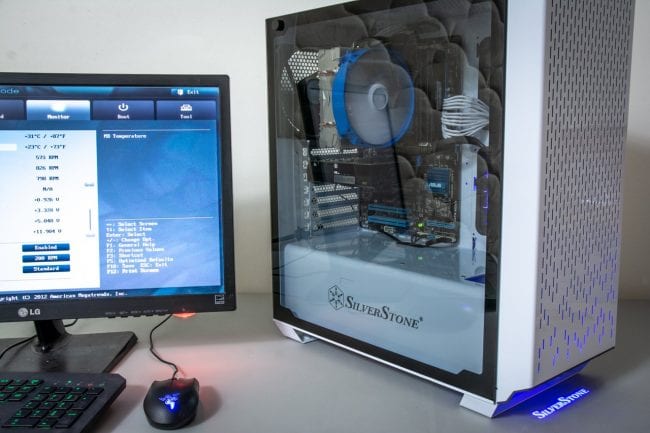
Isn’t this the beauty of a computer? It was a pre-built machine that my older sister purchased a few years ago that I purchased from her as it was an upgrade from what I was previously using. If you noticed in my above specs, I mentioned an EVGA GTX 1050 Ti, but in the image, if you look closely that is not the GTX; it’s a Sapphire Radeon 7700 HD. The Corsair CX600 is not modular, and so there are a lot of extra power supply cables. The cables are haphazardly zap-strapped to various parts of the case. I have seen messier internals *cough*Dell*cough*, but overall, it is not too bad, but it doesn’t bring out any interest if this were to sit on a desktop in full view.
CPU Cooler: Argon Series AR07
Before we dive into replacing the boring black case, let’s jump into swapping out that stock Intel CPU cooler first with one of (many) SilverStone’s CPU coolers!
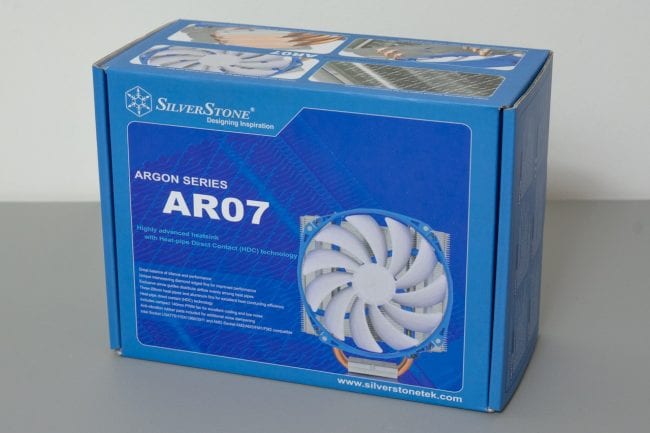
SilverStone offers a variety of CPU cooling products. For refreshing this older build that had the original Intel stock cooler, I looked at making use of an air-cooler and decided on the Argon Series CPU Cooler, primarily the AR07. Their All-In-One (or AIO) water coolers were unable to ship into Canada as that would have made the inside of the case even cleaner. The Argon series of CPU air coolers do look impressive, though, and at first, I thought a 140mm fan would produce a lot of noise.
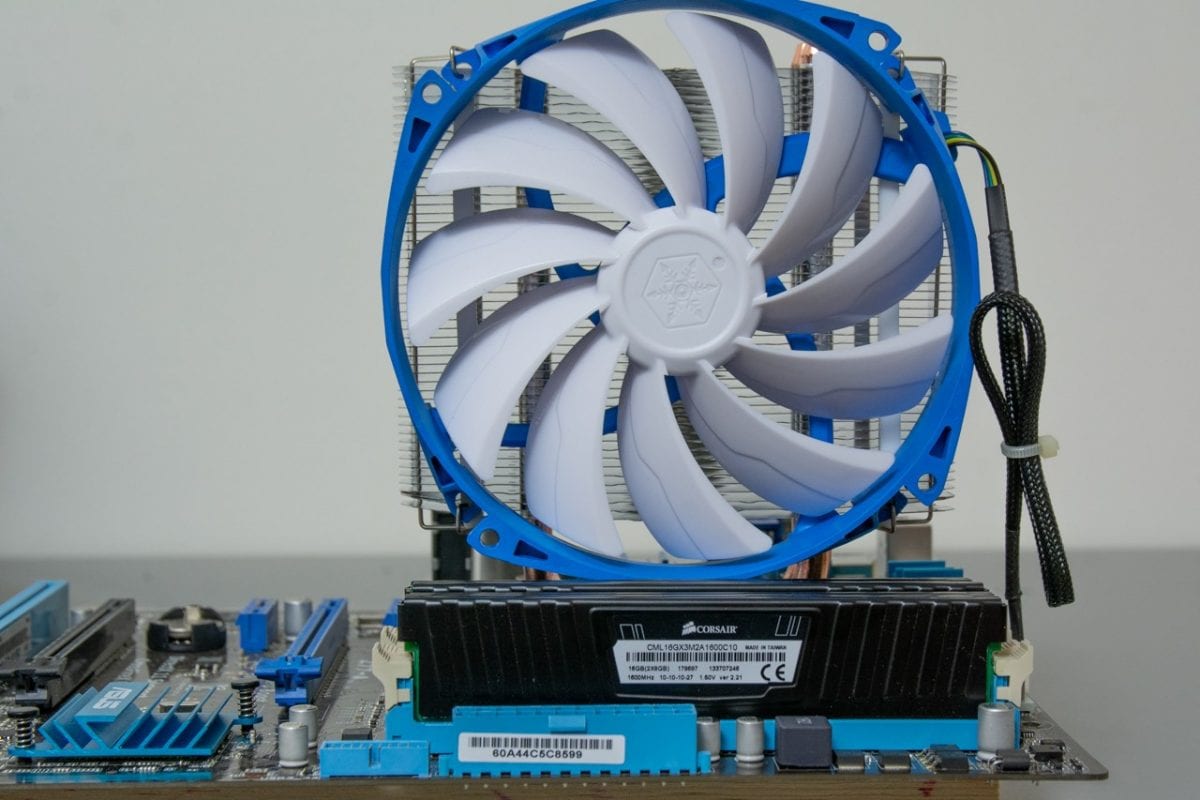
The AR07 is a CPU cooler compatible with both Intel and AMD sockets in mind. For our build, I needed something that supported the older LGA1155 socket on the Intel i7-3770, and the AR07 is a great fit. The AR07 is a single tower cooler that incorporates three copper heat pipes that feed up to a unique interweaving diamond edge fin design with an attached 140mm fan.
What’s Included in the Box?
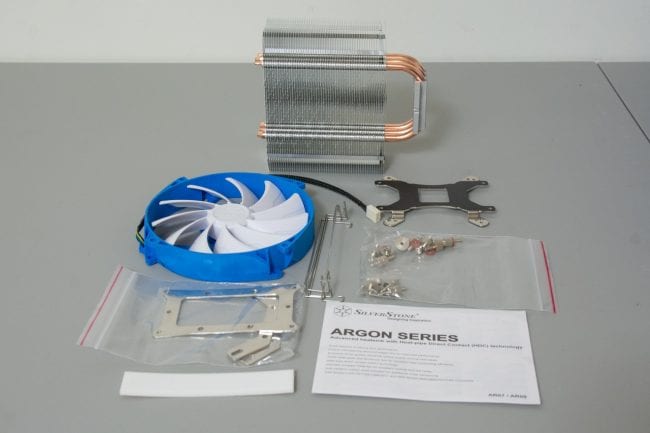
When you open up the box, everything is neatly packed away. The 140mm fan sits on top of the heat sink with the various accessories on either side. You get the screws, socket adapters, fan retaining clips, thermal paste, vibration dampening strips and install manual. Though, it looks like I may have misplaced the included thermal paste and had to go out and buy some ArcticSilver.
Design of the AR07
The SilverStone AR07 is a single tower CPU cooler with three copper heat-pipes that run through aluminum fins. It is a reasonably large cooler and will require a large case to ensure it has enough room to fit. The dimensions with the 140mm fan installed are 75mm (2.95″) x 163mm (6.42″) x 140mm (5.5″), luckily the SilverStone PM02 computer chassis we are also looking at has enough room to fit this.
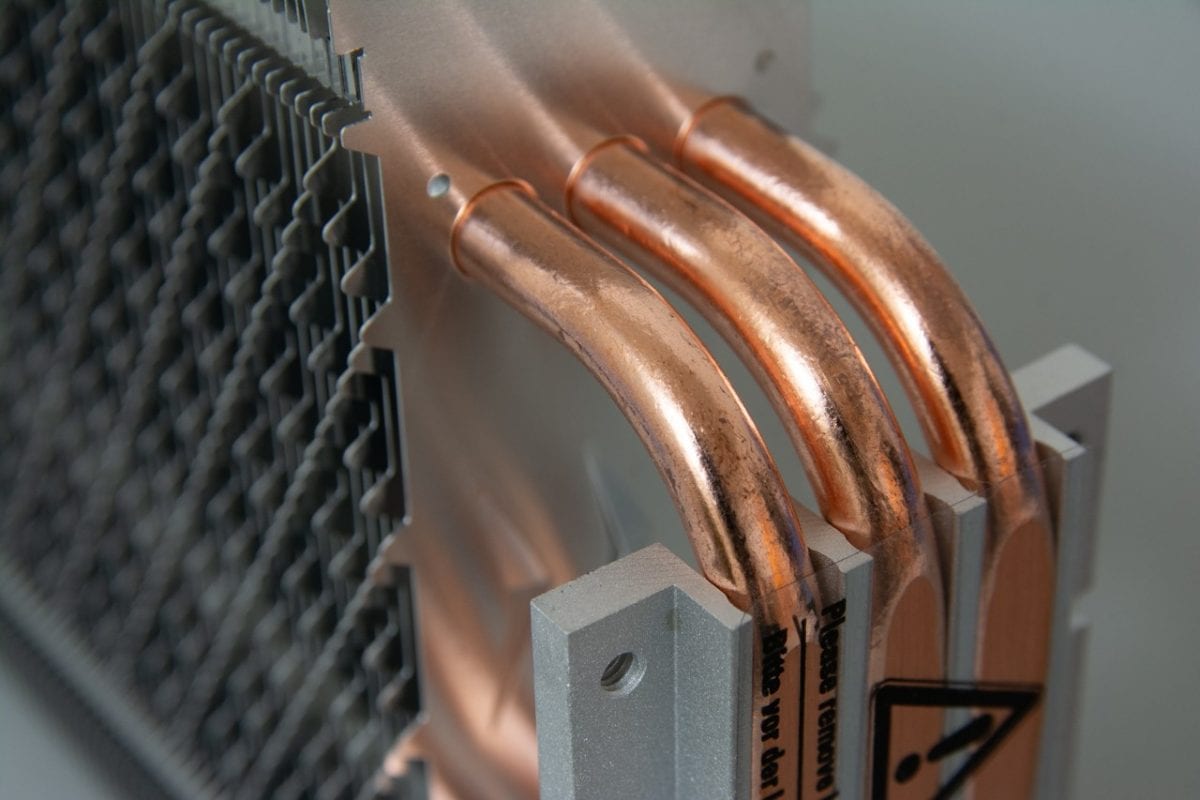

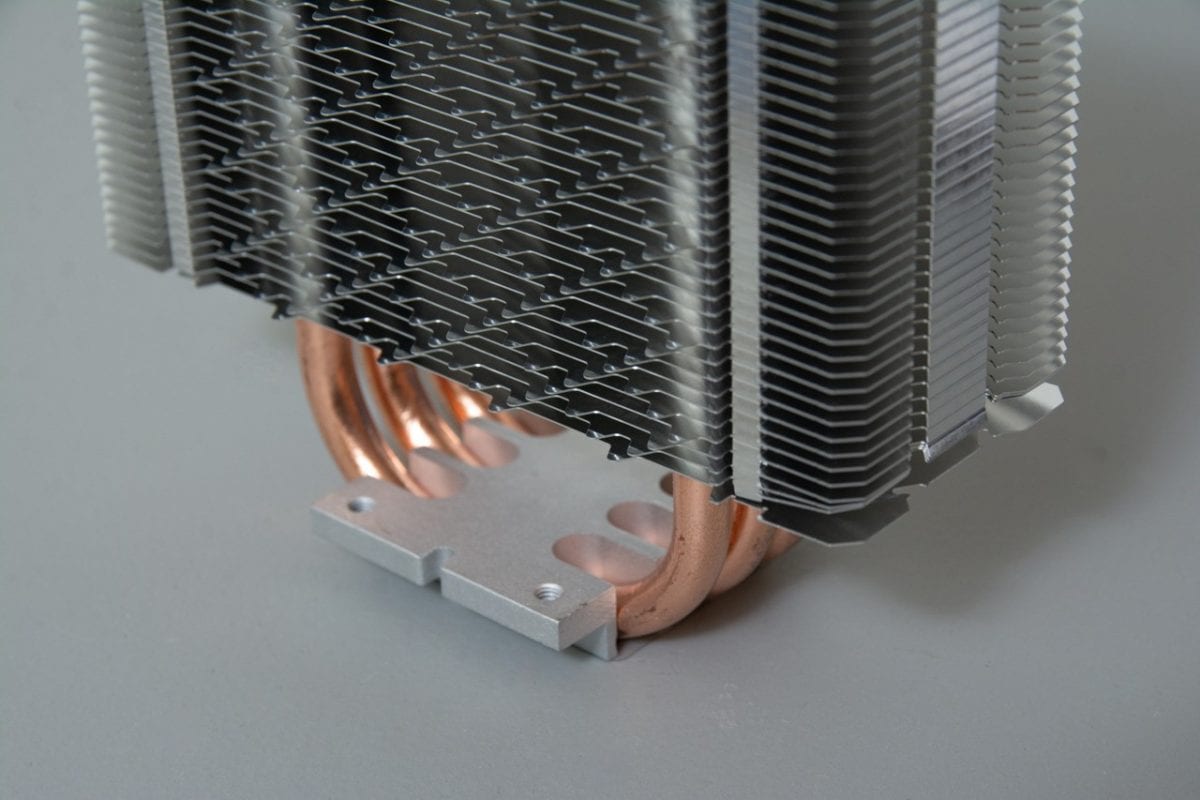
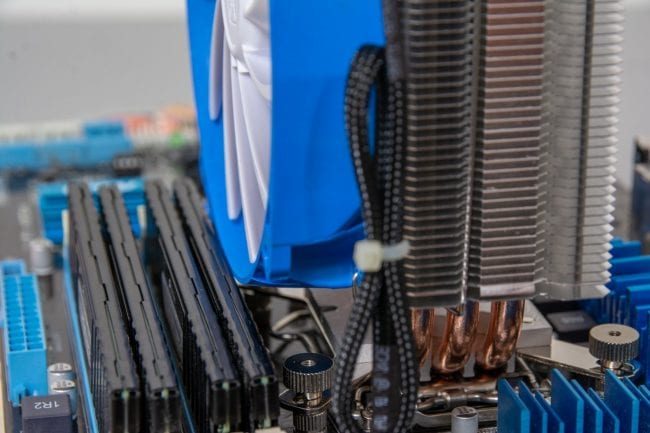
The three 8mm copper heat pipes help make up what SilverStone calls HDC or Heatpipe Direct Contact. The heat pipes as-is are not enough to fully cover the surface of the CPU, so they have interspersed pieces of aluminum to help create better contact with the CPU. Granted, the aluminum will not conduct heat as well as the copper pipes will.
Installation of the AR07
Installing the Silverstone AR07 is relatively straight-forward. I forgot how much I enjoyed putting computers together and was a bit worried about popping off the stock Intel cooler and putting on the AR07. I had to look at the included manual a couple of times to figure out where the vibration strips and retaining clips went, but overall, it was a sound installation.
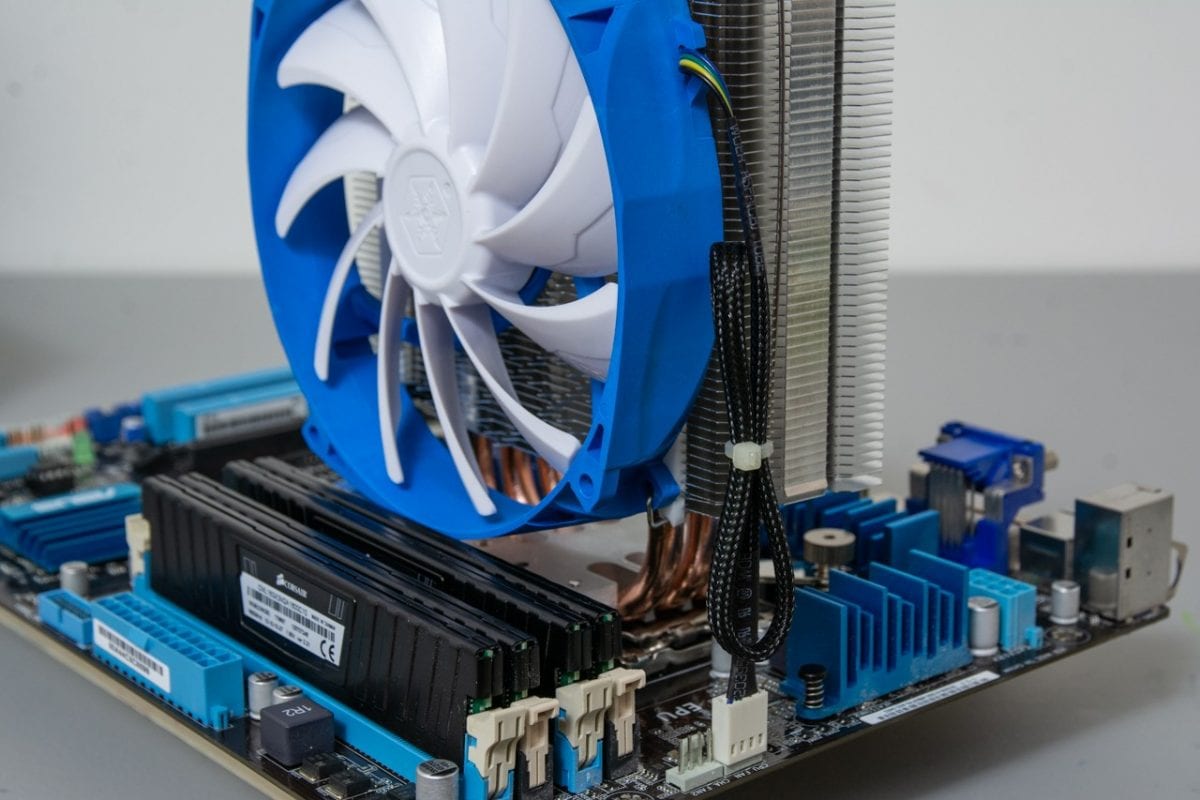
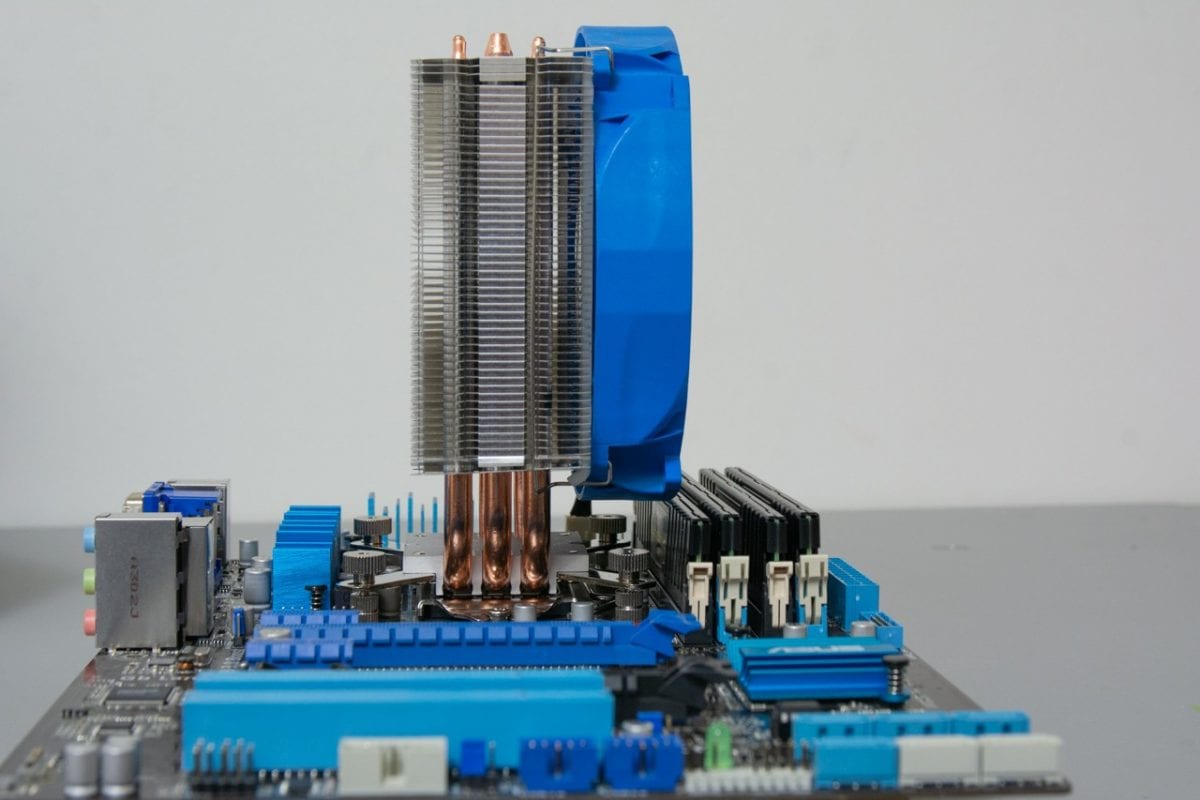
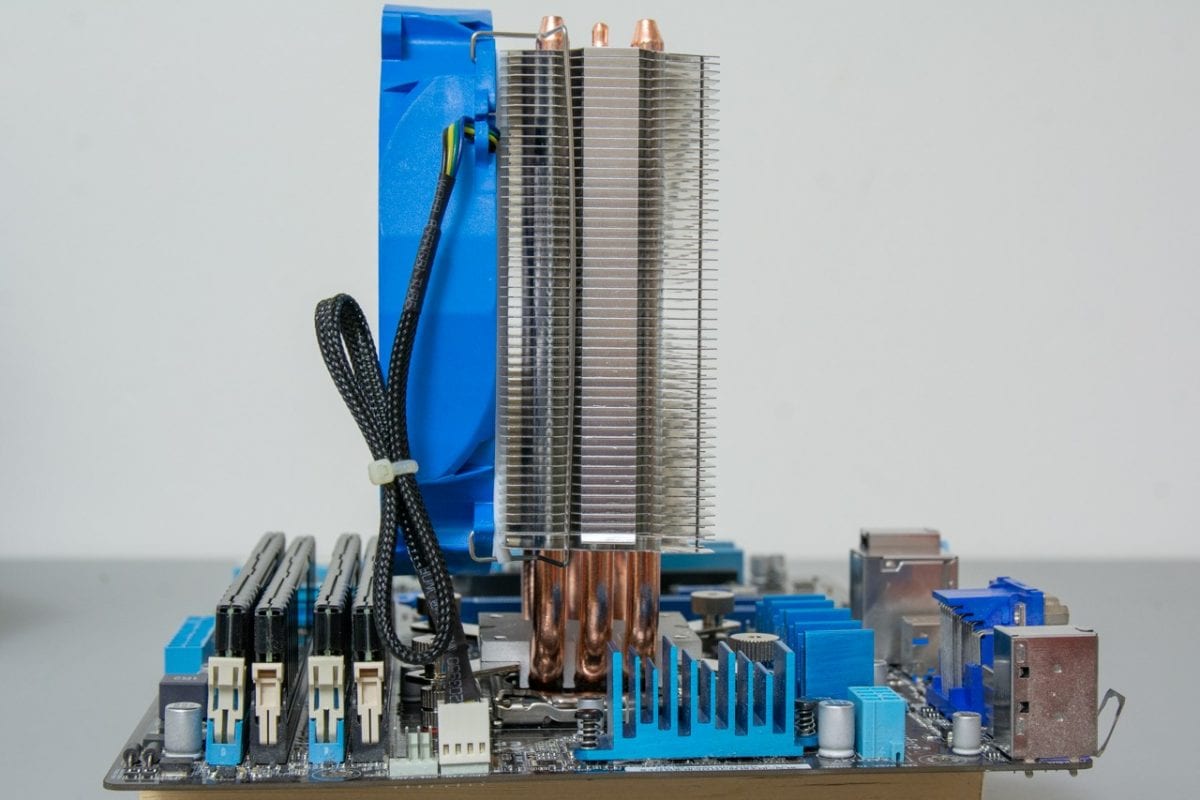
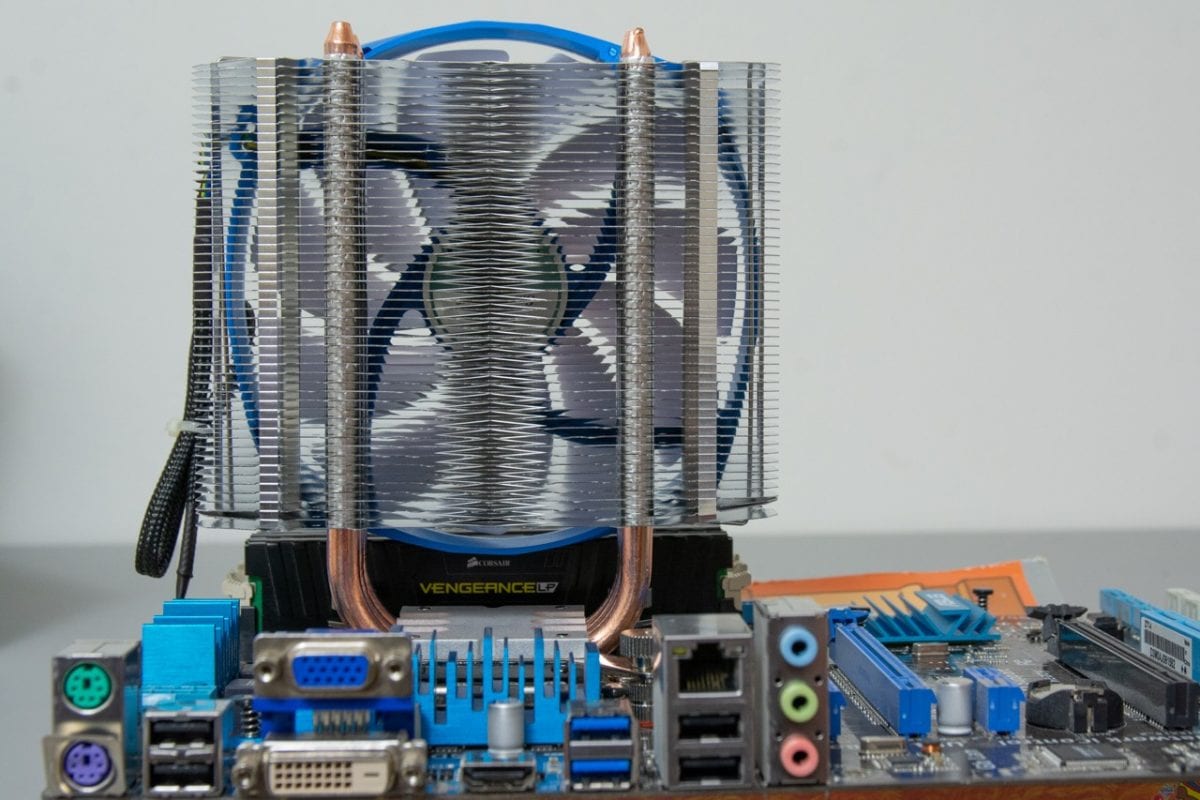
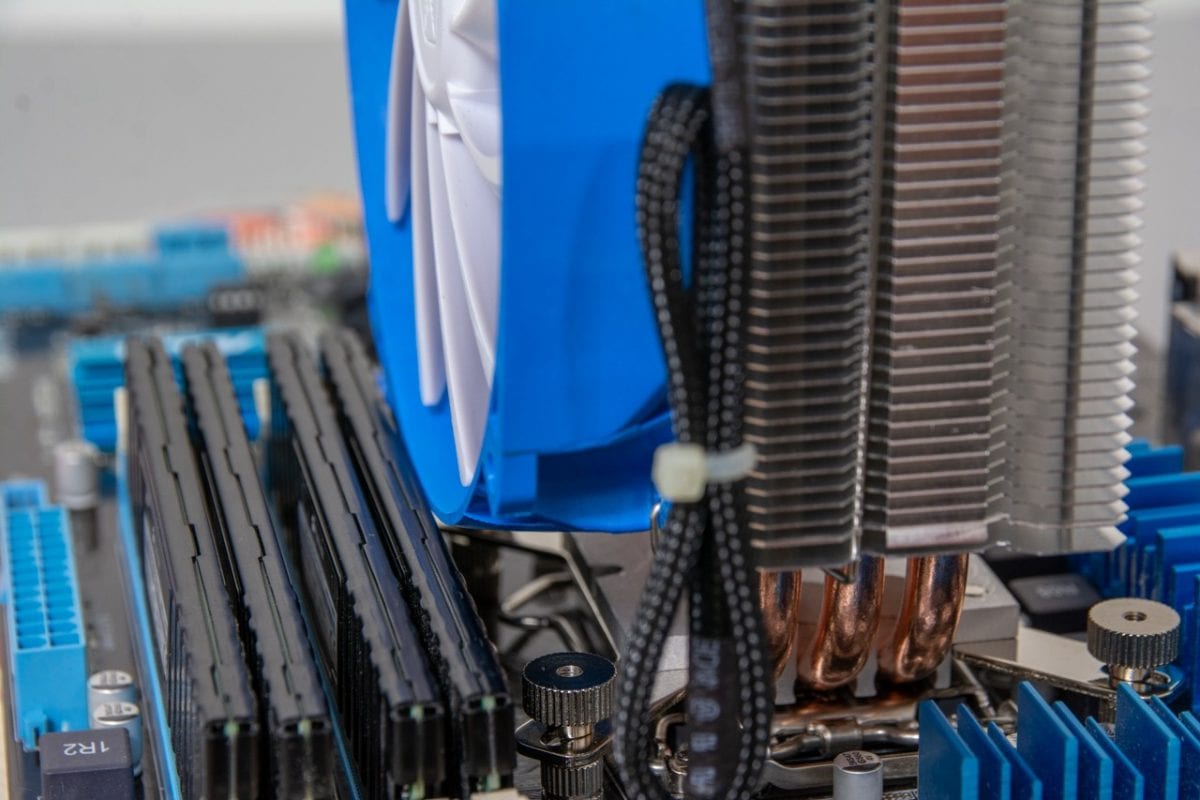
With the ASUS Z77-A motherboard and all RAM slots taken up, the fan JUST fit and luckily, there isn’t any strain pushing against the CPU cooler. I was hoping I would not have to orientate the fan in a different direction, and I lucked out that it fit the way I wanted to have it installed. Your mileage will vary, of course, depending on your motherboard’s layout.
One other item to note, though, there are arrows at the top of the heatsink tower. It tells you the direction that air should travel to utilize the design of the aluminum fins properly. I installed it wrong the first time and had to reinstall it after the motherboard was installed, but it was relatively easy to orientate the proper way with the motherboard still fitted in the case. Your mileage may vary depending on how much room you have to move around in the case.
Performance of the SilverStone Argon AR07
To put the SilverStone Argon Series AR07 to the test, I utilized a couple of benchmark type programs and had MSI Afterburner to show me a graph of the CPU Temperature over time while they were running. When running Cinebench, the CPU temperature high was 60 Celcius, with the average being around 50 Celcius. The CPU fan never went above 30% and was whisper quiet during the test, even while the CPU was hitting 100% at 4.2GHz.
Next up, I ran Heaven and tweaked it a bit so that the CPU would be used more than the GPU. Temperatures hovered around the 45 Celcius mark with a peak shy of 56 Celcius with the fan not going above 30% and being whisper quiet.
I quickly loaded up Fornite and played a few (horrible) rounds. Granted, the GPU would do most of the workload. The CPU temperature was steady at the 45 Celcius mark with the CPU’s fan never going above 30%.
For the size of the fan and the size of the heatsink, I am pleased with how well the CPU cooler performed and that the fan was never too loud. It’s a shame that this CPU can’t be overclocked as I would have loved to have been able to test how well the Argon AR07 handles overclocking this older CPU.
Computer Case: Primera Series PM02
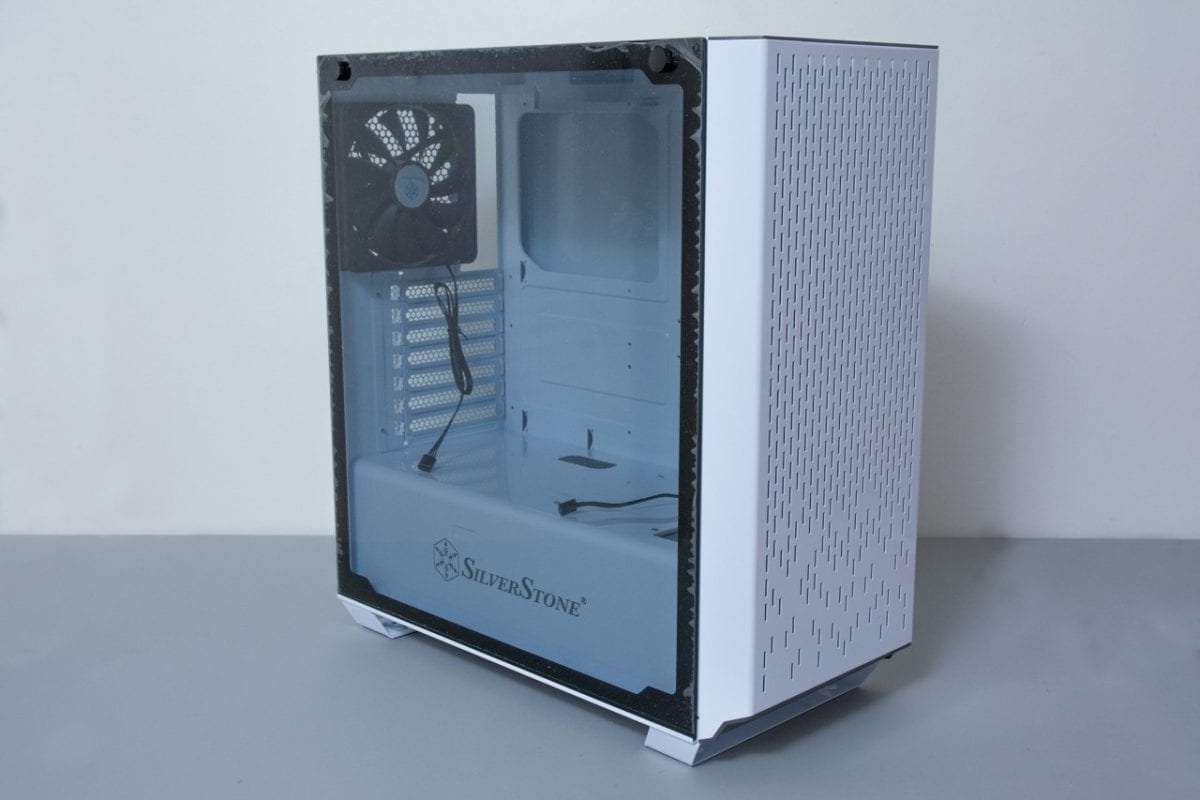
With a big tower CPU cooler such as the SilverStone AR07, one would need a case (or chassis) worthy and big enough to make use of it. This is where the Primera Series PM02 case comes in. I even opted for the white, because all of my cases have typically been black, you know, I wanted something a bit different.
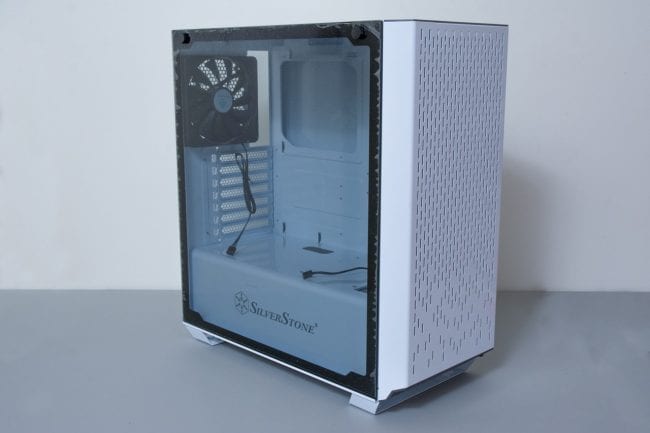
The SilverStone Primera Series PM02 is what SilverStone categorizes as Large ATX. It has a full tempered-glass side panel, front-mounted USB 3.0 and USB 3.1 Type C ports, quick access front filter, magnetic top filter, quick access PSU filter, a crisp projection of the SilverStone logo, 3x 2.5-inch tool-less drive bays, smark backside cable routing and more. It also includes 3x 140MM front fans with one 140mm rear fan. It can also support graphics cards up to 16.3″ in length.
What’s In the Box?
Now I do not have a photo of what is in the box. Majority of the items that come as accessories were already installed. In the case of the SilverStone PM02 case, the accessories included are:
- 3x 140mm Front Intake Fans (with removable dust cover)
- 1x 140mm Rear Exhaust Fan
- 1x PSU fan filter (bottom of the case)
- Magnetic Dust Filter for the top of the case (this is pretty cool actually)
- Baggy of screws and motherboard standoffs
Other noteworthy items are the tinted side panel, PSU shroud, easily removable front panel (access to the front fan filter) and more.
Upon opening the box, I was happy I went with the white case. Right off the bat, I find it aesthetically more pleasing than previous examples I have used, including the current Dell Inspiron case I am using for my main desktop.
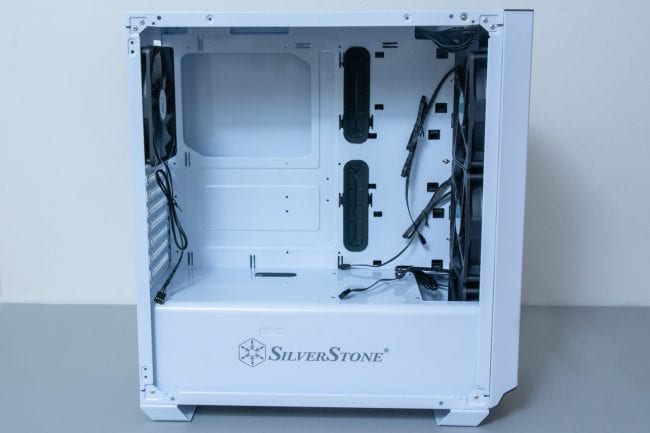
Removing the side window panel is quickly done by removing the two large thumbscrews at the top. This is one piece of tinted, tempered glass, so be careful when you put it down as it could shatter. When you place the panel back and screw in the thumbscrews, there are rubber grommets to help ensure you do not crack the glass. This also helps to ensure that the glass does not come in full contact with the metal. The PSU shroud extends the whole way across the bottom of the case. There are rubber grommets to pass the motherboard power cable, though and some other wires if needed. On the top of the PSU shroud, there is also a small hole so you can pass cables as required as well. This all helps keep the inside of the case neat and tidy. Not only is it great for aesthetics, but it helps play a part in maintaining airflow unobstructed as much as possible.
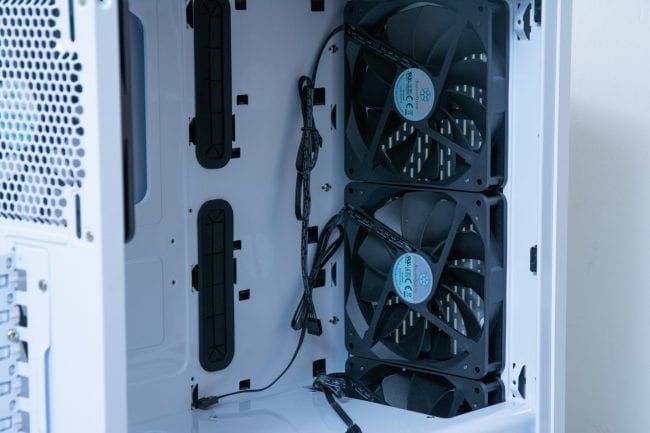
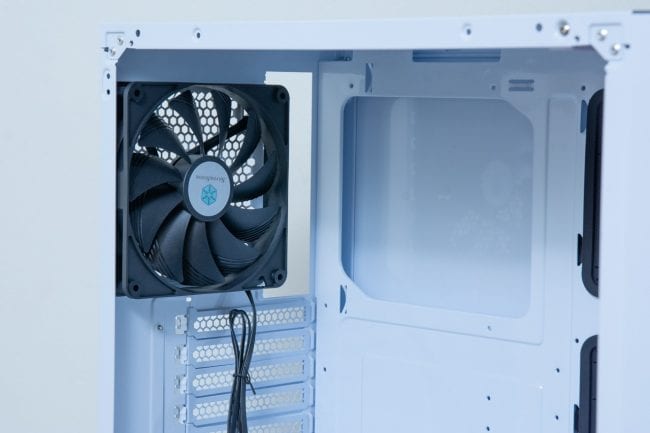
There are three 140mm fans at the front of the case. In the image above, you can see the topmost 2 with the third partially below the PSU shroud. This helps ensure there is more than enough air being brought into the case for cooling. I like how the third fan provides airflow to the hidden cables and PSU. I connected all three of them ,utilizing the CPF02 cable supplied by SilverStone. The CPF02 allows me to hook up three 4-pin fans to a single fan header on the motherboard.
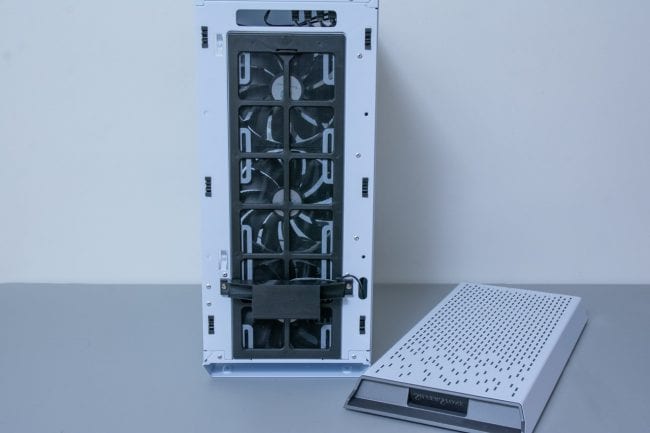
Removing the front panel is straightforward. You pull from the top front, and that will pop the panel off from clips that hold it to the front. This reveals the front fan filter that you can remove and clean/wash as needed.
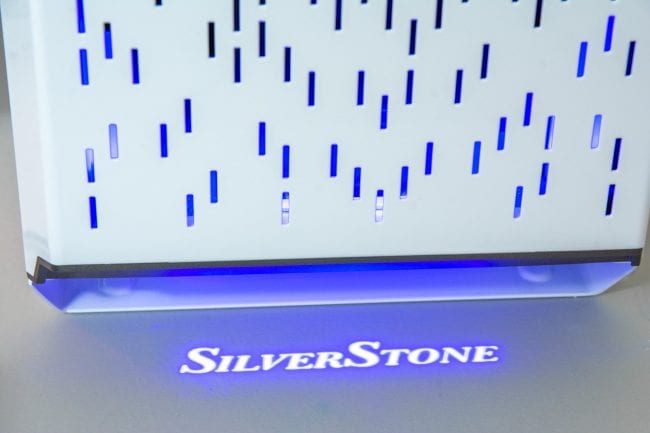
There is a small blue LED housing at the bottom of the front. This projects the SilverStone logo onto the bottom surface to which the case sits upon. A neat little effect though the only way to turn it off is by removing the power connector (SATA power). Perhaps a small toggle switch underneath could have been utilized, so you don’t need to remove the side panel to unplug the SATA power connector. For those who colour coordinate their computer components too, perhaps a future release could allow one to change the colour of the LED that displays the SilverStone name also.
At the rear of the case is a single 140mm exhaust fan. You can also see the back of the case has an opening, which allows you to access the back of your motherboard where the CPU is located.
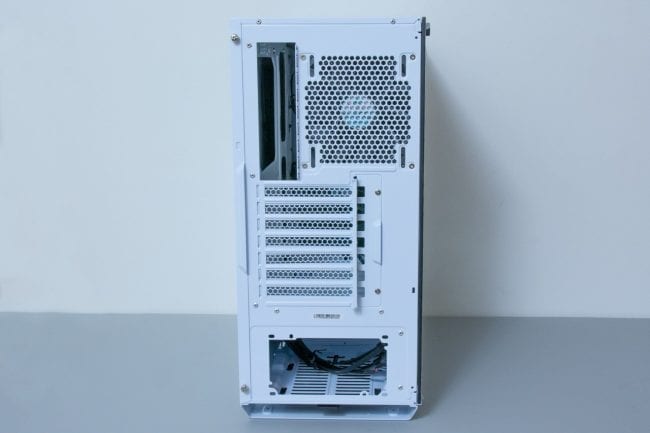
To the back of the case now. Small screws hold the slot covers in, so when you need to add/remove expansion cards, you do have to ensure you unscrew it so you can swing out the little retention portion. At first, I thought the PSU area was removable, but it is recessed a sliver, so you do need to remove the other side panel to install the PSU. It would have been nice to have been able to slide the PSU in from the back of the case as opposed to the side. When installing the PSU (later in the review), I had to cram a bunch of the power cables in at the same time as installing the PSU itself.
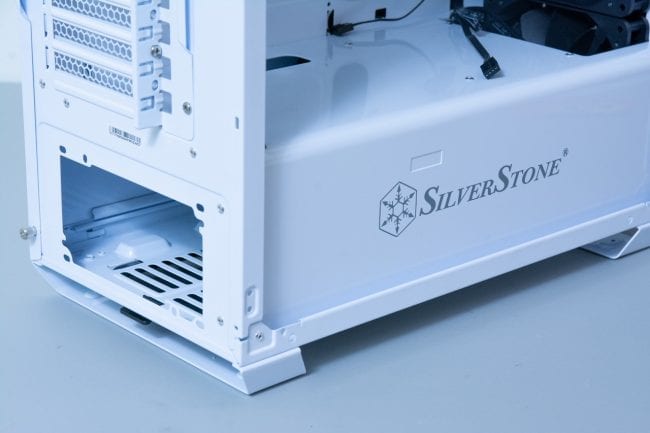
A little close up of the PSU shroud and rear of the case. The SilverStone logo stands out prominently.
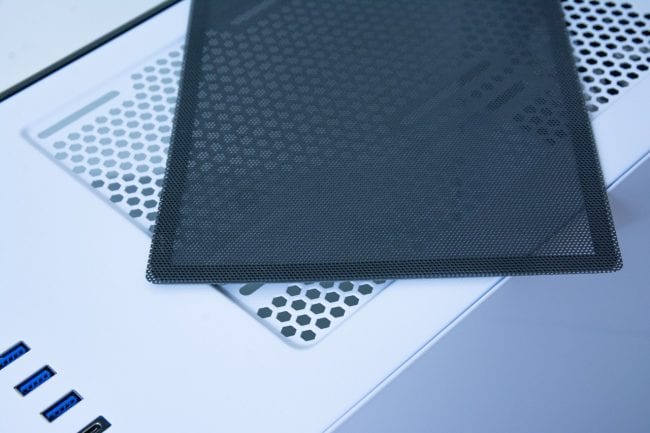
Back up to the top of the case and the included magnetic fan filter is a nice touch.
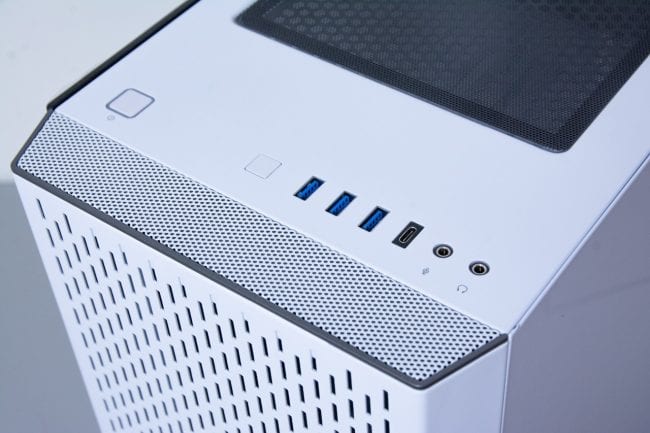
I’m totally into the IO ports of a case, especially the ones that are easily accessible. The SilverStone PM02 offers 3 USB 3.1 A ports with a single USB 3.1 type C port. Headphone and Microphone jacks. The power button (far left and glows blue) is spaced away from the reset button. The front grill is accented nicely with mesh on top and a neat slotted type pattern on the front
The whole front panel adorns a cool looking slotted design. It allows for air to be sucked in from the three intake fans, but I also think it looks good.
Power Supply Unit: Strider Series ST70F-TI (700W)
If you are looking to upgrade a computer, it is best to look at what power supply requirements you might need. Luckily for me, I am not updating the internal parts of this build, so going from the previous Corsair 600W to a higher power one is fine, but yes, a bit overkill perhaps.
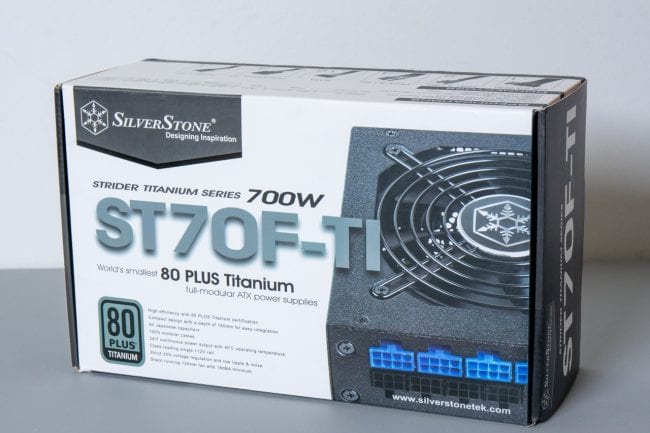
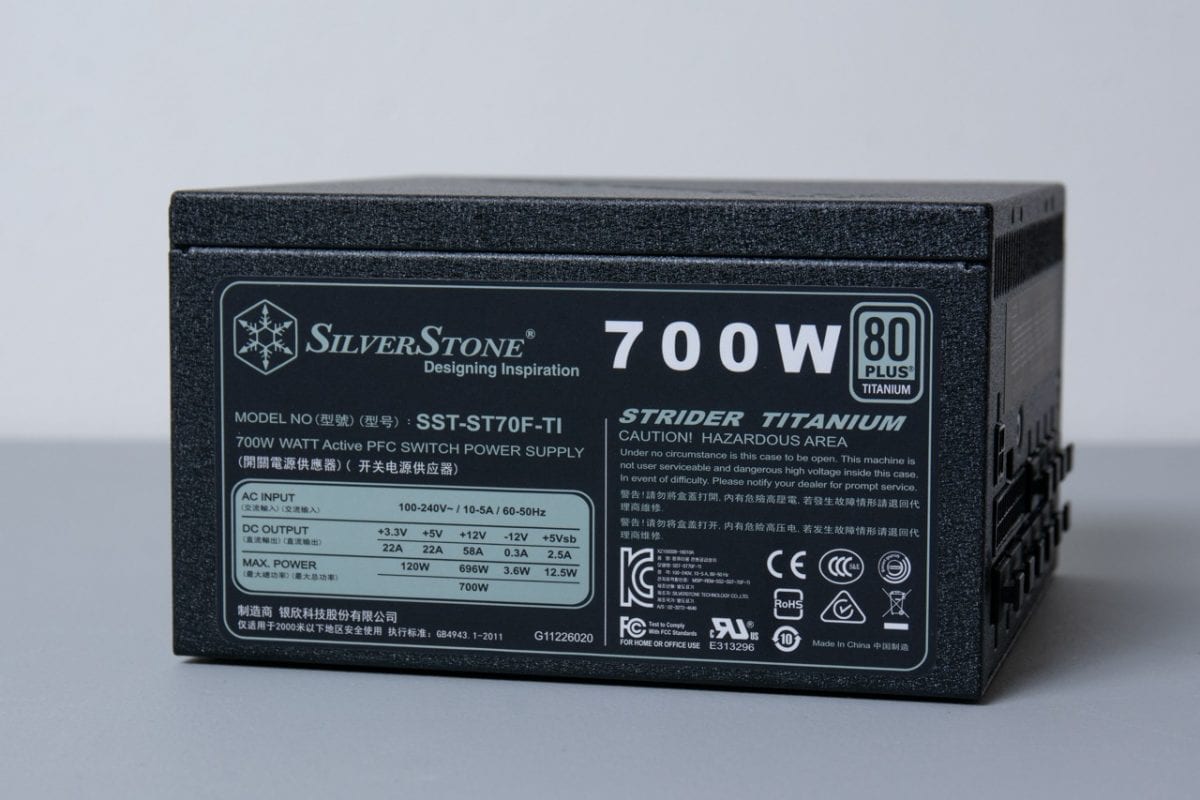
SilverStone carries a variety of Power Supply Units (PSU), starting with 80 Plus, going to Bronze, Silver, Gold, Platinum and finally, Titanium. In the case of this particular review, we will be looking at SilverStone’s Strider Series ST70F-TI, an 80 Plus Titanium rated 700 Watt PSU.
The SilverStone ST70F-TI is a high efficiency 700 Watt PSU with a compact and modular design. At a depth of 150mm, it is smaller than other PSUs of similar power capacities. The modular connections help ensure you use the cables you need are there without leaving you to tuck away and hide any unused wires.
What’s In The Box?
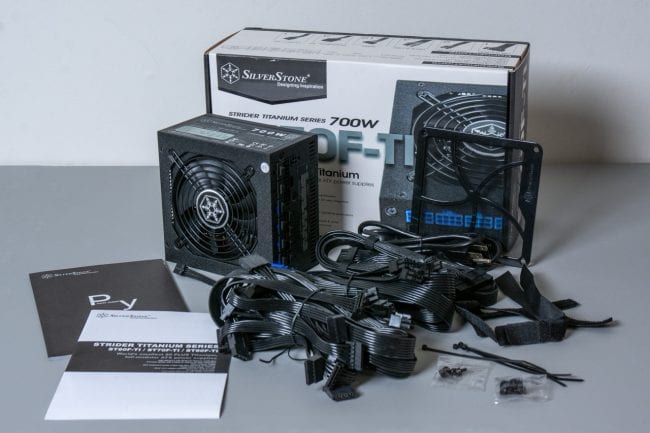
When it comes to the ST70F-TI, there is a lot of things that come with it:
- 1 x 24 / 20-Pin motherboard connector(550mm)
- 1 x 8 / 4-Pin EPS / ATX 12V connector(750mm)
- 1 x 8 / 4-Pin EPS / ATX 12V connector(550mm)
- 4 x 8 / 6-Pin PCI-E connector(”550mm” x 4)
- 12 x SATA connector(”600mm / 150mm / 150mm / 150mm” x 3)
- 3 x 4-Pin Peripheral connector(600mm / 150mm / 150mm)
- 1 x 4-Pin Floppy adapter connector (100mm)
- Magnetic fan filter
- Cable ties and Mounting Screws
First Impressions
When I first received the SilverStone Stroder ST70F-TI, I was impressed by how large the box was, definitely larger than other PSUs I have purchased. SilverStone says this is one of the smallest PSU of this wattage on the market, so I was a bit skeptical, but then I opened up the box.
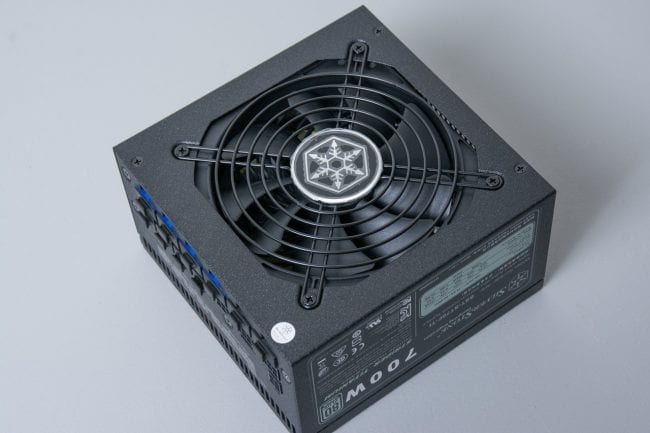
Right off the bat, I noticed it was smaller than other PSUs I have that have lower wattage. The general look is reasonably everyday when you look at it from the top. The textured metal housing is nice, and then the SilverStone logo is stamped diagonally across the top.
Flip the Strider ST70F-TI PSU over, and the 120mm fan is nestled nicely on the bottom protected by a simple fan grill.
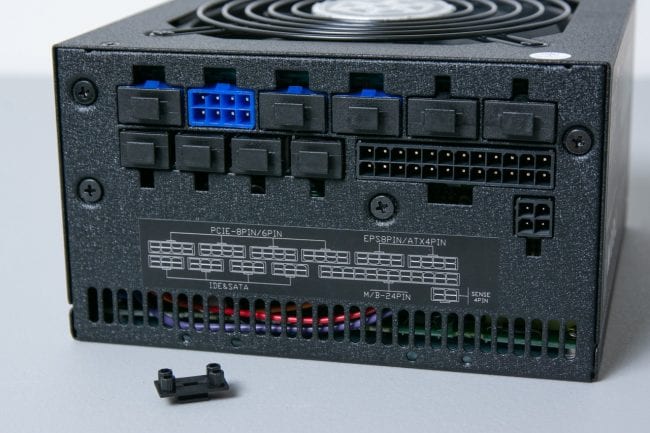
The SilverStone Strider ST70F-TI is a modular power supply. That means you use only the cables you need to use which can help keep the insides of your computer neater than if you had cords that were not required still attached.
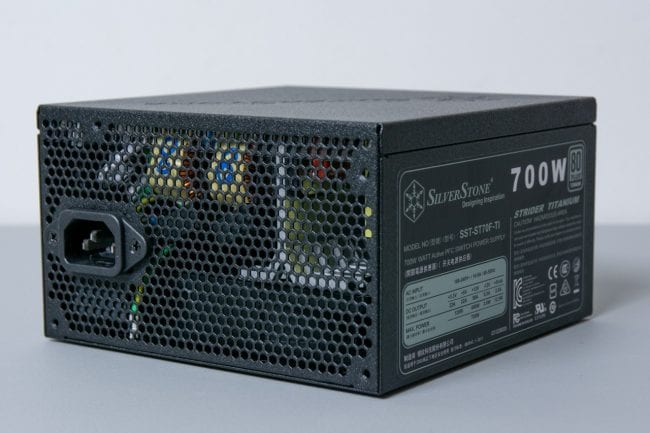
The rear of the ST70F-TI PSU has a substantial mesh backing to allow air to flow over the internal components to help cool things down. The one thing you might notice is there is no power switch. I like having a switch that I can toggle on and off, but it does not take away from the value and performance of this power supply.

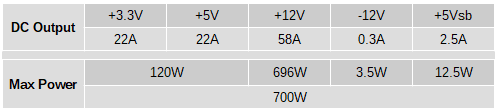
With most power supply units, there is the label that displays the power features of the unit itself. In the case of the ST70F-TI, it shows the following for the rails it supports

Overall Thoughts and Conclusion
Receiving all the SilverStone products at once was a bit overwhelming, but I was looking forward to unboxing and setting up all the components.
The SilverStone Argon CPU cooler was, of course, the “most difficult” thing to do. I did seem to have lost the thermal paste that was included in the box, so I bought some from good old Amazon and used that. I also noticed that I had the orientation of the tower wrong with how I mounted the 140mm fan. That was an easy fix, and luckily enough, I could () get my fingers in around the screws to remove the heatsink from the CPU and remount it properly. The installation guide doesn’t mention that the arrow on the top of the heatsink indicates which way the air should flow through the aluminum fins for optimal heat dissipation. All the tests I put the CPU through never had the 140mm fan spin faster than 35%, and even then, it was whisper quiet.
The SilverStone Primera Series PM02 case, I think, is beautiful. Not only is it easy to install the components I used, but it was also easy to hide the cables away from prying eyes give the whole setup a beautiful clean look. The one downside I found with the case was the PSU area. It would have been nice to be able to slide the PSU in from the back. I had connected all the items I needed first, then angle and contort my way into putting the PSU in place so that I could mount it to the rear of the case. The PM02 includes a PSU fan filter, so I did not make use of the included magnetic fan filter that came with the Strider ST70F-TI PSU.
The last but not least, part of the package from SilverStonew as the Strider ST70F-TI 80 Plus Titanium PSU. Overkill for this computer’s particular components, but it allows one to be ready for future upgrades. The 700W could be utilized in a newer Intel i7 setup or AMD Ryzen setup without worry. The ST70F-TI came with a bunch of different power cables, which is helpful if components need to swap out and require more or fewer pins present. The Argon CPU cooler has mounting hardware for both Intel and AMD as well, so that could be utilized in a new build down the road too.
SilverStone also provided a bunch of miscellaneous cables as well. They supplied a 3-way fan splitter cable (CPF02) that allowed me to hook up the three front case fans to a single header on the motherboard. Various sleeved extension cables in white so that I could carry on the white look of the PM02 case.
Overall I have loved working with these components from SilverStone. Everything was easy to install and work with, and I think it looks good! I can proudly display this computer on top of the desk, and people will take notice!