


So are you tired of the same old boring computer case? Ready for something sexy, curvy, and drop dead gorgeous? And yes, I am talking about a computer case. How about one that is designed by the famous Italian design firm Pininfarina (the same company that designed the Ferrari Enzo)? Teaming up with Pininfarina, Spire has introduced the SP-ATX-PALU/S case and on first glance, this case is amazing. But is this case all show and no go? Well, let’s find out.
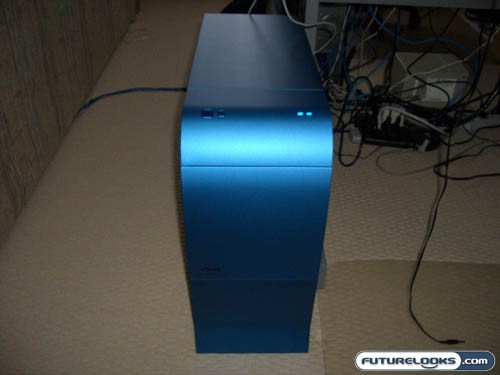
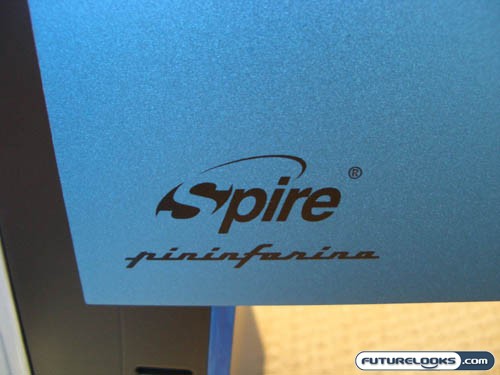
From it’s curvy front bezel to the uniqueness of it’s design, this is definitely a one of a kind case. Pininfarina is famous for designing works of art, and this case is no different. “Exclusively designed by world famous designer Pininfarina”, Spire has created the first truly artistically designed computer case. The case comes in a choice of 6 colors: white, silver, black, red, yellow, and blue – which happens to be the one that we will be reviewing today.
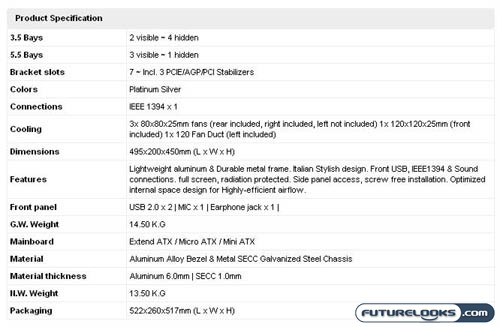
Specifications

Features
- Stylish curved Italian design
- Aluminum Alloy Bezel & Metal SECC Chassis
- Full folded edge, full screen, radiation protected
- Front USB/IEEE1394/SOUND connections
- Removable HDD Cage
- Removable Mainboard Tray / Side-Panel
- Tool-less side panel access for fast and easy upgrade
- 120mm Fan duct system on the side panel for maximum airflow
Looking at the specs, this is a fairly big case. With a net weight of 13.50kg (without a power supply), this thing is HEAVY. It has many of your standard features found on cases of similar caliber such as tool-less side panels, folded and rounded edges, and no less than 3 fans. A few things that caught my eye however, were a removable HDD cage, and a removable mainboard tray / side panel. This should help make it easy for installing components into the case.
Packaging
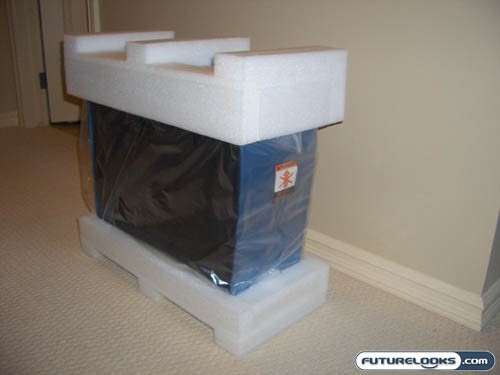
When I received the box, it looked like it had gone through a rough time during delivery. Luckily for us, Spire used multi-layer packing foam and not your cheap packing Styrofoam to protect the case. Instead of breaking apart, this type of foam absorts impact and bounces back.
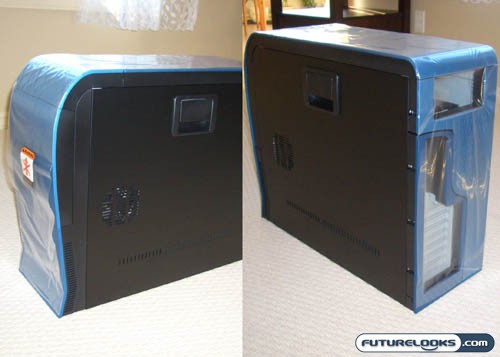

The case was also wrapped in a bag, and to top it off, there was another protective layer of plastic on the front, top and rear of the case to prevent any scratches. Kudos to Spire for taking such great care in packaging and protecting their case to ensure that we receive a damage free product.
Real-Time Price and Stock check – Shop Like a PRO!
What’s In The Box?
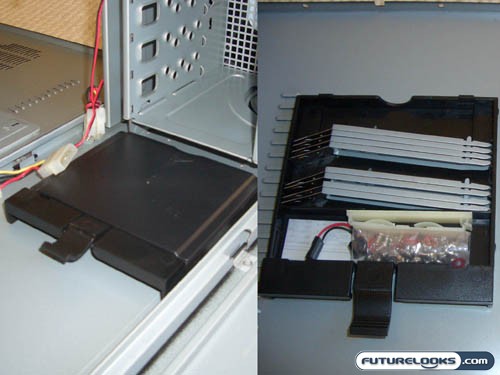
Upon opening up the case, I thought I was missing the usual accessories. With further investigation, I noticed a little black box tucked underneath the HDD cage. Pulling it out and cracking it open revealed all of our “missing” accessories. This included:
- Motherboard standoffs and miscellaneous screws
- Toolfree optical drive / HDD bay rails
- Motherboard speaker
- Instruction manual
The trend seems to be more companies building in spare parts bins into their cases. Often times, cases come with hardware bits that don’t seem to be universal. By having storage inside the case, we don’t have to throw them out by accident or lose them.
First Impressions

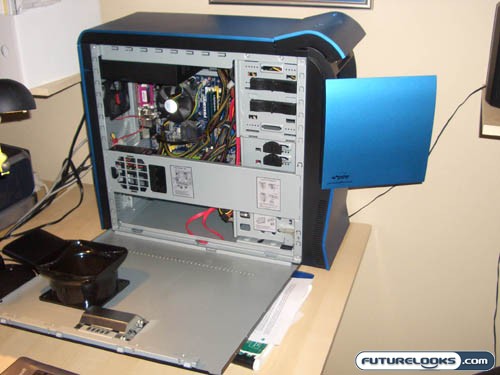
After unwrapping all of the protective packaging, I set my eyes on a very attractive case. Surrounding the front, top, and rear of the case is a 6mm thick Aluminum bezel painted in what appears to be a powdercoat blue, a color more associated with a high end car that with a computer case. The front reveals a power and reset button up top, along with the Power and HDD activity light. There was also a Spire and Pininfarina logo etched on the front of the case. It looks like Pininfarina took a minimalist approach in their case by hiding many of the eyesores of your typical case and greeting you with an elegant yet functional design. It was gorgeous!

Opening the main front panel reveals the 3-optical drive bays and two 3.5” drive bays. One thing to note was how easy it was to open the panel even with a magnetic latch. Another thing I noticed was how flimsy the plastic hinge on top / screw hinge on the bottom seemed to be. If I’m not careful, I could easily break off this panel.
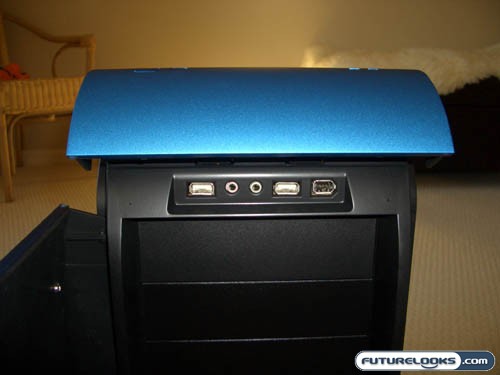
One of the unique features associated with this case has to be the upper front section. Lifting up this section (which requires the use of both your hands) reveals one Firewire and two USB slots as well as your standard headphone and mic jack. To close this section, you need to stick your hand underneath and push in the piece that holds it open. Unique as this may be, it is also a little clumsy if you need to open / close this frequently. Again, if I’m not careful when I’m lifting this case, I could accidentally grab this panel and tear if off of the case. Then our gorgeous case would no longer be so gorgeous.
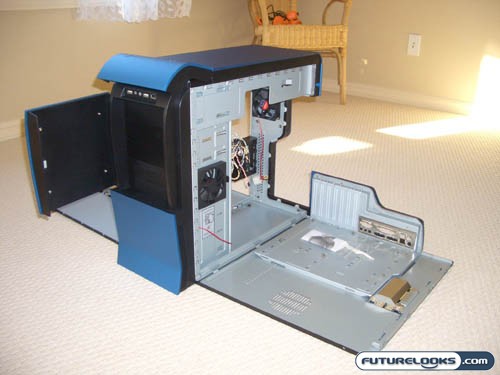
Now, the next unique feature is the flip down side panels. Pull up the latch on either side and the side panels flip down: No tools required here! This kind of reminds me of the flip up doors of many exotic supercars, such as the Pininfarina designed Ferrari Enzo. This is also reminiscent of the Apple Tower Systems. One of the side panels also includes a height adjustable CPU exhaust funnel for channeling hot air directly out of the case.
On the rear of the case, you get a 120mm exhaust fan, power supply slot up top, several screw in expansion slot covers, and a standard motherboard I/O panel. The rear panel is also removable to gain access to the fan.
Real-Time Price and Stock check – Shop Like a PRO!
Taking a Look Inside
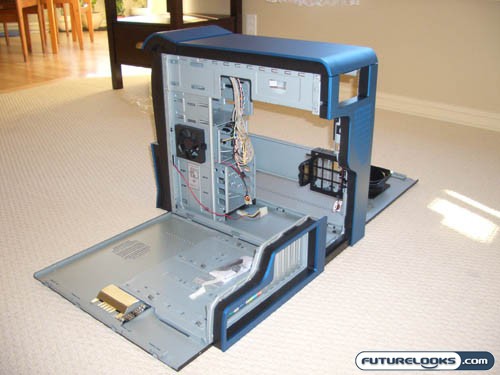
With the side panels flipped down, we get a really good look at the inside of this case. The side panels make it very easy to install the motherboard with plenty of room to work on installing all your other components as well. It is also very apparent that all edges are rolled or smoothed off so there’s no chance of cutting up your hands.

Included are 3 fans: 1 – 80mm rear fan, 1 – 80mm HDD cooling fan, and 1 – 120mm front case fan. There’s also a spot for another 80mm fan to draw hot air away from your video card. You’ll have to supply that seperately however as it is optional.
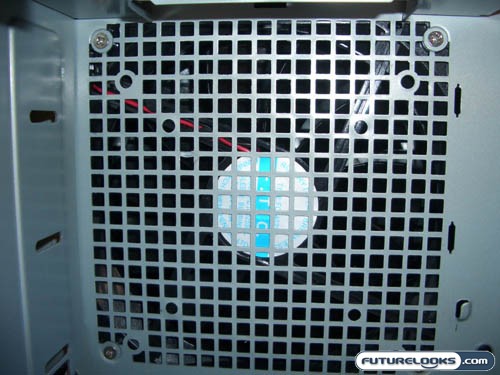
Taking a closer look at the 120mm front case fan reveals that it’s DC brushless fan, as are all the other fans. This will ensure noise is kept at a minimum. Unfortunately, there are no filters so dust could be a problem, but that’s nothing a good blast of compressed air once in a while couldn’t fix. However, being that there are so many other finite details in this case, I’m surprised this one was left out.
The “Enforce Bar” allows for the addition of an 80mm fan. This is located right across from where your videocard (or cards if your lucky enough to have an SLI setup) would be installed. This is a great location, especially if you have 2 videocards, as the space in between 2 videocards would have little to no air circulation. From it’s name, the purpose of “Enforce bar”, I assume, would be to help re-enforce the integrity of the case. Because of it’s weight, some reinforcements are required to keep the chassis from flexing when you’re moving the case around during transport.
Real-Time Price and Stock check – Shop Like a PRO!
More From The Inside…
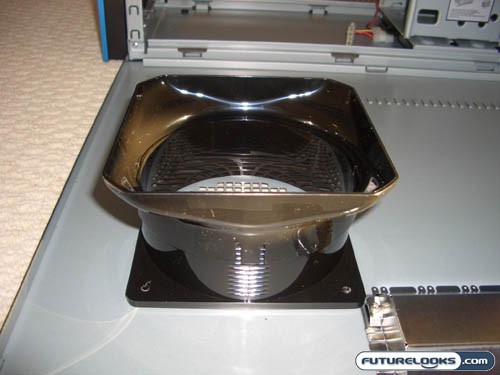
Looking at the CPU air duct, we are given a duct with 120mm diameter and height adjustability so that you can get it snug with your CPU fan. This will also help keep CPU temperatures down as hot air from the CPU is guided directly out of the case with minimal exposure to hot air from inside the case. This funnel is also removable since many aftermarket heatsinks utililze a “Tower” style. This funnel would probably work best with a stock CPU cooler or one of the large “Orb” style coolers.
It appears that a lot of thought was given to the cooling aspect of the case to ensure that your components don’t risk overheating. All areas that would be considered “hot spots” are well ventilated with active cooling or capability for extra fans. With the amount of fans in the case, we’re sure the temperature will remain cool.
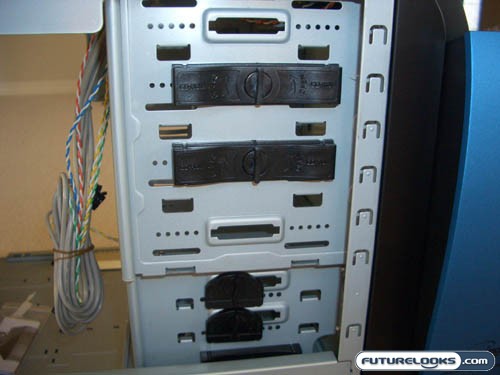
Continuing with the tool-less theme, the 5.25” and 3.5” drive bays include quick release clamps. This allows us to quickly insert our optical drives and hard drives of choice without the use of tools.
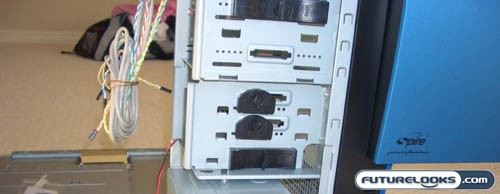

There is also a quick release clamp for a 3.5” floppy drive if you happen to require one. This should make installing all of our drives an extremely easy task.
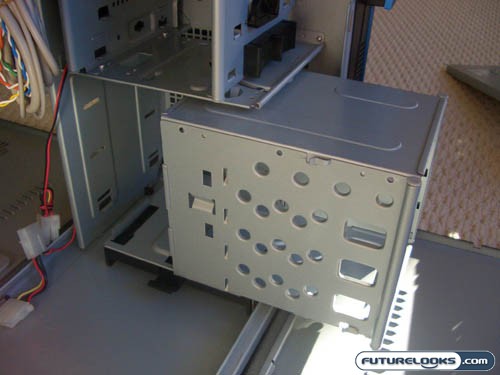
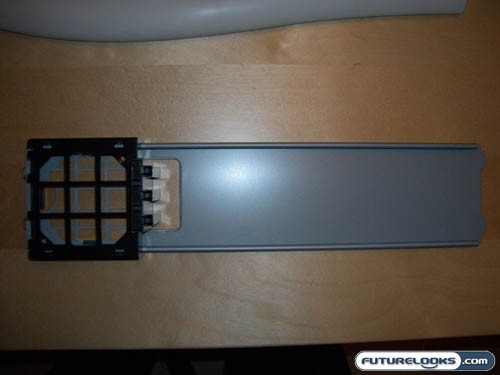
Another nice feature is the removeable 3.5” HDD cage capable of housing 4 drives. In order to remove it, you just use the latch to unlock the housing, rotate it towards you and slide it out. You can then install your HDDs and then reinstall it all without the use of tools.
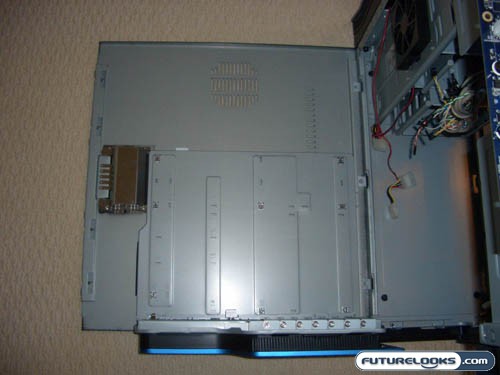
Finally, we have the motherboard tray with multiple risers. This case is capable of housing atx, micro atx, mini atx, and extended atx motherboards.
Real-Time Price and Stock check – Shop Like a PRO!
System Setup
Being that this is a fairly high-end case, we need to fill it with fairly high-end components:
- Intel Quad Core Q6600
- Foxconn P9657AA motherboard
- Patriot 2 x 1GB PC-6400 DDR Ram
- Seagate Barracuda 7200.10 250GB SATA300 hard drive
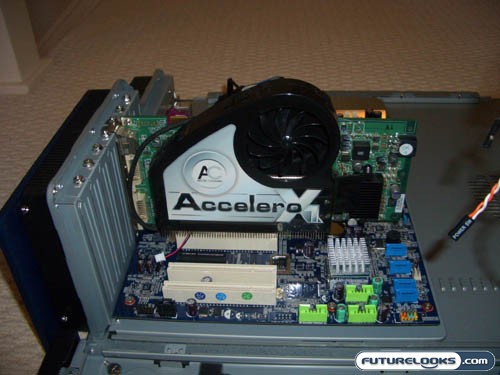
- Leadtek WinFast PX7800 GTX TDH 256MB Videocard with Arctic Cooling Accelero X1 cooler
- PC Power and Cooling Silencer 610 Power Supply
- LiteOn 20X DVD+/-RW SATA Drive
Our operating system of choice was Windows XP. Our Quad Core Q6600 Intel CPU will utilize the stock cooler while roasting away in the PCI-Express slot will be our Leadtek 7800GTX. Hopefully this will give the case the workout it deserves.
Onto The Installation
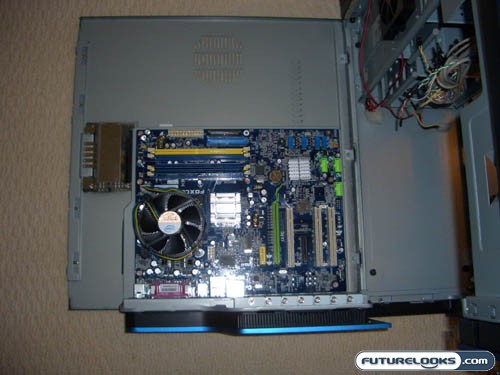
As this case has the ability to flip down the side panels, installing the motherboard was a breeze. Snapping in a few more motherboard risers, we lined up the motherboard, and secured it to the panel.
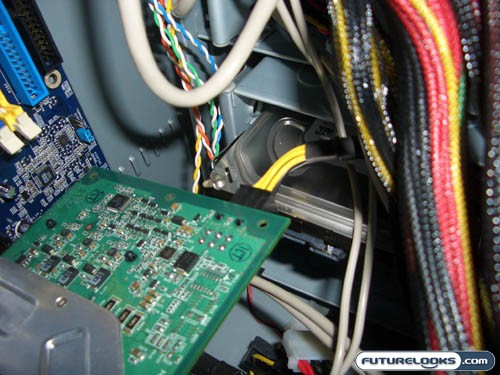
Next, we unscrewed a rear slot where we installed our videocard. Spire decided to use replaceable slots in case you screw up.
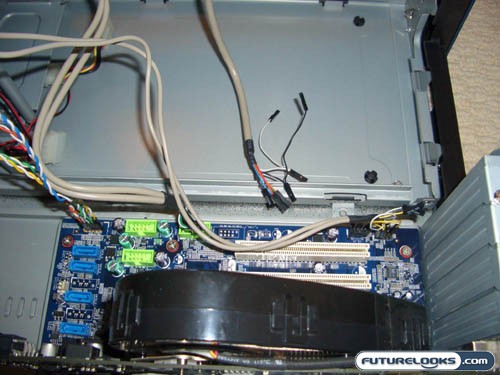
With plenty of length, and decent labeling, installing the two front USB, mic, headphone, power and reset button, and power and HDD status lights was very easy.
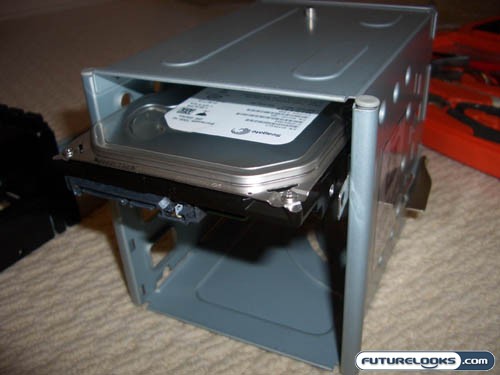
Since we had the HDD cage out, we installed the “tool free” drive rails to our hard drive. We then slid the HDD into the second slot and clicked it into place. Piece of cake!
Real-Time Price and Stock check – Shop Like a PRO!
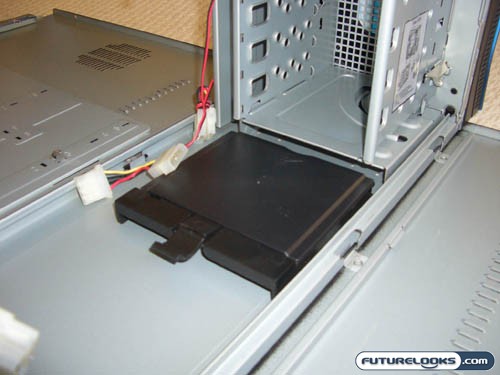
As with many cases, installing drives into the 5.25” drive bays requires a bit more work. First, we had to remove the front bezel. Then we had to bend away the metal cover to expose a slot. Following the “tool-less” theme, we opened the optical drive bracket, positioned the drive into place while lining up the screw holes, place the drive bracket back into place and voila! DVD drive installed!

When installing the power supply, we found it easiest to just pop the whole rear bezel off. Once we did this, the PC Power and Cooling 610 Power Supply screwed down easily.
With all our power connections completed, we proceeded with returning the accessory kit back into place. I personally really like this idea as I usually misplace these screws and miscellaneous pieces. I now know where to find all these pieces when I need them for next time.
Now with all of our components installed, we started to close up the case. First, making sure that we were clear of any obstructions, we flipped up the motherboard back into the case. However, we ran into a bit of an issue with the HDD location and the videocard. Being in the second slot, the HDD interfered with the PCI-E power connector of the video card. The solution was pretty easy though: Move the HDD one slot down. Luckily (or not so lucky) for us, we only have one videocard. Those with an SLI configuration may be required to install the HDD lower down on the cage, or use the fixed 3.5” drives above. This may cause some issues with people running multiple drives that require the use of all the bays.
Real-Time Price and Stock check – Shop Like a PRO!
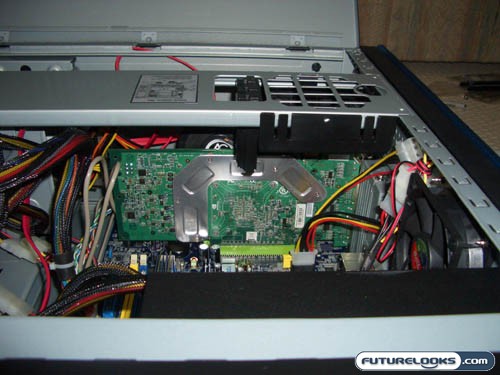
We then began the close up the other side by reinstalling the “Enforce bar”. We ran into a little issue with the spacing between the fan bracket and the aftermarket GPU cooler. We had to ever so lightly, massage the Enforce bar back into place and closed up the side panel. With a stock cooler, we would not have this issue.
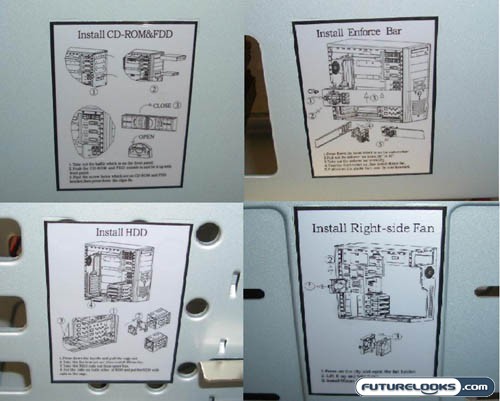

One thing to note was how easy it was to work on this case. Part of this was contributed to the instruction stickers located throughout the case detailing instructions for different tasks. No need to thumb through the manual when the instructions are right in front of you.
The Finished Product
With everything in place, we have a nice tidy system. There was plenty of room to route the cables so that we have a clean setup.
The last thing to do is close up the sidepanels of the case, attach power to the other peripherals and fire it up for some performance tests.
Test Setup
Idle conditions were set with Windows XP SP2. I booted the system and let it idle for 30 minutes before taking noise and temperature readings. The loaded conditions were established using a looping of 3Dmark2006 demo. Let’s see what we get.
Noise Levels
Being the gorgeous case that this is, many of us will be placing this on top of our desk so that jealous on-lookers can ooh and ahh at our beautiful case. And if you’re like me, I can’t stand a noisy case especially if it’s at ear level. With 3 case fans, 1 power supply fan, 1 OEM CPU fan and 1 videocard fan, I was expecting a fair bit of noise. I would have to say that this is not the quietest case I’ve heard as it sounds like it is moving quite a bit of air through the case. With our setup, noise levels averaged around 52 dbA.
Temperature Levels
Since we have cooling in the proper places, I’d expect superb cooling from this case. The front 120mm fan drew air in from the sides and bottom of the case to provide cooling to our hard drive. The side 80mm fan help to exhaust hot air that could be trapped underneath the optical drives, and by the other HDD rails. The rear 80mm fan kept the hot air from staying stagnant around the CPU / memory modules and exhausted the air out the back.
Under idle conditions, our Intel QuadCore Q6600 CPU maintained a 32C temperature while system temperature was at 36 C. Under load conditions, the CPU temperature only went up to 36 C while system temperature crept up to 38 C. If we had the fourth 80mm fan drawing air from the videocard, I would predict seeing even lower system temperatures. However, with the current setup, it is more than enough to keep our components and optimal operating temperatures. Depending on the type and number of components you may have in your system, temperatures may vary. Not to mention, the addition of extra fans will just make the system noisier.
Real-Time Price and Stock check – Shop Like a PRO!
Final Thoughts
This case is definitely a looker. It will outshine many other cases in this department alone. Although the case has many neat and innovative ideas, it is not perfect. However, you really do have to nit-pick to find any major flaws. The case is decently constructed with excellent fit and finish. It was a very enjoyable case to work on and to assemble. It features plenty of room for components and the numerous extra features like the tool box made me think “Hey, that’s a good idea! Why didn’t anyone else think of this?”
Spire, along with Pininfarina, has created a case that not only has the “show”, but definitely has the “go”. It is a case that you can show off to your friends and even hardcore computer techies will go “oooh!” and “ahhh!” when they get a glimpse of it. With a street price of around $110, it is of exceptional value when compared to other cases in similar price points. Despite the extra noise created with the included fans, I believe that with some quieter fans and an aftermarket cooler for the CPU, we could definitely get to a barely noticeable noise level from just noticeable quite easily.
Overall, I feel that what you get here is a supercar at a family sedan price. I’d definitely recommend this case to anyone that wants something sophisticated and well built. Did we mention the Ferarri ENZO people designed it?
Pros:
- Beautifully designed case, elegant yet modern – it’s definitely a Ferrari of computer cases!
- Tool-less assembly for side panels and drives
- Removable side panels makes installation very easy
- Very neat and innovative features (i.e. removeable HDD cage, hidden storage compartment, Enforce bar)
- Optimal placement of fans for decent cooling
- High quality construction
- Excellent value
Cons:
- Noise levels – supercar looks, supercar noise!
- No handles to pick up the case, in fact, there is no good place to pick up the case except for the bottom
- Weight – with everything installed, the case tipped the scales at just over 40 lbs
- Flimsy front covers that could easily snap off if you’re not careful
Overall Rating: 8.5 / 10.0


Discuss This Review in the Futurelooks Community Forums
Real-Time Price and Stock check – Shop Like a PRO!