
Photography is one of those hobbies and industries that have dramatically changed in the last 5 years. Most avid amateur photographers, including myself, used to shoot 35mm film. Now many of us only shoot digital. The days of 35mm gave me a stack of negatives, but I knew one day, there would be something to help me archive them into the digital age. plustek, a world leader and provider of imaging solution products, sent us the OpticFilm 7500 AI Slide and Negative scanner. The OpticFilm 7500 AI Slide and Negative scanner is deemed as one of their professional series negative scanners. It might be a bit overkill and over the top for the average consumer, but lets check it out and see what happens.
As an “Average Joe” amateur photographer that is looking for a way to digitize my 35mm negatives, I do know what I like in a product. Through some brief research online, I found that most cheaper negative scanners scan at lower resolutions and have less features than more expensive negative scanners that scan at higher resolutions. I figure if I am going to archive and digitized my negatives, I want to scan them into my computer at the best possible quality.
Features and Specifications
The plustek OpticFilm 7500 AI has an impressive array of talents which include…
- 7200×7200 dpi optical resolution
- SilverFast Ai Studio iSRD+Multi-Exposure Software Bundle
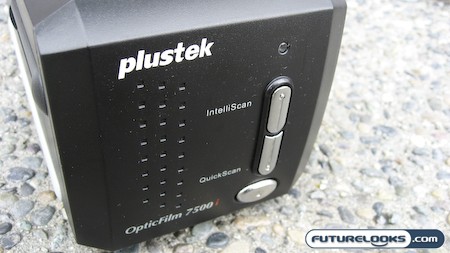
- Intelliscan and QuickScan one touch buttons
Technical Specifications
- Technology: Color CCD Image Sensor
- Hardware Resolution: 7200×7200 dpi
- Maximum Scanning Area: 24.3 x 35mm
- Scanning Mode: Color: 48-bits input, 24/48-bit-output
- Greyscale: 16-bits input, 8/16-bit output
- Interface: USB 2.0
- Power Consumption: 15W (operation) 5W (idle)
- Net Weight: 1.6 kg (3.5 lbs)
- Dimensions (WxDxH) 120 x 272 x 118.5mm ( 4.73” x 10.7” x 4.7”)
In order to operate this beast, you will need to have a Pentium III or higher PC running Win 2K, or XP/Vista. Mac users will need OSX 10.3.9 or higher. Both will require 512MB of RAM and AT LEAST 500 MB of hard drive space. If you’re going to archiveall your negatives, I recommend geting a whole ton more storage.
What’s in the Box
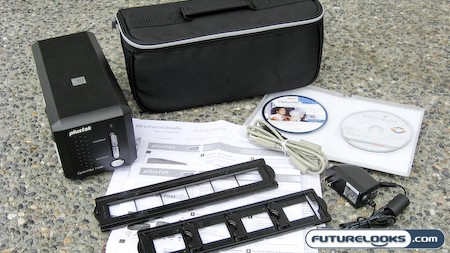
Inside the box, you’ll find the following goodies:
- Film Scanner
- USB Cable
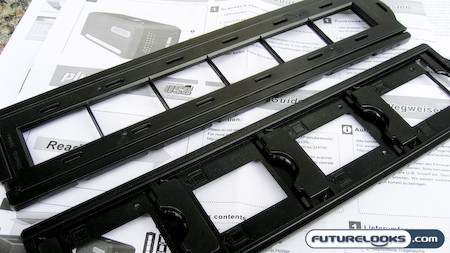
- One mounted slide holder, one filmstrip holder
- Power Adaptor
- 3 Quick guide manuals
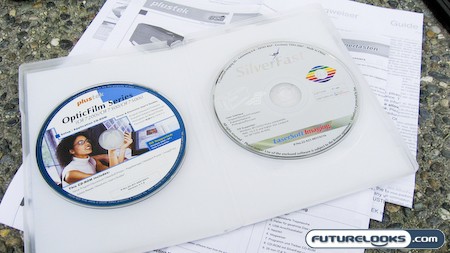
- Setup Application CD-Rom
- SilverFast Ai Studio Software
- Padding Carrying bag
Overall, it seems to have everything you’ll need to get the job done. So far, no overkill here. I really don’t know how often the carry bag will be after I scan all my stuff into the digital age.
First Impressions
My first thought when I looked at the plustek box was some confusion. It was obvious from reading the English text on the box and the 3 quick guides that whoever wrote the English text, English was not their first language. The back of the box and the 3 quick guides were convoluted with text as the instructions and the back of the box had 11 different languages available. I can understand the rational for printing multiple languages as this eliminated the need to reprint documentation for different markets.
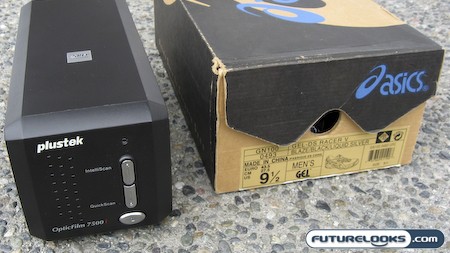
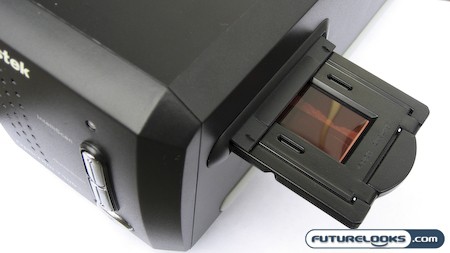
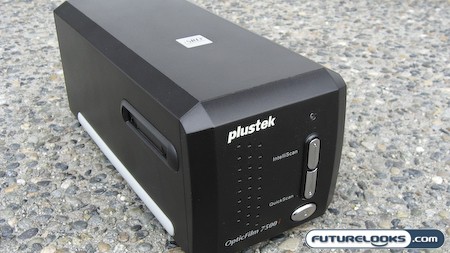
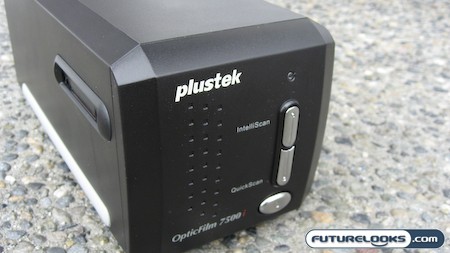
The actual physical scanner is nothing special. It is about half the size of a regular shoe box, with 3 buttons on the front: Power, Intelliscan and Quick Scan. There are no moving parts except for the slide and negative holders that go into the side of the scanner.
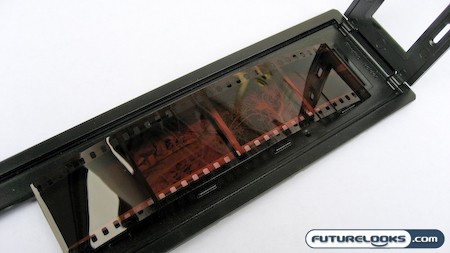
I thought the film and negative holders seem a bit flimsy for a higher end product. When you close the lid on the negative, the negative seems to still move around inside the enclosure.
Installation and Setup
After unpacking all the box contents and having everything in front of me, I was ready to hook the scanner up to my computer. One would think that a piece of hardware like this should be relatively straight forward. Plug it in via USB, install the driver and you are good to go.
Of the 3 quick start guides, I had no idea which guide to start with first so I started with the plustek “Read Me First Guide”. This guide walked me through the connection of the hardware and installation of the driver software. This was relatively straightforward using the plustek OptiFilm Setup Application CD Rom.


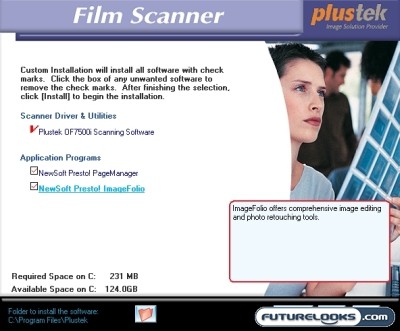
There are two pieces of other software on the driver CD:
- NewPresto Page Manager – this is a file organization program
- NewSoft Presto ImageFolio – this is an imaging editing and retouching program.
I figured that I would choose not to load Page Manager and Presto ImageFolio as I like to organize my folders my own way and like most people I already have other imaging editing and retouching programs that I am comfortable using such as IrfanView and Adobe Lightroom. If you do not have image software that you already use, then utilizing NewSoft Presto ImageFolio would be a viable option.
After the scanner is installed, the scanner icon installs itself in the windows system tray by the clock.


Double Clicking this icon or going via the Start, Program menu, you can access the QuickScan settings window.
Using the Software

Most of the options are pretty straight forward and intuitive to use. Of all the changeable options, the 4 most important changeable options in this menu to me were:
1. Selecting between 4 different file formats ( TIF, JPG, PCX, or BMP) that you want the scanned file to be saved as.


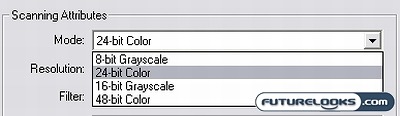
2. Selecting from a number of color modes. 8-bit Grayscale, 24 –bit color, 16-bit Grayscale, and 48-bit Color.

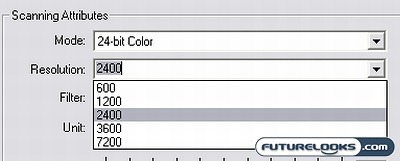
3. Choosing the resolution you want the image to be, 600 dpi, 1200 dpi, 2400 dpi, 3600 dpi, and 7200 dpi.

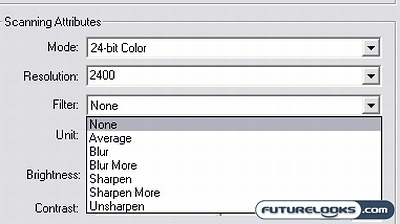
4. Apply a number of filters to the scan if you also like. Blur, Sharpen, Average, Unsharpen etc.

The true power of this scanner really comes from letting the user choose the resolution and the color mode of the scan.
Checking Out The Hardware
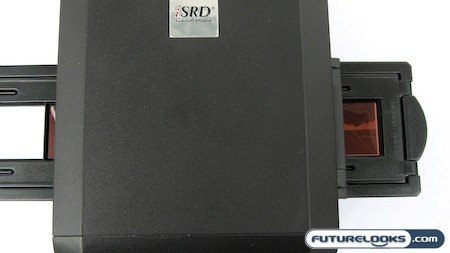
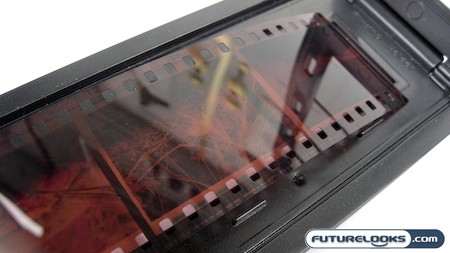
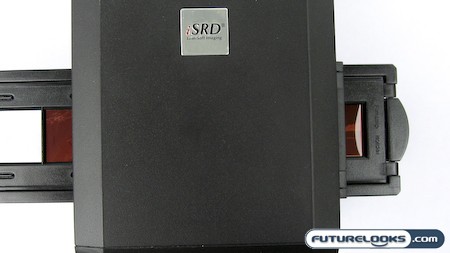
After setting all the options you want, the last step is to loading the negatives in the negative holder and insert the holder into the side of the scanner . The scanner does not automatically feed the holder through, so you will need to manually feed the slide holder to the image you want to scan .
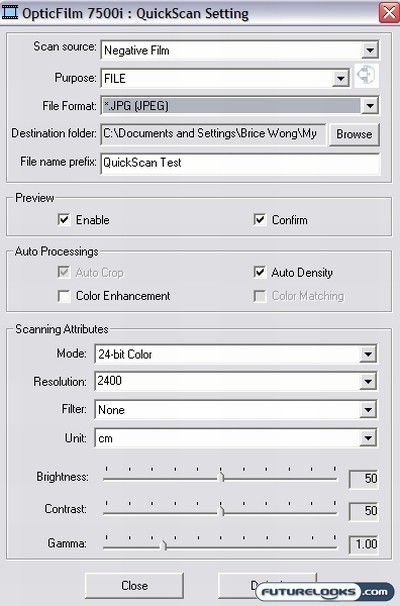
You can get the preview of your scan to come up by making sure you select the “Preview” and “Confirm” options on the settings menu. I like this preview as when you hit the “QuickScan” button on the scanner, you get a window that looks like the following:
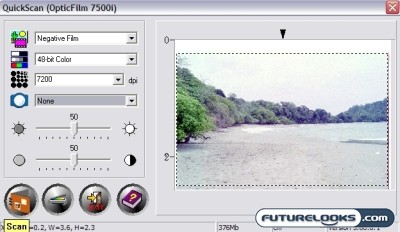

As you can see, I have asked for a file that is 48bit color, 7200 DPI and I can sort of crop my picture the way I want in the preview window. A 7200DPI scan is a whopping 378MB in size! So much for having only 500MB of minimum storage.
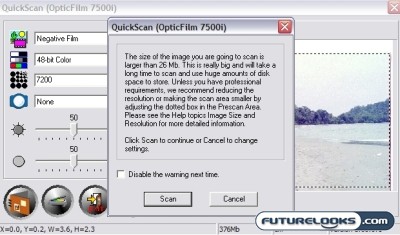

Files sizes that are this large, prompt a warning window to pop up when you hit the scan button. It asked you if you really need a file that is over 26MB in size!
How Long Does It Take?
I did some scans using a moderate machine that might represent what most folks will be using. It was a Pentium D820 running at 2.8 GHz with 2GB of RAM.
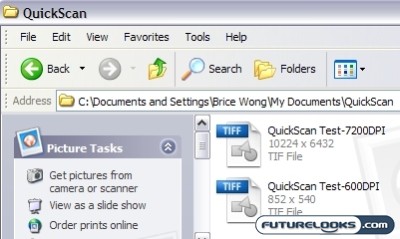

The 378MB, 48 bit color, 7200 DPI scan took about 4 minutes and 30 seconds to scan and resulted in a file that was 10223 x 6432 vs a 1.31mb, 24 bit color, 600 DPI scan takes about 7 seconds resulting in a file that was 852 x 540.
After the scans are complete, you can then take the scanned files and make further adjustments and modifications to them in the imaging software program of your choice. Professionals will likely use Adobe Photoshop CS3 or some other high powered graphics program. Seeing as I’m not much of a Photoshop CS3 pro, I stuck with Adobe Lightroom and IrfanView for very simple color/exposure modifications.
If this is all you need the plustek scanner to do then everything will work wonderfully well for you. Hit the QuickScan button and away you go.
What about the IntelliScan Button?
The OpticFilm 7500 Ai Slide and Negative scanner comes bundled with another imaging and scanning software from LaserSoft called SilverFast Ai Studio. If you have SilverFast AI Studio installed on your computer you can hit the “IntelliScan” button on the outside of the scanner and SilverFast Ai studio will automatically launch with the scan of the image for immediate image editing.
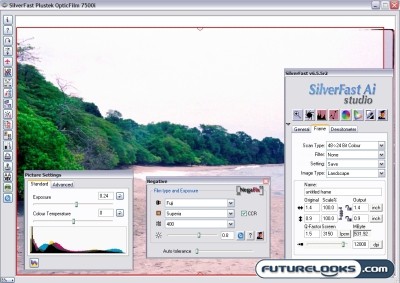

SilverFast Ai studio seemed to display characteristics of a very high end piece of image editing software. So much so that the options that pop up are quite dizzying. Each of the buttons that you see along the left of the main window and the all the option tabs in the smaller windows have many fine tuning options that you can optimize and change to affect the image. I had a really hard time trying to navigate around the windows and make the changes to my scans without somehow royally screwing them up. I believe these options and this software would be beyond the average user. I am sure if you were a trained graphics artist you would be more familiar with the imaging lingo, options and features. For me, I’d have to stick with the standards.
I also found SilverFast a bit confusing to install. When you start the installation program, the software asks you if you want to install the software for Photoshop/Stand-alone or TWAIN plugin as below:
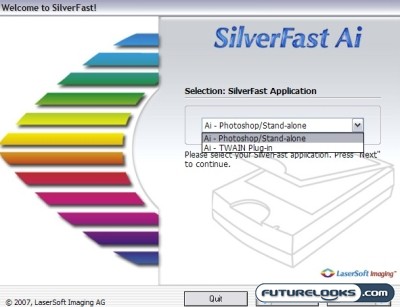

I interpreted this as, “If I don’t have Photoshop then I want the unit to work on its own – ie “Stand Alone”. I wasn’t immediately able to figure out what the “TWAIN” option implied and I don’t think the average person would either. In the end I installed both applications and everything seemed to work fine.
Scan Quality
Probably the most important question to ask is are the output files of this scanner any good? I have provided three examples below for discussion.


Crop of the 7200DPI scan

Crop of the same area at 600 DPI

Original 35mm developed print (for reference only)
The scanner is so detailed in the scanning process that it will pick up pretty much any foreign matter you have on your negative. In this case, the 7200 DPI in particular shows some serious dust artefacts that are not in the printed original. This leads me to believe that my negative was dusty or the internal scanning mechanism had some dust on the surface. You can see the dust and specs all over the scans; they look like snow!
The scanner in both 7200 DPI and 600DPI resolutions seem to wash out the colors of the photo. I find the colors and textures in the original picture much more rich than the scan. The trees in the original photo are much more of a lush dark green as with the emerald color of the water near the shore of the sand. The sand on the beach in the scans seem to be more white and washed out instead of being a textured, brown shade.
These problems are relatively easy to fix in most image editing programs. Lightroom, Photoshop and Silverfast all have a dust removal tool that will help with the dust specs. It is advisable to start with a clean and dust free negative if you can as it will save you time in post processing. As for the color, once the digital picture is in an editing program, you can pretty much mess around with the colors until you find something that is appealing to your eye, or as close to your print as possible. This is all great if you have lots of time on your hands, but it is sort of annoying that the scanner doesn’t give a file that is closer to the look of the original print as the washed out colors of the scans do need some tweaking. If the built in Silverfast Ai actually used some “Ai” and presented us with some easy to select choices, I think I’d be more inclined to use it, not to mention, save a lot of time.
Final Thoughts
After using the OpticFilm 7500 Ai Slide and Negative scanner I think the true power of this unit is way overkill for the average Joe consumer. Really, what average guy really needs files that are 7200 DPI at 375mb each? I really think the performance of this unit is definitely designed more for professionals that need 7200 DPI resolution files from a negative that is no larger than 1 inch by 1 inch. To give you an idea, the amount of information in this small space scanned at 7200 DPI could enable the user to enlarge the scan to produce an image big enough to wrap the side of an office building in downtown Manhattan…sort of, but you get the picture.
Average users looking to archive 35mm negatives could probably get away with something less expensive and maybe something in PlusTek’s OpticPro ST Series of imaging products designed for general consumer and home use.
Regardless, the OpticFilm 7500 Ai Slide and Negative scanner does work. However I do have some issues with the SilverFast AI Studio software and the quality of the digital files after scanning the negatives. Although you can request from 600DPI all the way up to 7200DPI resolution from the scanner, the scanner is so sensitive that it seems to pick up absolutely every spec on the negative. This is a bit of a pain in the rear, as this requires additional steps in the image editing program to get rid of these specs! If your negatives have been sitting around for years and years, they may be dirty or have a weird film on them from being stored over time. If you want to get as clean of a scan to start with, it is advisable to start with clean negatives.
The other issue with dust and weird particles is the ability to clean the inside of the scanner. It is one thing to start with a clean negative, but what happens if some dirt or dust managed to get inside the scanner on the scanning surface? There is no way to open the unit to check and clean the scanning surface. I suppose you could stick the straw of a compressed air can inside the unit and give it a blast, but you have no idea what you are blasting and cleaning!
I illustrated above that the OpticFilm 7500 Ai Slide and Negative scanner seems to produce images that are much more washed out than the original picture whether it is a high resolution or low resoution scan. I guess this doesn’t really matter if you are going to edit the heck out of the scans and tweak things to what pleases your eye, but it would have been nice to have the scanner produce files at any resolution that are a bit closer in color to replicating the original print. The SilverFast Ai Studio software was no help in this respect beause I found it to be confusing and somewhat over my head for most of the things I would do.
At $600 USD, this is no cheap piece of hardware and archiving negatives will take some time with this unit as you need to manually push the film strip holder through to each image you want to scan. It would have been nice for the film strip to move to the next slide automatically. The Silverfast Ai software could really use some Ai and just give the user a few different scenarios instead of smacking them in the face with a bevy of adjustment options. However, if money is no object, you have lots of time on your hands and like to edit hundreds of digital photos and you want the absolutely best possible quality out of your 35mm negative then this is the piece of hardware for you. Just make sure you have the horsepower and storage to process 7200 DPI files that are 300-375 MB each.
Pros
- 7200 DPI Scanning ability out of a 35mm negative
- No moving parts and relatively easy to use after hardware is installed
- Good professional grade piece of hardware
- QuickScan menu settings are easy to use.
- Nice carrying bag for transport
- SilverFast Ai Studio is good value added software if you don’t want to buy Photoshop etc.
Cons
- Expensive and way over kill for the average consumers needs
- Too many languages on the box and instruction manuals
- SilverFast Ai Studio is confusing to use
- High resolution scans take at least 4 minutes per image
- Manual feeding of slide holder through the machine takes a while
- Slider holder seems a bit flimsy and the negative still move around inside the enclosure
- Output files are a bit washed out and colors are off compared to the original print without adjustment
Overall Rating: 7.5 / 10.0


Discuss This Review in the Futurelooks Community Forums