
Many enthusiasts are starting to gravitate towards clean looking cases. And companies like NZXT are willing to deliver them. While this trend has gone so far as removing even optical drive bays, end users still occasionally need DVD/physical media to build systems or install games. However, the majority of physical media has shifted away towards downloadable content. Even the best system integrators are now offering systems that don’t include optical drives. For workstations, it means one less security hole in an important system.
The NZXT H440 enclosure we are reviewing today, sports a clean design that pleases the eyes but follows the digital trend. You won’t find any ROM dive slots or other clutter. The facade is smooth, artistic and even logical. Let me show you what the face of clean looks like.
NZXT H440 – Specifications
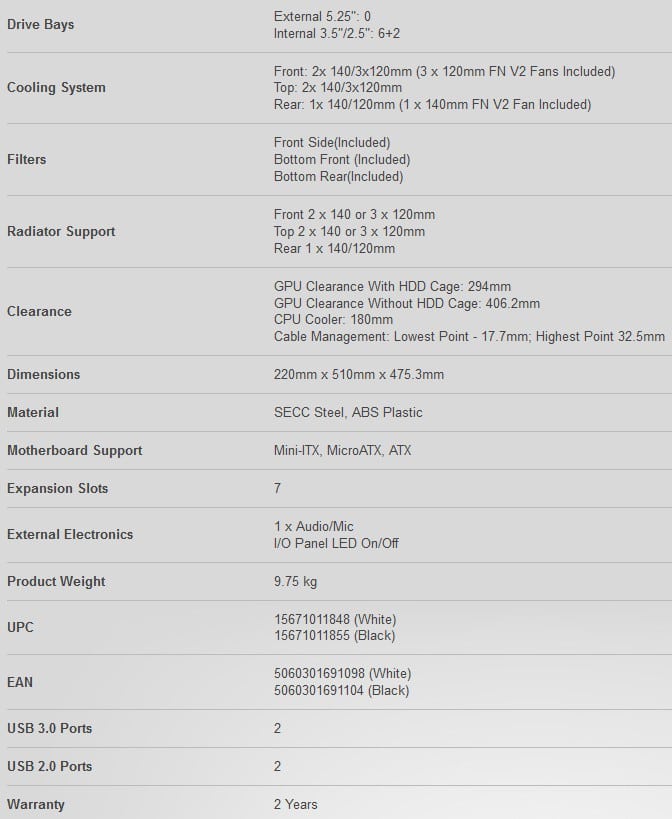
This is all the pertinent specifications straight from NZXT and confirmed to be inside the H440. The case is designed to support water cooling whether custom or all-in-one like the company’s own X41 (140mm) or x61 (280mm) systems. And of course, you can even mount up one of their own Kraken G10 GPU cooling brackets, and throw another X41 in there somewhere.
The main shell of the case is made from SECC steel while the bezel, top, and lower internal cover are made of plastic of very high quality.
NZXT H440 – Features

Cooling and functionality appear to be the main focus of the H440. However, there aren’t any front accessible 5.25″ bays. They’re all internally accessible only. This adds to the clean looks of the system, that eschews optical drives and other clutter.
Three front 120mm fans fill the front of the chassis and connect directly to a 10 channel 3pin fan hub on the back of the motherboard tray. This area can also be used for a single (140mm), dual (120 or 140mm), or triple 120mm radiators. The rear 140mm fan can be removed to support a 120 or 140mm radiator. And of course, NZXT would love if you simply threw a trio of their very own cooling systems into the loop. Or you can build your own.
It appears, water cooling is indeed the NZXT H440 mantra.
What’s in the Box?
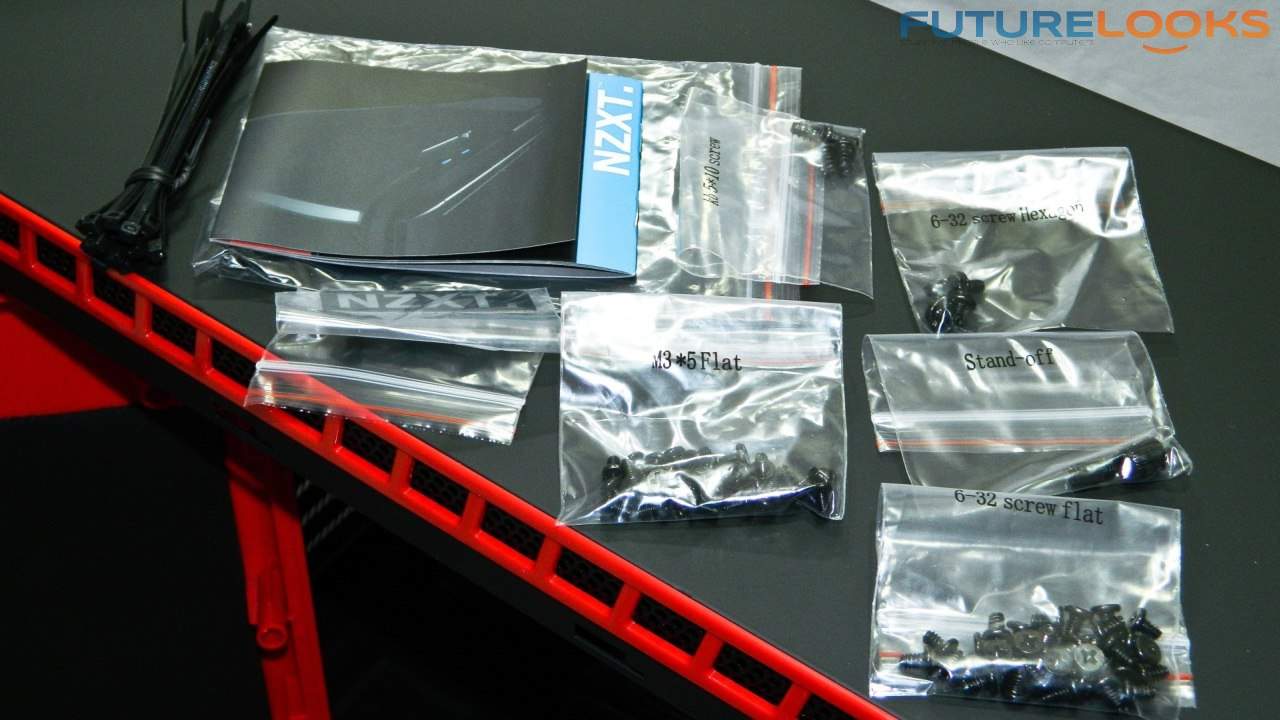
NZXT includes more than enough screws and accessories to fit a basic system, along with the manual to help guide you through. The screws are black to match the cosmetics of our red and black chassis, and allows the attention to be completely focused on the components. Even the standoffs come with a small tool to help attach them to the motherboard tray.
Plenty of zip ties are included, however, these are a dime for 1,000 as well as a one time use. Velcro straps would be a nicer touch not to mention reusable. An added bonus would be the ability to quickly reposition cabling, or to assist in bundling of cables.
A Look Outside the NZT H440
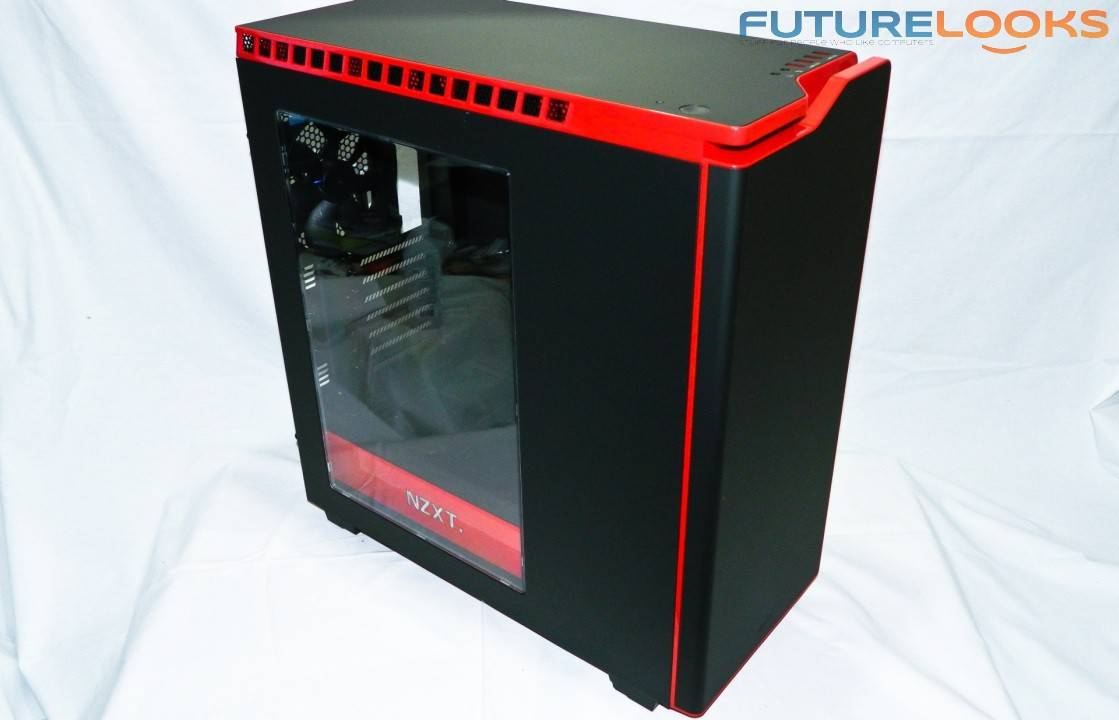
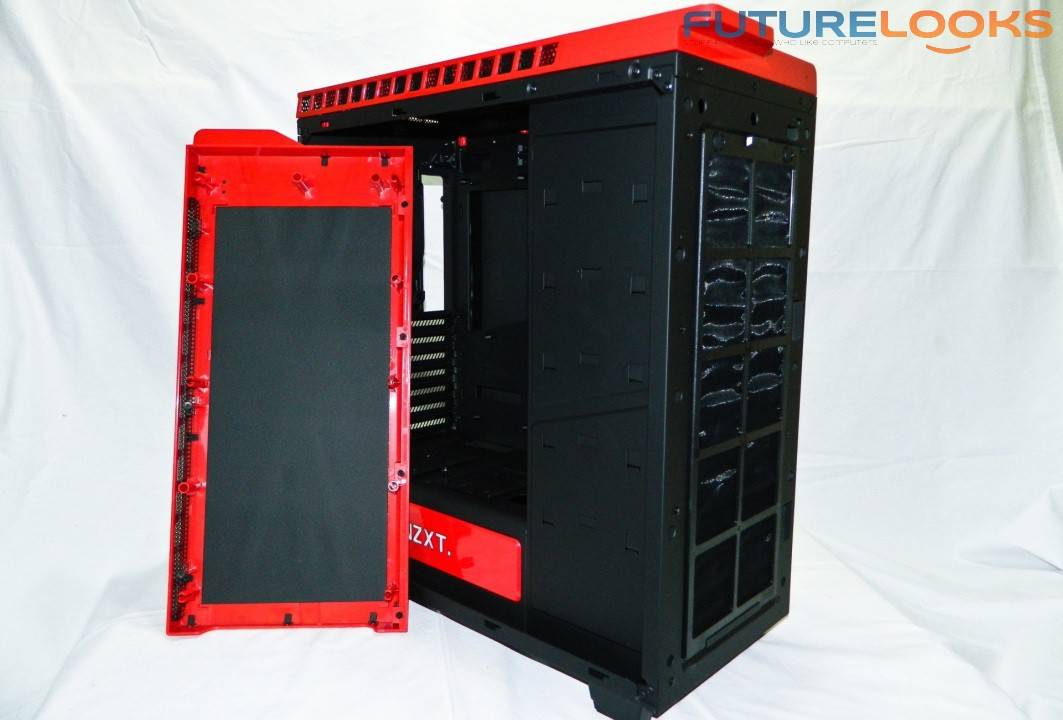
The NZXT H440 is a seriously clean enclosure. Matching red venting does a great job of accenting the top and front bezels. Both can easily be removed by simply pulling evenly on the parts, which reveals the chassis beneath. Both also have a very fine rubber like finish, which is pleasant to the touch, and aids in carrying when transporting your machine to a LAN party. On the downside, the soft finish also marks a easily if you have greasy fingers.
The front almost looks like a door you can pull open, but we assure you, it cannot be pulled. A simple side window displays a jet black interior, to help show off any lighting effects your components create.

The back of the chassis features an LED that lights up the rear IO and PCI area, which is a great feature that first appeared in their Switch 810 chassis and continues to be one of our favourite ones. There are also rubber grommets for any external liquid cooling, 120/140mm fan port with 140mm fan, PSU plate cover which is fastened by thumb screws, and bottom rear vent. The vent is removable which makes it easy to clean. The thumb screws are ring fastened so they don’t fall off but just loosen instead, allowing us to work with them easily.
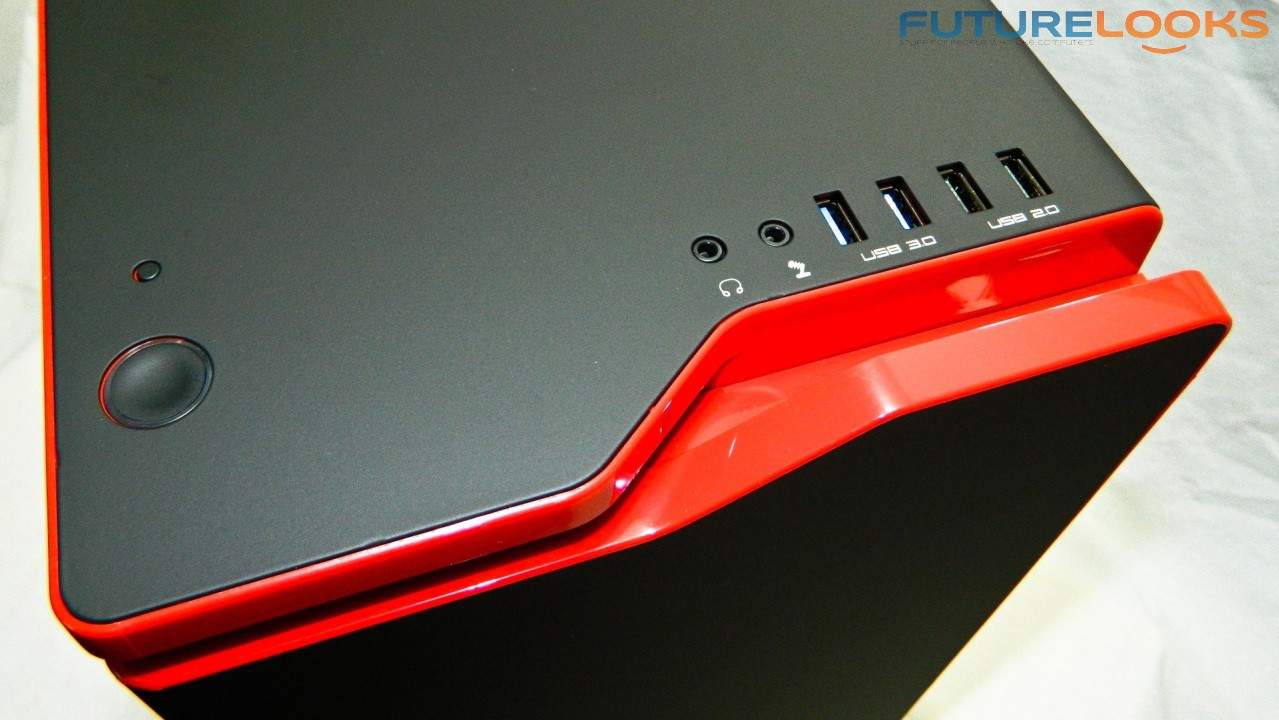
The top of the enclosure houses the external connectivity ports. At the front, there is a smooth power and reset button, which is retracted enough to avoid accidental pushes. Users also get two USB 2.0 and two USB 3.0 ports along with a set of headphone and microphone jacks.
A Look Inside the NZXT H440
Pulling the front panel cover off first, reveals a good chunk of sound dampening material, which helps with keeping fan noise to a minimum. It also revealed that the front vent cover, is simply held on by a magnet in each corner. This means that it’ll come off easily for quick cleaning if the need arises. And the filter itself does help to reduce the amount of internal dust down. No one likes to clean dust out of a case, and too much dust can obviously reduce the effectiveness of heatsinks and fans.
The side panels also have some padding to help cut down on noise as well. Looking inside, we can see a massive motherboard tray cutout, which is essential for the installation and maintenance of CPU cooling solutions. There are grommet holes for wires all the way down the length of the chassis.
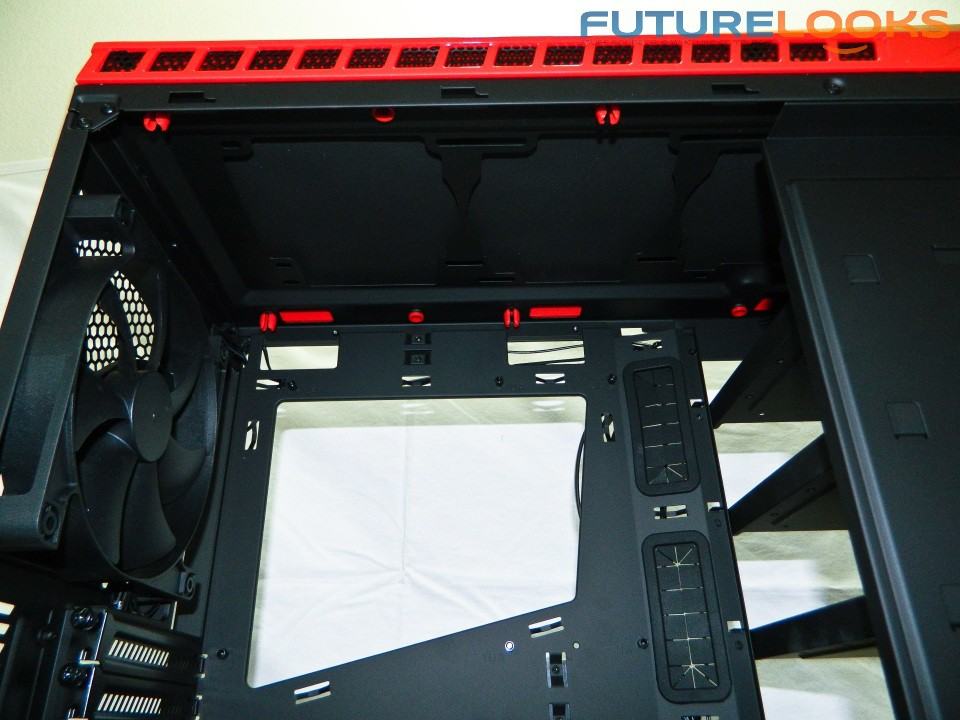
The top of the chassis reveals three more fan ports, and even more sound dampening material attached to the top panel. There is actually enough space on the inside for a dual fan radiator. It might get kind of tight depending on your RAM and motherboard heat sinks, but the possibility is there with the right combination of components.
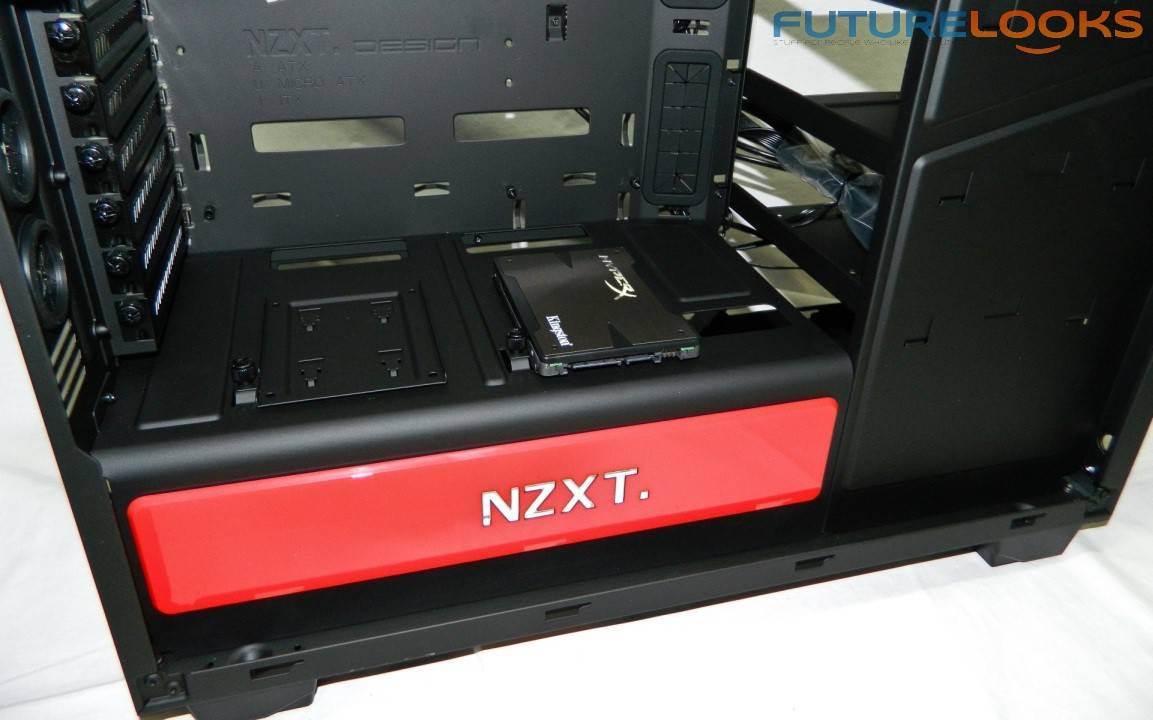
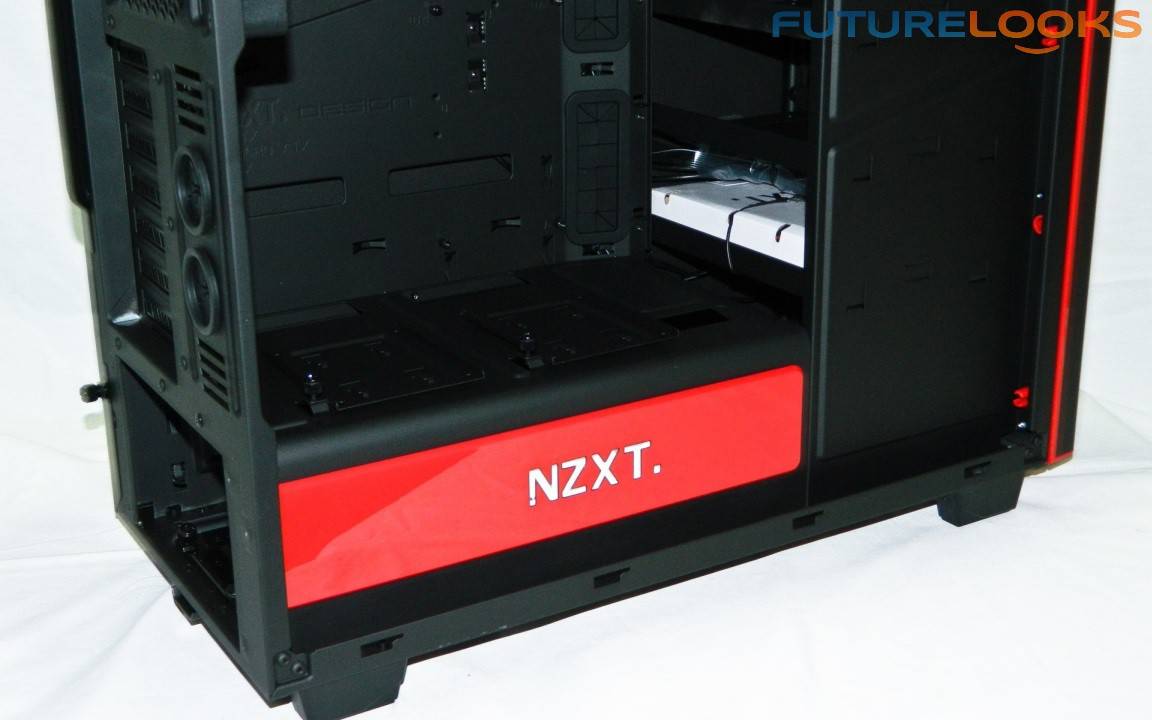
At the bottom of the case, just above the covered power supply area are two thumb screw mounted SSD trays. They slide in and off easily when loosened, and is a great place to put them, seeing as the space in most cases, is not used very well, usually empty.
As mentioned, the PSU area is closed off via the NZXT cover, which gives the case a very finished look. The NZXT logo lights up when the rear LED light button is turned on. There doesn’t seem to be a way to independently turn that on without the rear LED light which can be a little annoying at LAN parties. Modding may be required if you really want to kill it.
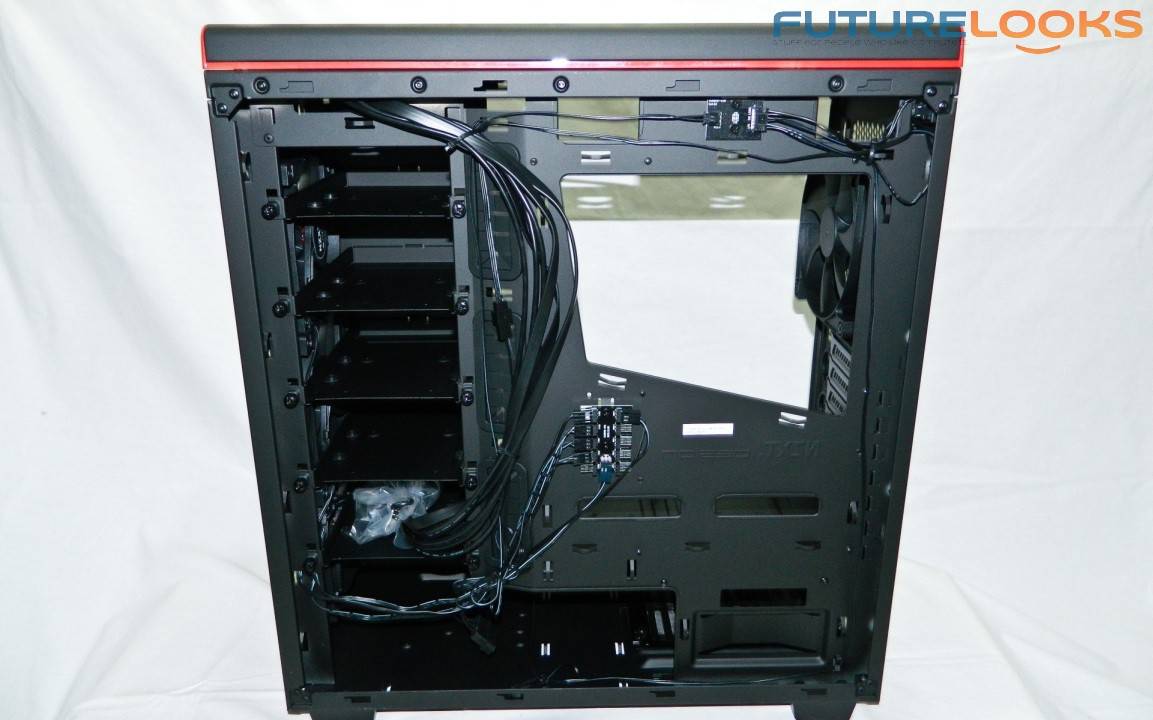
Behind the motherboard tray, the NZXT H440 looks pretty uneventful, but very well laid out for a clean finish. There are a lot of places to attach zip ties or Velcro straps, allowing you infinite options to manage your cabling properly. A good chunk of space in the gutter allows for even the laziest cable management job, and the successful closing of the side panel.
There are also four removable drive trays on the left, but there aren’t any for 5.25″ devices. All of them are for 3.5″ hard drive, and are setup for mounting 2.5 inch drives.
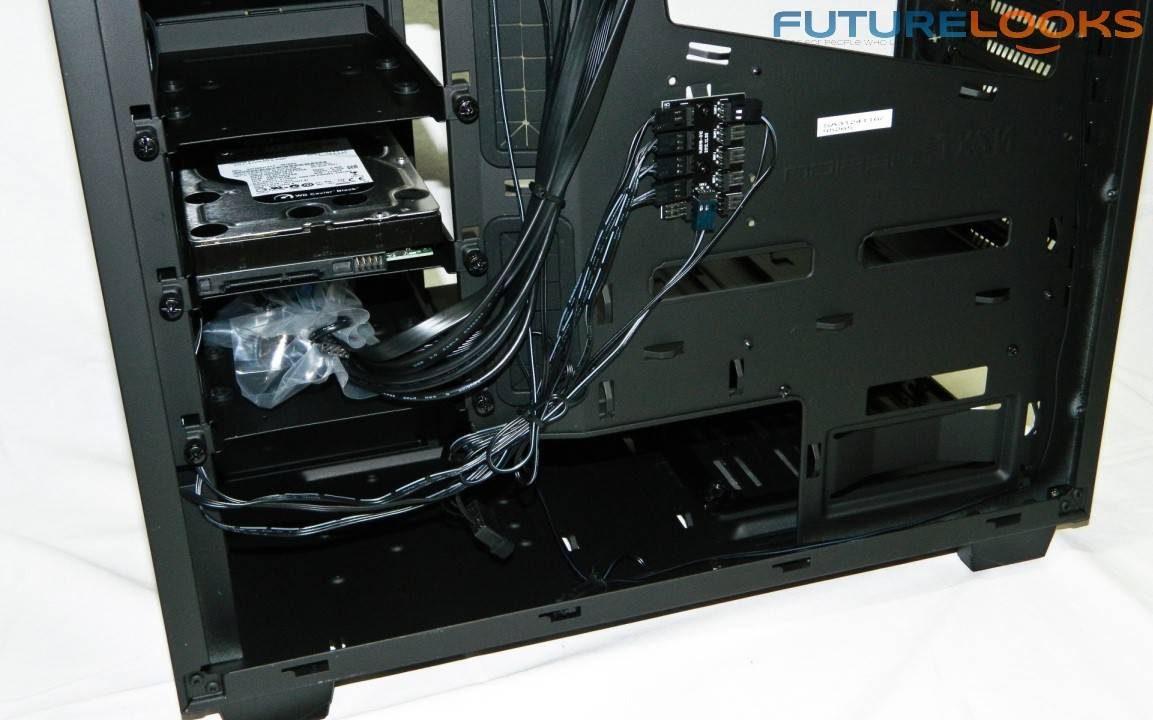
Here you can see the tray with a 3.5 inch hard drive installed, but you can easily mount a 2.5 inch device up. NZXT included more than enough screws in the package to give you good choices. It’s easier to see the 10 channel 3-pin fan hub which connects directly to the PSU via a 4pin power connector just hanging there in the middle of the motherboard tray. It’s a good spot to keep extra power supply cabling for example, and running fan extension cables to this point, provides a centralized location for all your fans. You can even label them, making life easier when a replacement is needed.
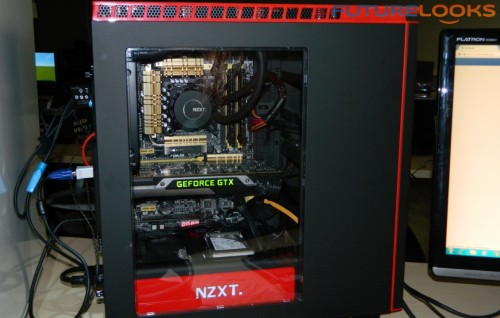
Now that we’ve given you a look at the most interesting parts of the NZXT H440, let’s put some components inside, to see how it deals with the rigors of every day use. In particular, it’s ability to handle heat and control it.
Test System Setup
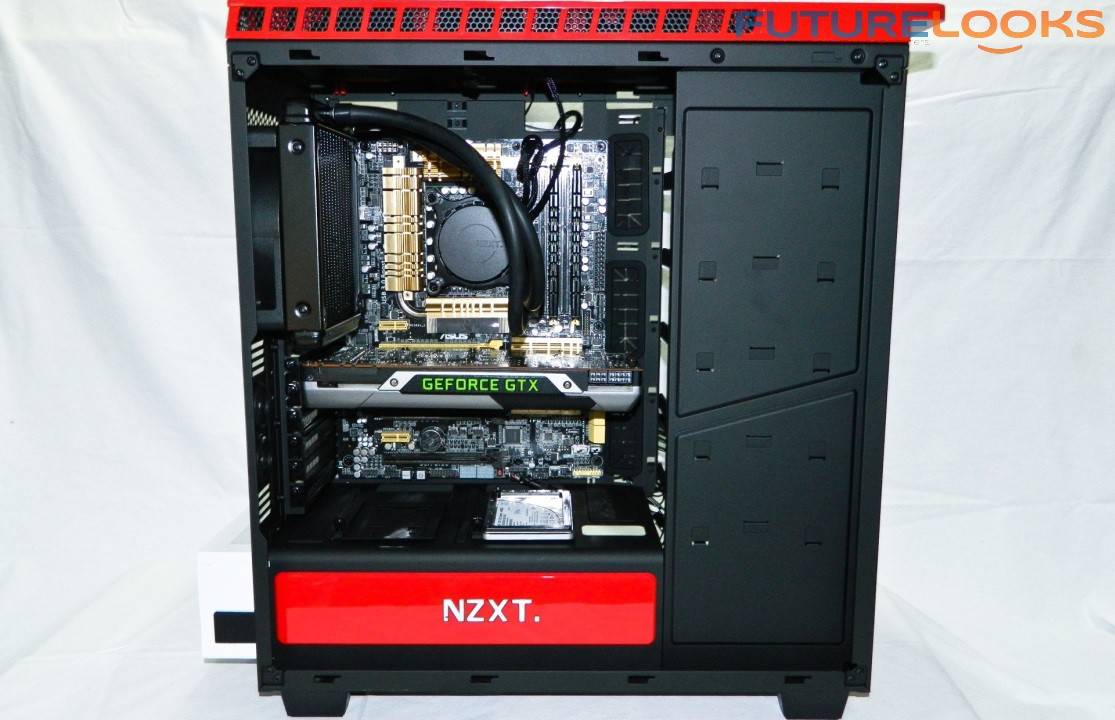
The system above includes an Intel Core i7-4770K Haswell Processor, cooled by the NZXT X40. We used an ASUS Z87 Deluxe motherboard, fitted with Kingston HyperX Beast 16GB 2133MHz DDR3 memory. For the GPU, an NVIDIA GTX 780 video card was installed. Finally, storage duties were handled by an Intel 480GB 520 SSD, and Western Digital 2TB Caviar Black hard drive.
Installation Notes
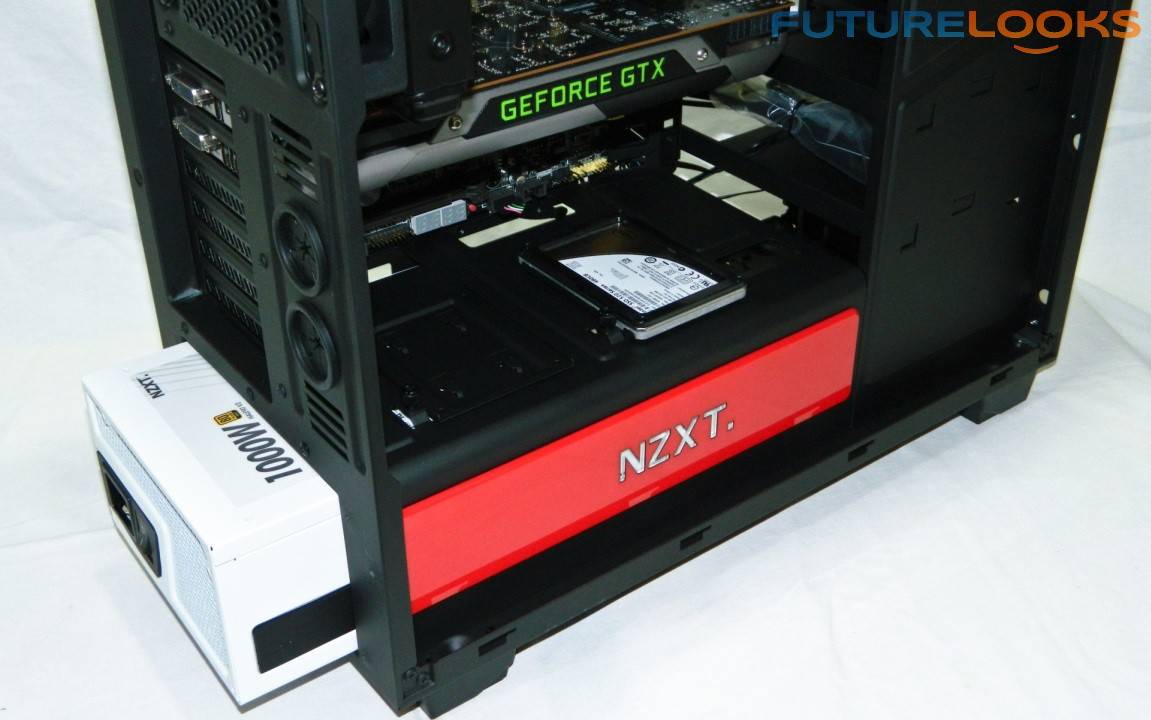
The power supply is literally the most complicated thing to install, and to be honest, even that wasn’t very difficult. Simply remove the PSU cover and slide a unit of your choice inside. It will easily fit any sized power supply. It’s better if you figure out which cables you need for the system and pre-attach before fastening the PSU in to place.
Other than that, we have no other difficulties to report. Although if you need an optical drive onboard, you’re out of luck.
Thermal Testing
The system was set to run full load projects with three different thermal configurations. This will give us an idea of just how efficient the NZXT H440 is at cooling a system.
- Test 1: Open enclosure without side panels.
- Test 2: Closed enclosure with side panels, front three 120mm fans turned off.
- Test 3: Closed enclosure with side panels, front three 120mm fans turned on.
Idle and load temps were recorded after an hour in each test. If an enclosure can cool the components as well as an open chassis, it’s good. If it can cool the components better, it’s a great enclosure.
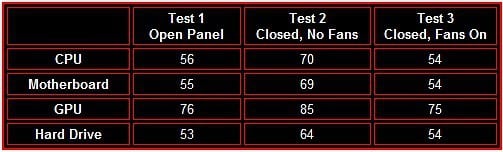
With the enclosure open, the system manages temps well which is essentially my baseline. As expected, without fans, the system gets quite hot and loud. The poor video card struggled to cool which was evident during 3D benchmarks. However, it’s a different story when the system is set up properly.
The NZXT H440 cooled the system nicely and even slightly better than when the case is left open. That’s because the front fans push cooler air inward and the design of the hard drive area helps direct air to the back of the case. This is exactly what a great enclosure should do. The rear mounted 140mm fan also made all the difference with higher RPMs.
Final Thoughts

The NZXT H440 is a great enclosure with an excellent, forward thinking design. It also has features to support this idea, and cooling performance to keep your components in the safety zone. Put them all together and it equates in to the right kind of user experience we want, which is a very clean computer system.
The 10 channel fan hub, placement of main SSD trays, easy to access 3.5″ bay trays, front chassis triple fan cooling with magnetic vent, liquid cooling possibilities, and the successful re-purposing of 5.25 device space in this enclosure, really puts it in a league of its own.
There were only a couple very minor things that can easily be avoided. For example, if you transport your case back and forth to LAN events, be aware that strategic positioning of the hand(s), is needed to avoid pulling off the front bezel. And, it would be cool if we could easily turn on and off the NZXT nameplate inside the case easily, for personal taste.
Ultimately, the NZXT H440 offers all the important features that make an excellent enclosure. It even comes in a white with black trim model, for those looking for a more “Storm Trooper” theme, made famous by NZXT’s Phantom. And for a very reasonable $120 US/CA, the NZXT H440 can be your next enclosure that can clean up the clutter of your current system, or provide a great home for a new one. It even comes with a full 2 year warranty and support from the company.
The NZXT H440 is on trend, on the nose for design and features, and it’s an Editor’s Choice from us for this great looking and performing case.
Pros
- Excellent design and theme
- Quality build
- Ample cooling and control via included fan hub
- Exellent liquid cooling support for both custom and all-in-one systems
- Shows off your system well
- Easy installation and setup
- Competitively priced
Cons
- Front bezel is easy to pull off by accident (which can result in a crash landing)
- Rear LED and internal NZXT sign cannot be controlled separately
Overall Rating: 9.0 / 10.0


Help Us Improve Our Reviews By Leaving a Comment Below!