
I am going to assume that anyone clicking on this article has thought about using a Linux distribution. This will be a brief introduction of what you can expect from Ubuntu 10.10, one of the most used and best supported Linux operating systems you can find. I am not going to bog this down with how to fix hardware conflicts, or preach about needing better driver support. I am here to be your tour guide to Ubuntu 10.10 and provide useful information for newbies and veterans alike.
Getting to Know Ubuntu

Ubuntu’s desktop space is now designed to minimize the clutter of your operating system, and bring more attention to your applications. We will focus on applications a little later, so lets start with the operating system itself.
The two most important areas on your desktop are both along the top bar. On the right you will find (in order) your running tasks, audio controls, communications, clock with full date, personal accounts, and the power button. The running tasks area, clock, and power buttons are all self explanatory and do exactly what you think they do, so lets get into the unique things you find here.
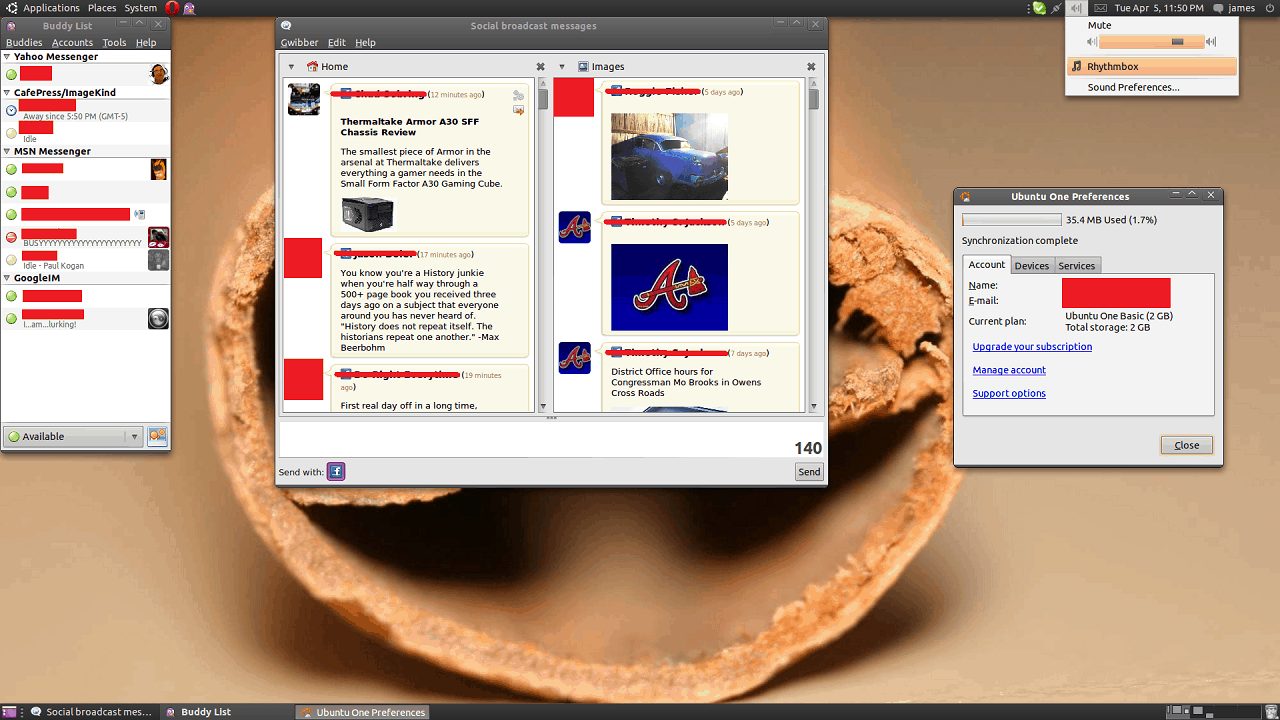
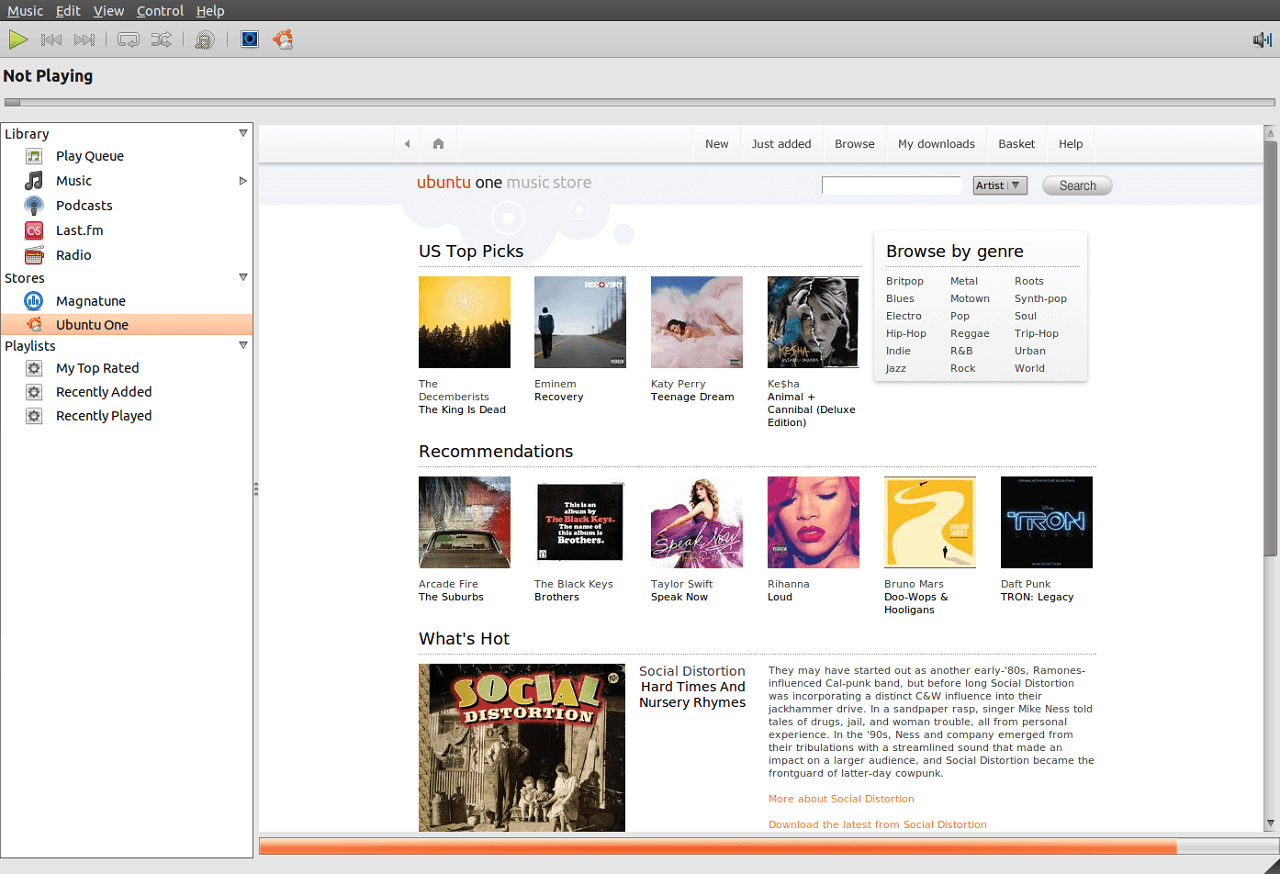
The audio control icon is a quick menu with immediate access to the audio volume, Rhythmbox, and sound preferences. The key feature here is the Rhythmbox link. You can use this link to start Rhythmbox; but once the program is running, this area becomes a mini player. It will show you the CD art, track name, artist, album, and provide basic controls without needed the primary Rhythmbox window open.
You will find the communications and personal accounts quick menus to provide the same features for their categories. The communications quick menu provides access to your IM, notifies you of new IM’s by changing color, and access to Evolution (which handles contacts, e-mail, calendar, and scheduler). The personal accounts quick menu allows you to change your status in your IM without opening it. It also gives access to your Ubuntu One Account overview, and personal contact information.
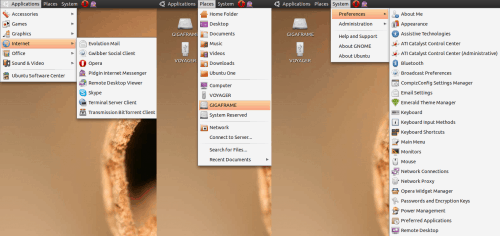

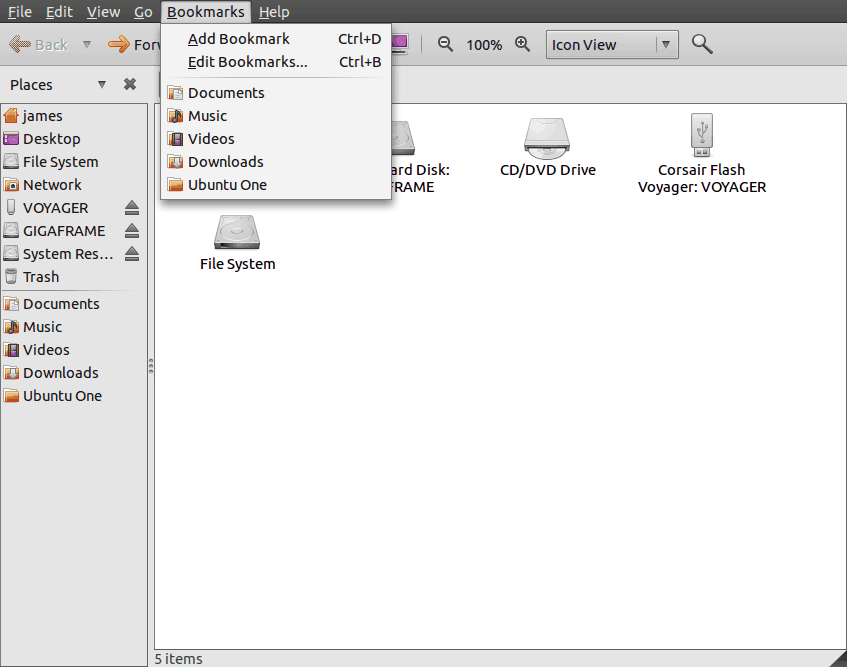
The other important area is the left corner of the top bar. This is the place were most of your mouse clicking will be done. This area is your Apple File Menu or your Windows Start bar. “Applications” is where you can find currently installed and new programs. “Places” is list of important locations on your computer, including all your personal folders, accessible hard drives, and recently opened files. And finally “System”, where you find all of the controls to Ubuntu. Think of the System Menu as your Control Panel.
The rest of the top bar can be used for quick links. You can pin your favorite and most used programs via drag and drop to any location on this bar. This allows you to find those important programs without needing to pull down a menu or sub-menu.
The bottom of your desktop space you will find the lower bar. This only has 4 pieces and its main job is active management. On the far left you will find the Show Desktop Button which has been apart of Ubuntu for as long as I can remember. A simple tool that minimizes and restores all your open windows at once. Framing the far right of this bar, you will find the Trash Can. No desk space is complete without one.
On the same side as the Trash Can, you will see two or more small squares. Let me introduce you to multiple desktops. Each of these squares is actually a live preview of each of your desktop spaces. You can literally take a desktop full of open programs, files, etc. and just set it aside to work in a complete clean space. By default you get two, but I personally use four because I customize my Ubuntu into a cube using Compiz Fusion. You can get to any of your desktops by simply clicking on one of these. It will quickly become something you love if you use multiple full screen programs at once.
The rest of the lower bar is the running program bar. Much like Windows, here you will find tabs for each of the programs you currently have open. Now let’s dive a little deeper.
Ubuntu Getting to Know You
I know we spent a lot of time getting to know the basics of Ubuntu’s desktop environment, but you can’t use a tool if you don’t know where the power button can be found. The same for any operating system or software UI. Now that you know where things are and what they do, let me help you teach Ubuntu to fetch, roll over, and play dead.
We all have our preferred software we like to use for our daily business. While Ubuntu can give you most of them, some software is just out of reach. Software out of reach can be replaced:
Best Known → Ubuntu Equivalent
Microsoft Office 20XX → OpenOffice.org 3.2
Apple iTunes → Rhythmbox
Any Instant Messenger → Empathy
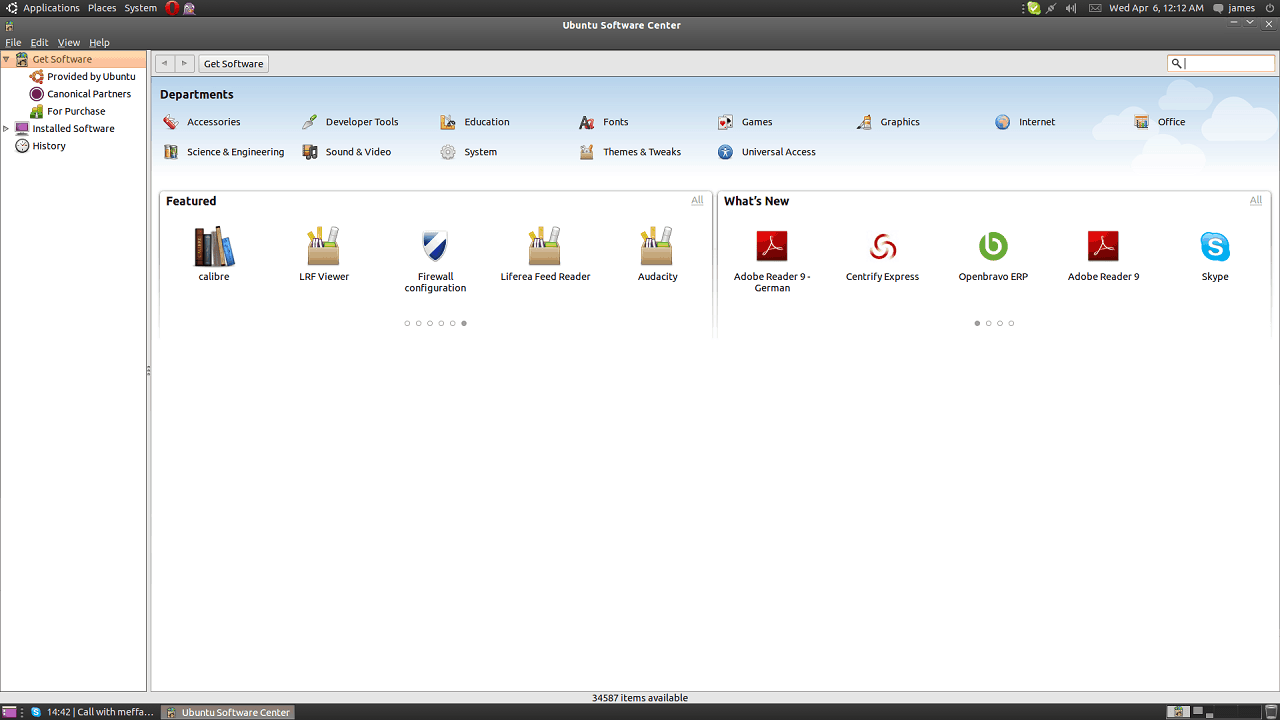
These are all programs you will find already installed and ready to go, but we are going get the software you want first. On the Applications Menu you will find the new Ubuntu Software Center.

This is your single source for almost all the software you will need or want. It is a easy to use replacement for more complex methods of software installations that use to haunt me in nightmares. If you need to install or remove software from Ubuntu, you do it here.
You can find the software you are looking for via search (by name, type, or keyword), the various categories, or the side bar for specific software such as installed programs. No need to search the Internet, navigate websites, download installers, etc. You simply find what you want, click Install and you’ re done.
There will be times you will not find what you are looking to install. For me this was my beloved Opera. If you are an Opera user, you already know Opera has a dedicated Linux version on their home site. These kinds of install will not only install it, but add it to the Ubuntu Software Center as well for future reference. This applies to any software you manually add.
Since you have the USC (Ubuntu Software Center) open, this is a good time to install your favorite web browser if its not Firefox or install Skype, a PDF viewer like ePDFViewer, various games, and VLC. You can also replace software. For example, you can use Pidgin instead of Empathy for your IM, or GoldenDict instead of Dictionary. You can also install some other import things from USC such as the Flash plugins for your browser, and restricted DVD playback plugin.
My First Restart
We are nearing the end of our setup. The first time you will be required to restart your computer. First, all the ATI and Nvidia graphics users will want to turn on their respective Additional Drivers. This is the first thing you will find in the Administration Menu. After it searches for the drivers, simply accept and let them install all the needed software and drivers for you. Many of you will be happy to know both comes with their respective control panels for tweaking.
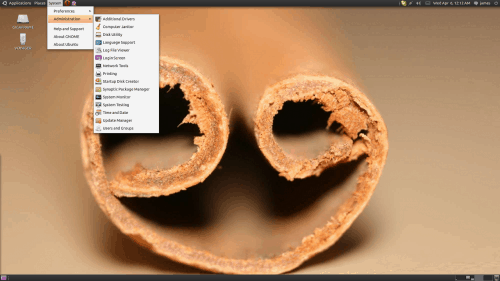
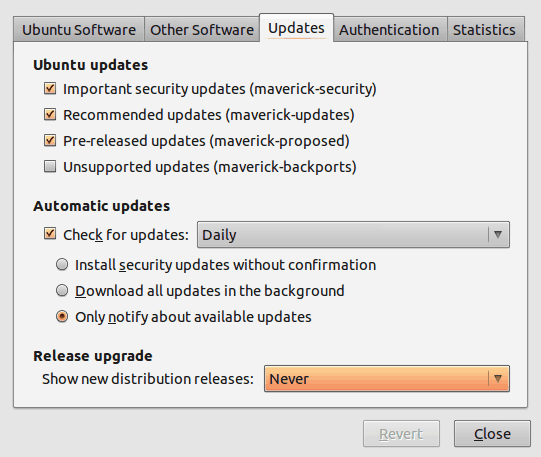
Finally you will want to start the Update Manager from the same Administration Menu. The update system in Ubuntu doesn’t just update the operating system. It will update the OS, all your software, the kernel, etc. You will need to make some tweaks to the settings to ensure you update everything all at once.
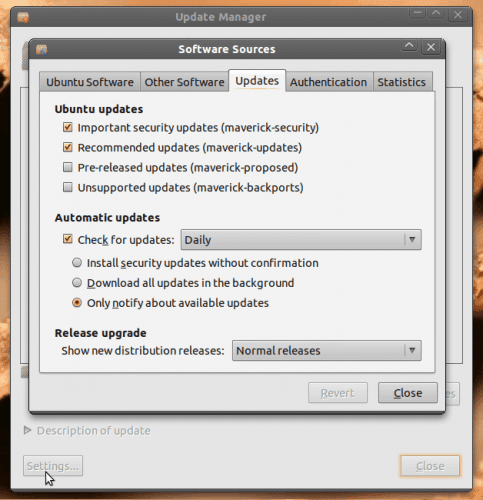

Click on settings in the Update Manager. Check “Unsupported Updates” and set the update schedule and release upgrades as you see fit. If you are new to Ubuntu, I recommend turning Release Upgrades off for the time being and setting the update schedule to bi-weekly. This will minimize the rather annoying pop-up messages and avoid the too short 6 month distribution cycle.
While you have this menu open, click on the Ubuntu Software tab and check all four available boxes. Then anything not labeled “source code” or “beta” on the Other Software tab should be checked as well. Now you can close this menu, check for updates, and update all your software which I am sure will require your first restart.
Finish with a Theme
For your free gift at the end of the tour, here are some great sites to get icons, themes, wallpaper, etc. to add a more personal touch to your desktop space:
http://screenlets.org/index.php/Home
Remember, Ubuntu is an African word that best translates to nurturing community; And the Ubuntu community is always their to help.
This concludes our tour of Ubuntu 10.10 and the need to know basics. Please feel free to read my first article over at MEGATechNews for my first impression of this operating system. I hope this will help anyone who is new to Ubuntu and Linux get a quick easy start.
Love This Guide? Hate This Guide? Leave a Comment Below!
Futurelooks’ Guide to Ubuntu 10.10 and Warming up to Tux – Photo Gallery