

The one trait all PC enthusiast share is the desire to do things their own way. All those who have taken the time to research, select components, wait for parts to arrive, build, and bring a new PC to life will tell you they enjoyed every minute of it. It is about putting the “Personal” back in a Personal Computer (PC). BitFenix is a company that truly understands this idea and designs their cases with the end user in mind. Today we will be looking at the BitFenix Outlaw case which does everything its own way.
Features and Specifications
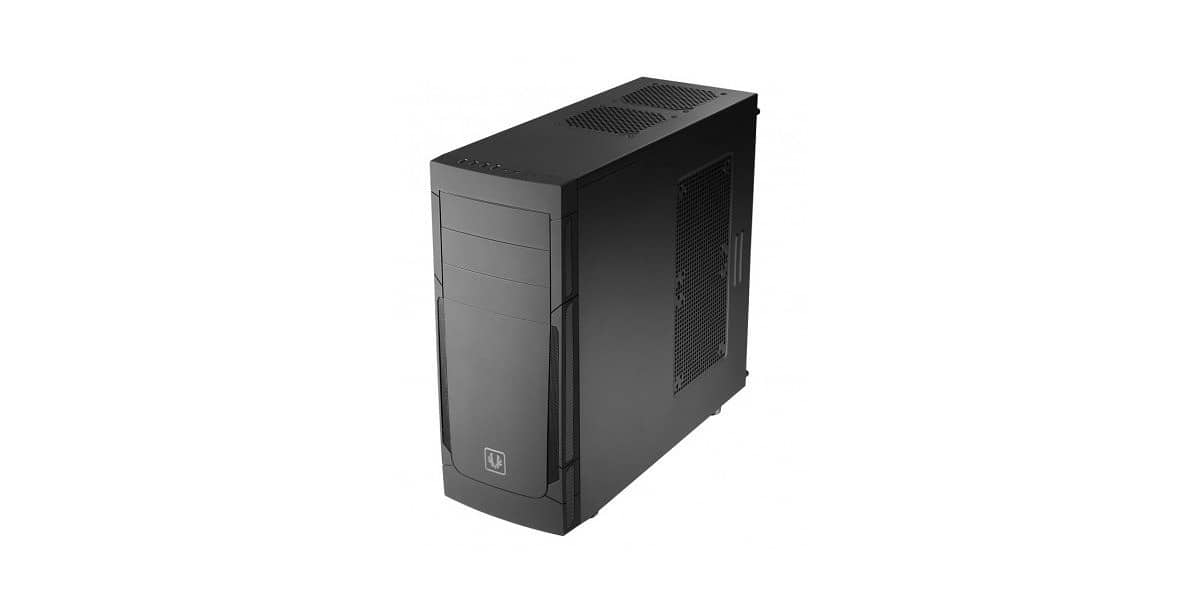
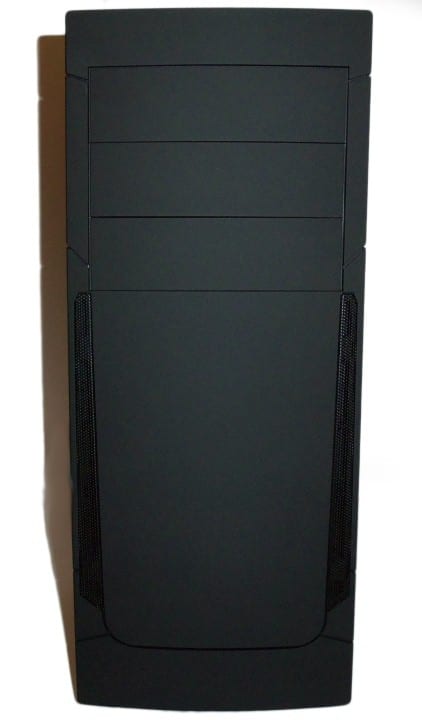
The Outlaw chassis has a nice list of features you may find on other cases but not implemented in the same manner. The first thing that catches my attention is the MSRP of $49.99 for a mid-tower case. Constructed of steel with a plastic front panel is the norm for this price segment and the Outlaw is no different; however, it does have the unique BitFenix Soft-Touch coating to hide the plastic. This gives the case an interesting look as the plastic is not apparent until you remove the front panel.
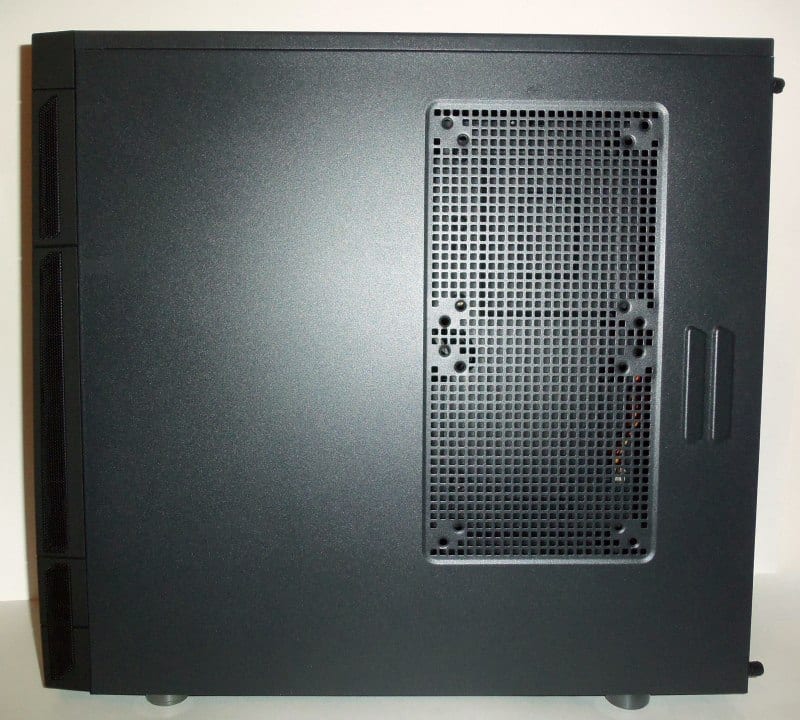
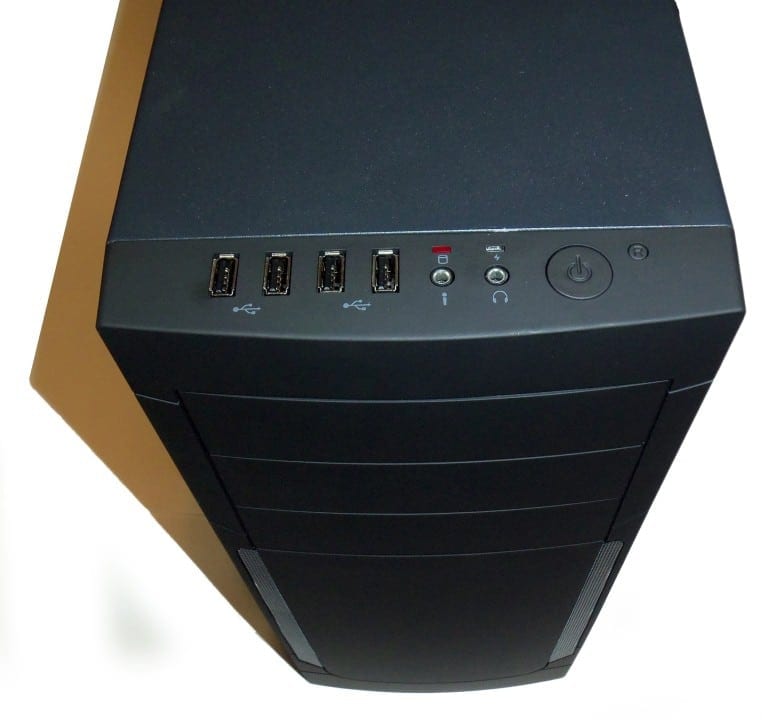
Standing at 17.24 x 7.08 x 18.82 inches (Height x Width x Depth), the Outlaw has room for four 5.25” external bays, four 3.5” internal HDD bays, one SSD mounting point, eight fan locations (1 included), seven rear expansion slots, and four front panel USB 2.0 ports. The PSU is mounted at the bottom of the case either with the fan facing down or up. There are also 8 rubber grommets in 4 of the HDD mounting section to absorb vibration and a huge CPU cooler cutout.
While a standard Mid-tower in form, the Outlaw is a reverse ATX case. This means a standard ATX motherboard will be mounted to the left panel up-side-down. At first glance it seems odd, but this would done to relocate the GPU area to line up with the 5.25” bay. This allows the Outlaw to house a GPU nearly as long as the case. A GPU up to 11” will fit without obstructing the 5.25” bay, but should handle a GPU up to 14.5” by sacrificing a 5.25” slot or two. No big deal for most modern builds that may be “optical drive free” as more and more enthusiasts take to loading their OS from a USB drive.
What’s in the Box?
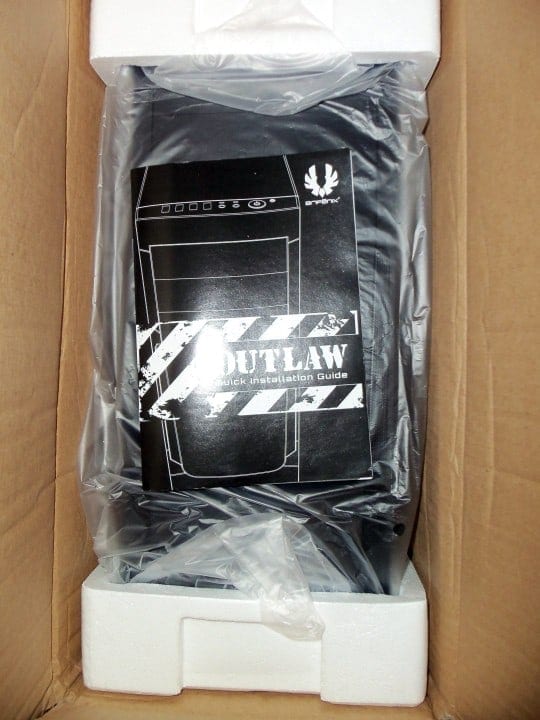
In the box you will find the Outlaw case, a quick installation guide, and your standard packaging foam. Once you open the case itself, you will find a small box that contains various screws, BitFenix logo sticker, and ten zip ties. The screws for this case includes security lock screws, four PSU screws, and motherboard tray screws. There are also a total of 39 thumb screws for your HDD, optical drives, and rear expansion cards, making it easy to install and remove components when needed.
First Impressions
The Outlaw has very underwhelming appearance with few curves or sharp angles. Excluding the Soft-Touch coating on the front face, it is a standard box design. It is very clear at first glance the Outlaw is for those who prefer understated case style. There is not much to say about the exterior of the Outlaw, but the interior makes up for that in spades.
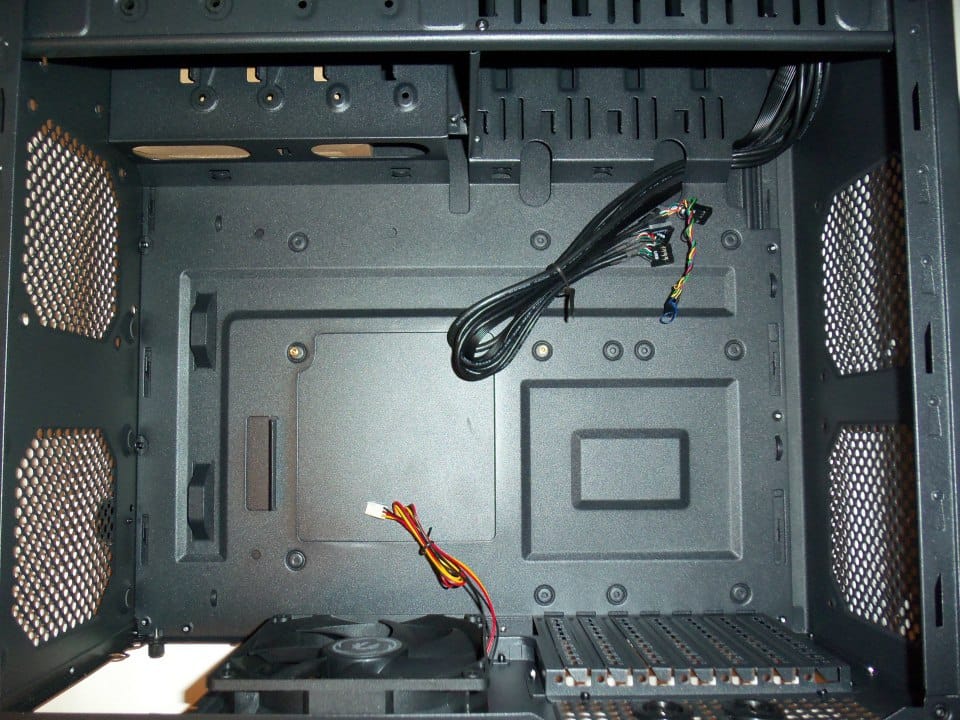
Once you open the Outlaw case from the right side using the rear thumb screws, function takes the front seat. There was clear effort to get more out of standard features than other cases in the same price and size. The steel is fairly sturdy, especially the side panels. Both side panels combine for more than 50% of the total weight of the case which is no surprise as they have more steel surface area than the rest of the case. Everything is black and well painted. There is not a single square inch of the Outlaw that has not been painted. While the overall look of the case’s interior is great, there are some issues I noticed.

The first thing that struck me as strange was 4 drill holes for a single SSD at the bottom of the case, just under the HDD mounting area. This was clearly a move to save a little money and to reduce the size of the case. It is often the norm of more expensive models to either have a way to use any 3.5” slot for a 2.5” drive (those with drive trays), or provide a 3.5” to 2.5” adapter. This is actually a good idea for this size case as you could use an SSD and still maintain your four 3.5” drive bays to bring your total drives up to five.
Potential Installation Issues
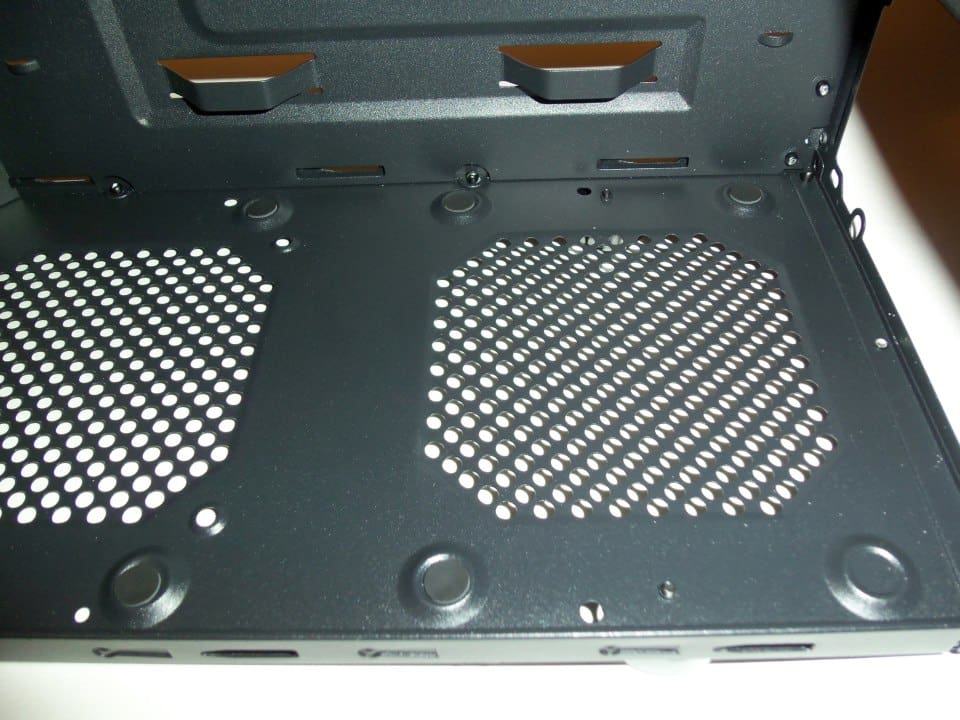
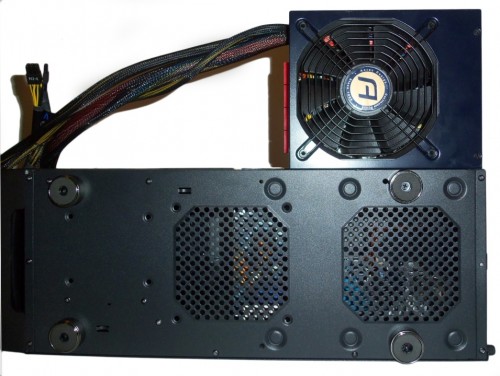
The next thing I think that was a bit odd is the PSU lower venting area. There are 6 thin foam pads to prevent scratching the paint of the case and your PSU due to vibration. These pads are too thin to absorb the vibration and reduce noise. Second it implies longer, non-standard power supplies were thought of in the design of this case. The issue with this is the vent is cut to a standard 120 mm size. When longer power units are used with a large fan near the PC connection panel, this vent will not work. That was the case with my Antec power supply. The vent was blocked too much to work properly.
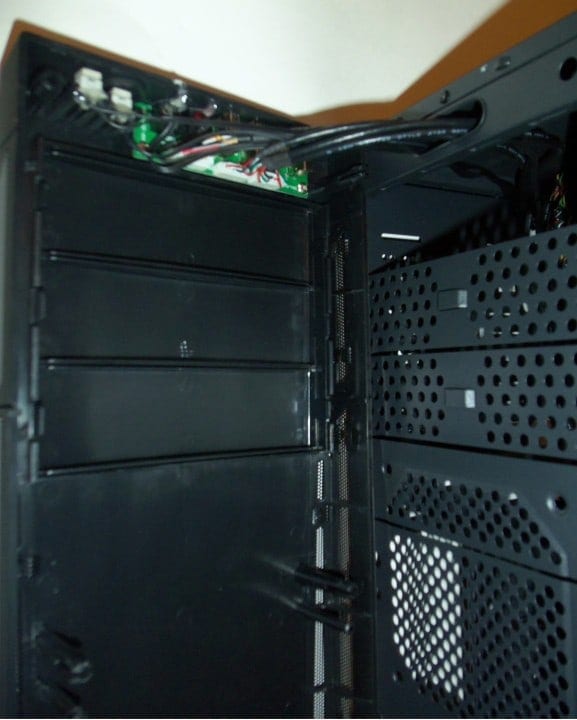
Once I removed the front face plate, I could see one other minor issue. The last 5.25” tray has a detachable metal stamp out like the others; however this stamp out doubles as part of the are where the 120 mm fan optional fan mounts to. While designed in a way that you can secure it for use with a 120 mm fan, it means you have to choose between a second fan or use of this forth slot for a drive. As this slot is the one that will most likely be blocked by a larger GPU, it will not be an issue for those users.
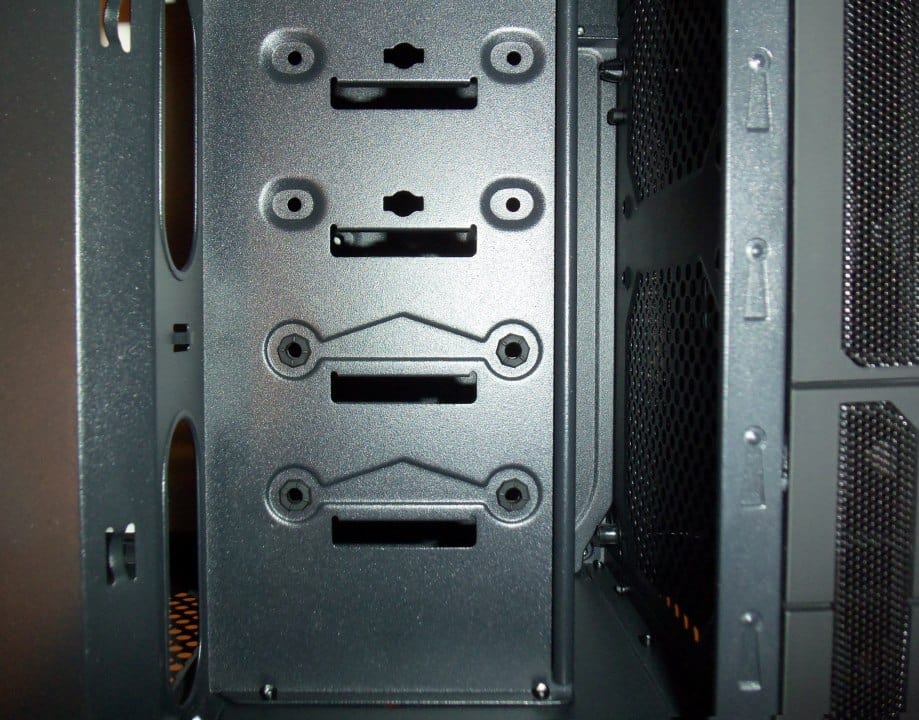
Finally, there is a short coming to the HDD mounting area. It is clear the top two slots and the bottom two slots use two completely different manufacturing techniques. The top two seem to be cut with a tool-less locking mechanism in mind. A tool-less mechanism that does not come with this case. The bottom two slots have rubber grommets and are to be used with the longer thumbscrews provided. This should absorb some vibrations from the HDD and reduce noise during drive spin-ups.
Test System
To test the BitFenix Outlaw case, we had to install a system into it. This will help us not only figure out if there are any installation issues one may run across, but also allow us to comment on thermal performance and noise. The test system setup is as follows.
- CPU: AMD Phenom II X6 1100T
- CPU Cooler: AMD 125W stock cooler & Noctua NH-D14
- Motherboard: Gigabyte 890FXA-UD5 (rev. 3.1 AM3+ socket)
- GPU: AMD HD 6850 1GB Reference Card
- RAM: G.Skills Ripjaws 2x4GB 2133 MHz RAM @ 1600 MHz 9-9-9-24 CR1
- HDD: Seagate Barracuda XT 2TB
- PSU: Antec HCP 850W
- Sound: Onboard Realtek ALC889
- OS: Windows 7 Ultimate 64-bit
Software Used to evaluate noise and temperature levels include.
- OCCT
- FurMark Burn-in
- AIDA64
- AMD Overdrive
The Build


Let me start by stating this is the easiest PC build I have done to date. The layout, very roomy interior, and some noteable features in the BitFenix Outlaw made this build a breeze. There were only two brief moments when I had to stop to figure out how to approach something with the Outlaw. The first was the individual bags of thumbscrews (three in total) which have three distinct designs.
There are eight HDD thumb screws which are long and have a flat end to work with the rubber grommets included with the case. The next set are shorter with pointed ends for the rear expansion slots and additional HDDs. Finally you have the thumbscrews for the optical bay which are also short, but have the flat tips. At first the only way I could tell the ODD and expansion slot screws apart was by counting them as there was 16 ODD thumbscrews and only 15 PCI expansion ones.
The second time was when I was considering the airflow for additional fans. The reverse ATX design alters the normal convention of case airflow. When building in the Outlaw case, you should take careful consideration to what needs air the most and how many additional fans you wish to use. The slots you use as intake and exhaust make change depending on the design of your CPU cooler, GPU heatsink, or number of components. For my build I was only using the included fan and I did not move it. Personally I think this fan would have better served my build as an intake fan since the PSU would act as the exhaust.
I started the actual build by adding the 8 other standoffs for the motherboard. BitFenix included a special standoff in the center already that had an edge on top. Once I sat the motherboard into the case, I realized the pressure from the rear IO panel spring arms and that standoff perfectly centered the motherboard in place. This made placing in all the screws a breeze as the case was holding the motherboard in place for me.

The next thing I installed was the 5.25” DVD drive and my HDD. The HDD and SSD are in the lower section of the computer and could be very hard to reach once the RAM and CPU cooler have been installed, so you want to get those in after the motherboard is mounted. If you reach inside the case as I did and pop out the front panel covers, you can complete the entire build without ever removing the front panel. Once these items are in place it is just a matter of using the correct thumbscrew to secure them.
Tidying Things Up
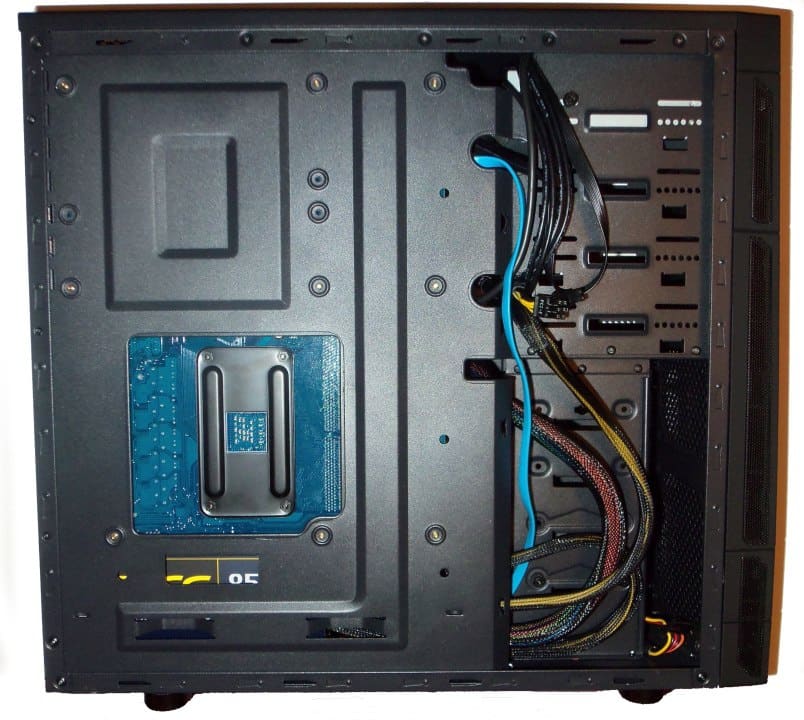
I started to work on wiring for the case at this point. The Outlaw does not have any extra width to put wires behind the motherboard tray, but does take advantage of the reverse ATX design by placing the wire cutouts around the area behind the HDD cage. I found that this two inch space had more than enough room to route and hide wires.
Once I had the wires in place I completed the build with the CPU, CPU cooler, and graphics card. To install the Noctua I needed my screw driver again. The Noctua NH-D14 fits inside the Outlaw, but just barely and only after the removal of the 140 mm center fan. If replaced it with another 120 mm fan, the Noctua cooler could be used in this case. It was still easy to install since the motherboard cutout was large enough to work as intended. More often than not, I find these cutouts to block some of the screw holes making it useless. Once I installed the cooler, I broke off the rear expansion panel covers and installed the GPU with the included thumbscrews.
Acoustic Testing
Now that we have a complete PC, we can move on to the testing. The acoustic testing is a simple measurement of the case an the noise level from 1 meter away.
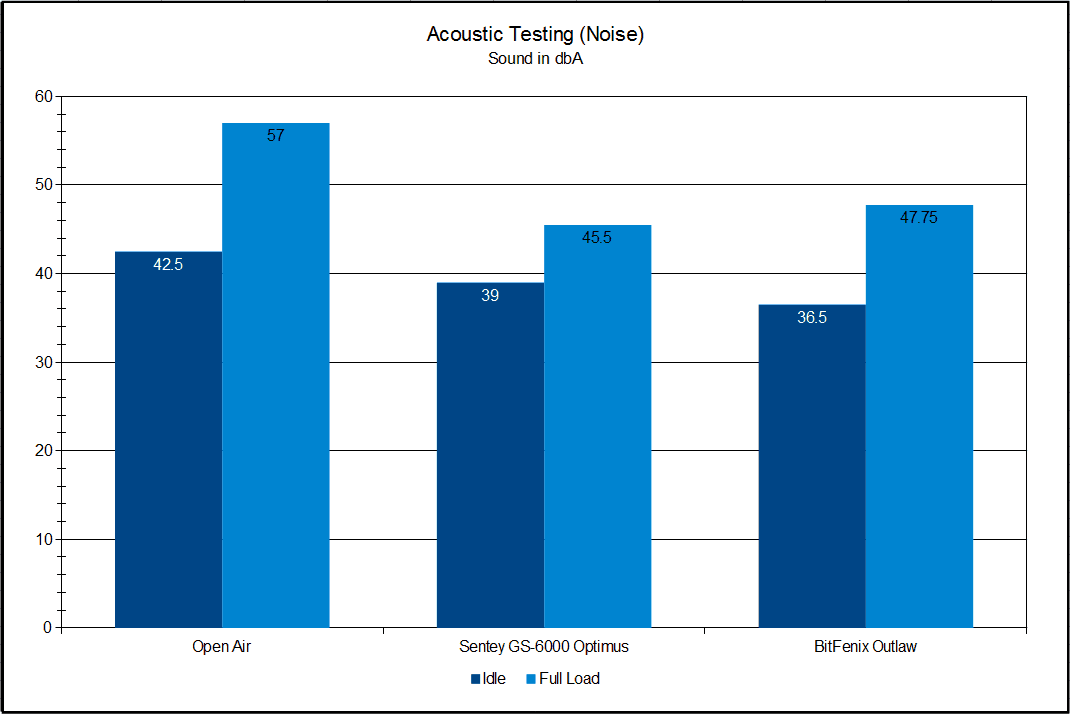
This all boils down to the noise the fans generate in relation to the amount of noise from the CPU and GPU coolers the case lets escape. At idle, the BitFenix generates the least noise because it only has the one 120 mm fan generating additional noise. Once a heavy workload is run, the single fan is not enough to properly cool the entire system alone, so the CPU and GPU fans have to spin faster to compensate. This generates more noise and the Outlaw’s well ventilated design works against it in this case. This is just one time in which buying additional fans is a requirement.
Cooling Efficiency
In addition to reducing noise, a computer chassis should also improve cooling over open air. This time I ran the same full system stress test and measured the temperature of the the internal components.
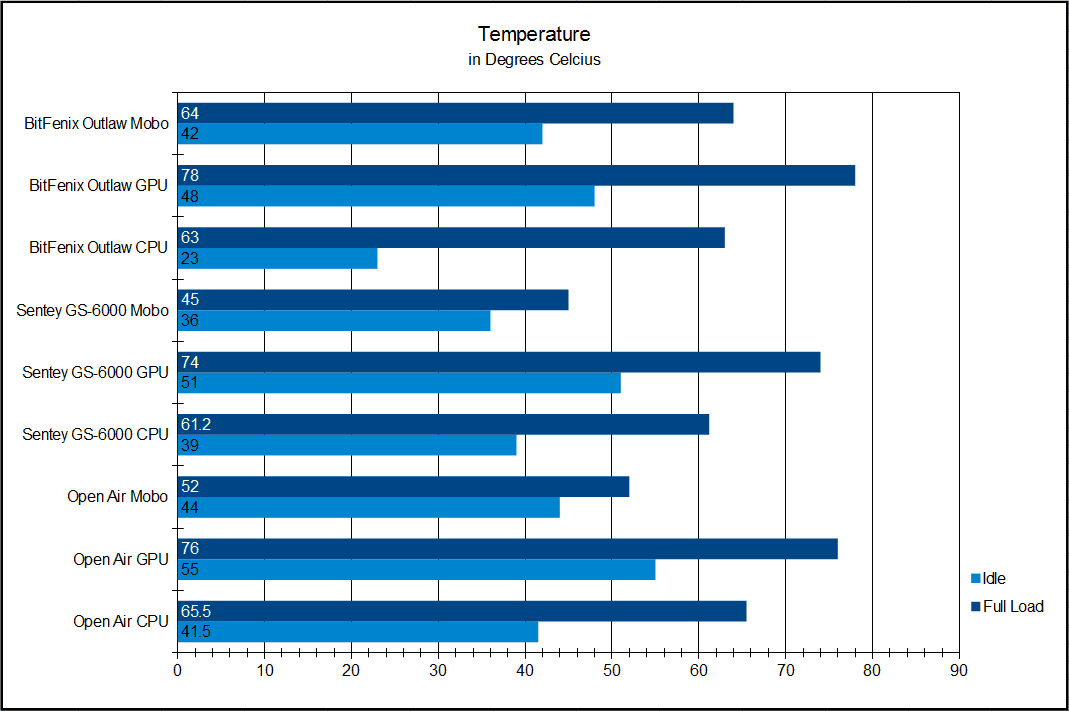
The BitFenix Outlaw, as I had it configured, improves the idle temperatures over open air. It also does better at idle than the Sentey GS-6000 that I reviewed a while back in both CPU and GPU temperatures. This is not that strange as my particular setup has both the included 120 mm fan and my PSU’s 120 mm fan as exhausts right next to the CPU location.
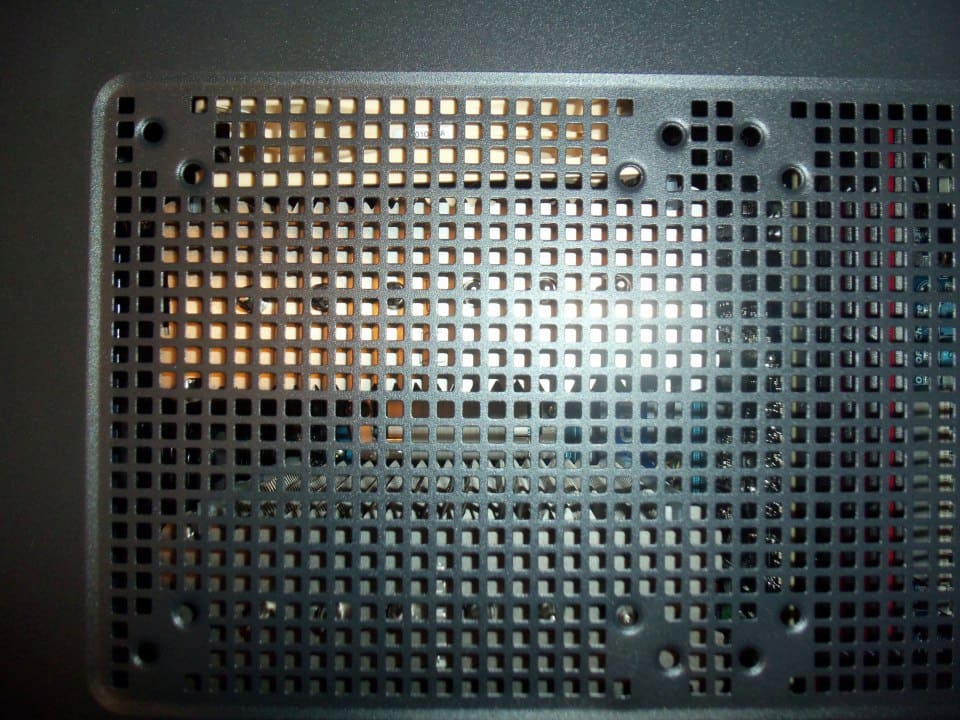
The AMD reference HD 6850 GPU is left to draw in air on its on from the top vents. The problem is with a fan in the top slots, the vent is restricting airflow. The case has the potential to cool a system at low noise levels, but it will take more than the included fan. This of course starts to increase the price of the chassis once you start adding on these additional fans.
Final Thoughts
The BitFenix Outlaw is a PC builder’s chassis. The design, style, and overall appeal is firmly directed toward those building a PC on a budget. With the exception of a few minor issues, it is a well designed, sleek case that is absolute joy to work with. While that is great for fellow reviewers and people who build a lot PCs for others, it is not so great for the PC owners who have to foot the bill. It seems that there may be some hidden costs.
At the MSRP of $49.99, this case is directed toward people who are looking to get the most out of their dollar. The price is attractive, but deceptive as you will need to buy $10 to $15 worth of fans to get the needed cooling and tame noise to within reasonable levels. The only other way to correct this is to spend money on a better CPU cooler or a graphics card with a more efficient cooler design. Both of these options will still cost you extra. This is where the hidden costs lie.
There are also some other minor issues that make me just scratch my head such as the vastly different designs for two of the HDD mounting spaces. The case also included an SSD mount point that seems like an after thought. The lowest 5.25″ bay slot is always the first thing you have to give up for either better cooling or more powerful graphics. While these are problems with the execution of the design, I can’t really hold it against the Outlaw. It is also too easy to look at these issues as strengths since an SSD doesn’t take away a 3.25″ space, a full sized GPU can be used, and many people don’t like factory fans anyway.
Honestly there are only two real weaknesses to the Outlaw case. The paint is applied with a different method than any case I have owned. When damaged, the paint does not scratch, it cracks and peels off. It is very easy for a minor ding to turn into a big problem. The other other is the missing USB 3.0 front panel ports. I know it is not a widely used medium just yet, but I expect to have a PC case for at least a couple years before retiring it.
Even with the flaws and oversights, the BitFenix Outlaw is a great $49.99 computer chassis. If you need something in this price range you can work with easily and may already have upgrade plans for the future in a different chassis, this is your case. This mid-tower is surprisingly roomy with no sharp edges and flexible options to fit your needs. A great choice to include in any short list of cost efficient cases that I am sure no owner will be disappointed with.
Pros:
- Easy to Work
- Soft-Touch Feels Great
- Four USB Ports on Front I/O
- Very well Ventilated
- Reverse ATX design allows large GPUs to Fit in this Mid-tower
Cons:
- Lose of one 5.25” bay when using a long GPU and/or two front 120 mm fans
- Thumbscrews can be Mixed Up
- No dust Filters
- No USB 3.0
- Can Only Use One SSD
- Only One Included Fan
Overall Score: 8.0 / 10.0


- Help Us Improve Our Reviews By Leaving a Comment Below