

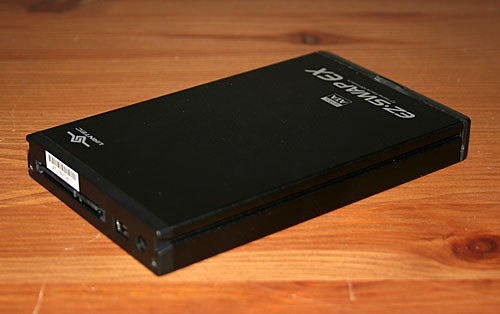
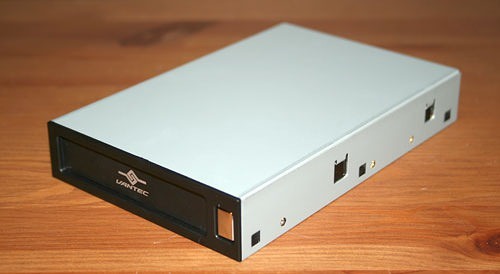
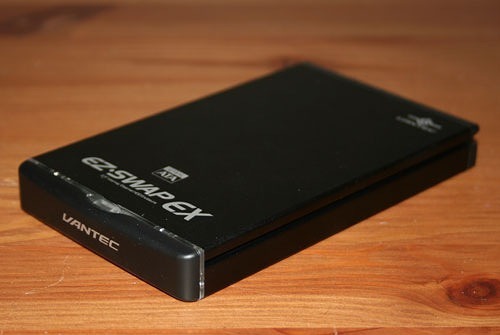
Do you have a spare 2.5 inch SATA capable hard drive that is lying around? Maybe you upgraded your laptop hard drive and don’t want to put the old one to waste? Well, VANTEC has the solution for you! Their EZ Swap EX external hard drive enclosure for 2.5 inch SATA hard drives allows you to use small and portable drives in cartridge like fashion with your standard desktop systems.
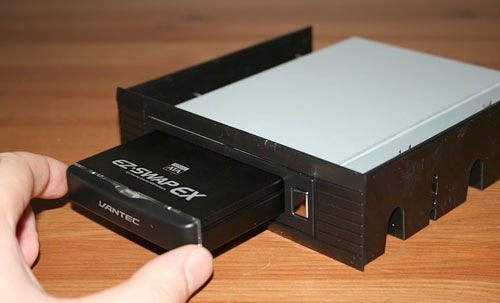
The one thing that stands out about the EZ Swap EX enclosure is that it also comes with a caddy to will allow you to ‘dock’ it into your desktop tower with ease. It’s almost like having an old school tape backup system, only that it’s not tape, but a much faster hard drive. The EZ Swap EX supports both eSATA and USB 2.0 connections which is handy for transferring larger files between computers.
What’s In The Box?
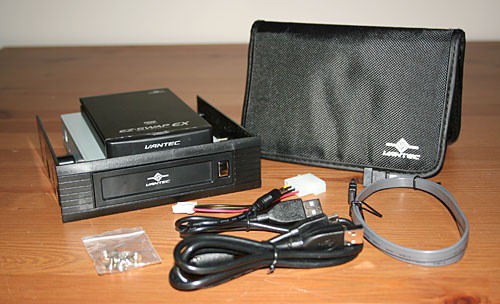

The following items come with the Vantec EZ Swap EX hard drive enclosure:
- EZ Swap EX Enclosure
- 5.25” Bay Mounting Bracket
- 3.5” Bay Insertion Rack
- USB Cable
- SATA Cable
- Power Cable (USB)
- Installation Screws
- Carrying Bag
- Manual
No driver CD is required because the unit plugs in via USB or SATA and acts just like a regular external storage drive. It was a little odd not to see some fancy backup software packaged with it, but typically, we toss it and use our own stuff anyway.
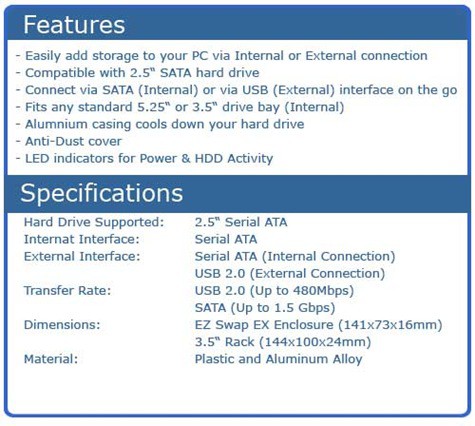
Features and Specifications
As taken from the VANTEC USA website…

The Vantec EZ Swap EX comes in two versions: The MRK-250ST which is SATA/USB and the MRK-250FD which is IDE/USB.
Real-Time Price and Stock Check – Shop Like a PRO!
Installation and Setup
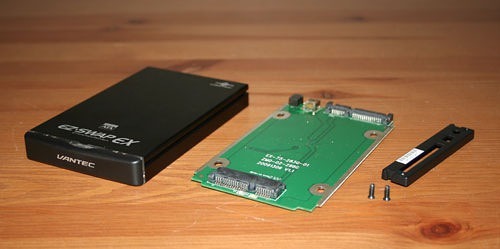

The first thing you need to do when setting up the enclosure is to remove the two small screws on the back of the drive enclosure. Make note not to loose the tiny black screws else you will not be able to secure the hard drive into the enclosure.
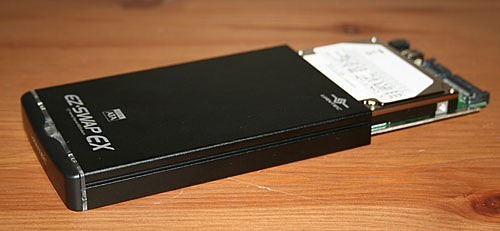

Mounting the hard drive to the PCB is easy and straight-forward. Just plug the drive into the connectors on the board and secure with the four included screws. Once that’s done, the drive slides into the enclosure and is secured with the back panel and screws removed earlier. The mounted drive slides into the enclosure and slips into the internal connectors. Just reattach the back panel with the mounting screws removed in the first step and you’re done…for now.

The EZ Swap EX enclosure can be used without installing the desktop drive caddy, but that’s really the best part of this product. Using just the USB cable supplied turns the EZ Swap EX into a standard portable hard drive. One thing I noticed when I used the drive as a USB portable drive is that it was able to draw enough power from the USB connection without having to use the supplied USB Power cable. This is good because if you ever use it with a laptop as USB ports can be in short supply.
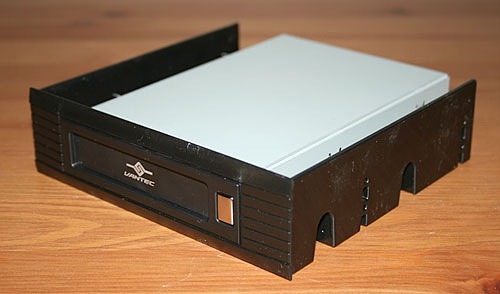

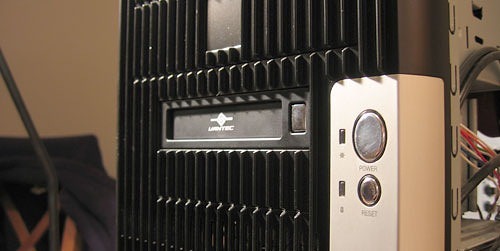
Installation of the 5.25 inch caddy is like any other 5.25 inch device. You attach the included SATA cable to the back of the caddy and then plug the other end into an available SATA header on your motherboard.

Using the supplied Molex converter you can attach the typical 4-pin Molex connector to the rear of the bracket to supply power for the enclosure when it is docked in the system. I found it a bit odd that I did not have to use one of my SATA power connectors to supply power to the device. Luckily I had a spare 4-pin Molex connector, but it would be a more complete solution if it had both SATA data and power connections.
While sliding the 5.25 inch bay bracket into my tower I found that it did not fit snuggly against the side rails like my DVD burner does. My case has a ‘tool-less’ locking system and I just could not secure it to my liking. I could wiggle the 5.25 inch bay bracket by at least half an inch and that simply would not do. Also, because the ejection mechanism requires a stiff push to eject the enclosure, it deflected quite a bit. Plastic just isn’t a good material to use here. Let’s see if it works any better in the 3.5 inch drive bay.
Real-Time Price and Stock Check – Shop Like a PRO!
Installing the 3.5 inch Rack

Installing the 3.5 inch rack starts out as easy as installing the 5.25 inch bay bracket. In fact, the 3.5 inch rack sits inside the plastic 5.25 inch bracket. Once you remove the 5.25 inch bracket, you can install the 3.5 inch caddy in a standard 3.5 inch drive bay. Sounds easy enough, however, it wasn’t all roses. I went from too much wiggle room using the 5.25 inch bracket with the 3.5 inch rack to having to push pretty hard to get the bare 3.5 inch caddy into the drive bay. The drive was also fairly snug when inserting it into the rack and ejecting the drive required a stiff push. This is necessary so that the delicate connectors don’t deviate from their intended trajectory and could possibly be damaged.

After attaching the SATA cable to the appropriate header on the motherboad, it was time to power up the computer. During boot up, the drive was recognized as just another hard drive in the BIOS. Now it’s time to put its SATA and USB capabilities to the test.
SATA Performance
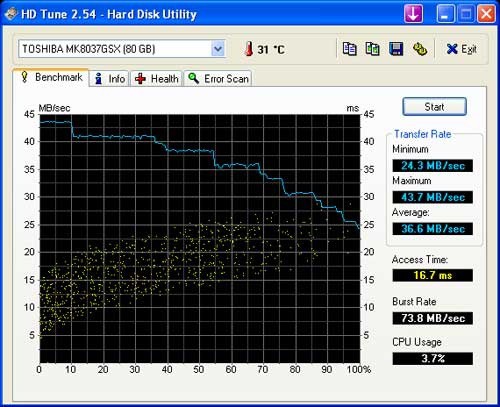

I found that that the SATA speeds of the drive to be quite reasonable since along the way it has to make two connections before it actually gets to the drive itself. I also found that the ratings on the HDTune website for the particular drive I was using to be consistent with what other people have benchmarked. This helps ensure that the product is working properly.
USB 2.0 Performance
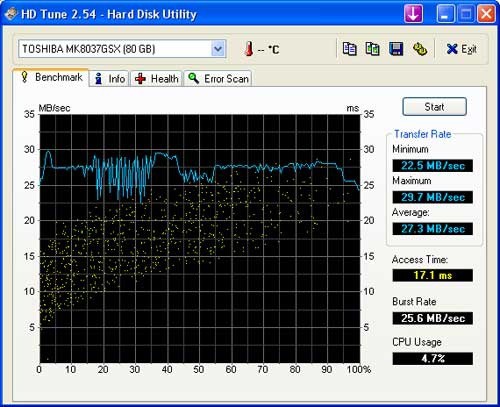
The USB side benched to be roughly half of what the specification for USB 2.0 sets (60MBps) at an average of 27.3 MBps but according to Wikipedia some vendors only have claimed their rates are only at most 40 MBps where as most seem to hang around the 10-20MBps range so this tells me that the USB 2.0 functionality of this product is actually quite good.
Real-Time Price and Stock Check – Shop Like a PRO!
Final Thoughts

Overall, I believe Vantec has created a useful option for people who might have spare 2.5 inch SATA hard drive (or IDE with their IDE/USB product) lying around or who are in need of a portable storage system that is small and compact in design but versatile in functionality. Being able to use a USB connection without having to run separate power is a big plus for those who do not want to be burdened with extra cables and reduced portability.


The dock for the enclosure is this product’s best feature. Just slide the enclosure into the dock and it is like using the old style Jaz cartridges or 8 track for those of us that are older. This frees up the USB ports on your computer and allows you to have the data transfer speed of SATA without much effort.
Installation for me was a bit of a pain in regards to the 5.25 inch bay bracket. Ideally I would have liked to use the 5.25 inch bay bracket but with over half an inch of play. This is annoying, especially when using the ejection mechanism. I had to opt for the 3.5 inch bay mount which ended up being almost too tight. However, it seemed that my case was more to blame for the poor fitment so your mileage may vary.
Operating temperatures under full use were never an issue. Unlike other enclosures I have used that need a fan to help keep the drive cool, the aluminum construction of the EX Swap EX enclosure allowed for worry-free operation while holding the drive in the palm of my hand. I definitely recommend this product for anyone that is looking for a 2.5 inch SATA hard drive enclosure solution that wants the portability of USB without sacrificing speed when you get home thanks to the SATA interface.
Pros
- Dual USB 2.0 and SATA Connection
- Docking system via SATA
- Good performance with both USB and SATA connections
- Aluminum construction of enclosure helps the drive dissipate heat for better cooling
Cons
- Squishy plastic 5.25 inch bracket doesn’t fit right
- The 3.5 inch bracket fits a bit tight (but your mileage may vary)
Overall Rating: 9.0 / 10.o


Discuss This Review in the Futurelooks Community Forums
Real-Time Price and Stock Check – Shop Like a PRO!