


When it comes to high-end computer cases, Cooler Master has certainly risen to the occasion in recent years as a strong choice for enthusiasts. With top quality construction, unique features, and outstanding designs, it’s not surprising to see them win that sort of mindshare with consumers. Last year, they really lured me in with the introduction of their “Cosmos” case during the COMPUTEX 2007 show in Taiwan.
With the “Cosmos 1000” now readily available, Cooler Master has made a lot of drooling enthusiasts happy, including this one. Although I’ve had my review sample for a couple months now, I didn’t want to sign off on it too early as a winner. Now that the Honeymoon is over, I’m finally able to be a little more objective in my opinion of this truly unique chassis. On with the show!
Specifications
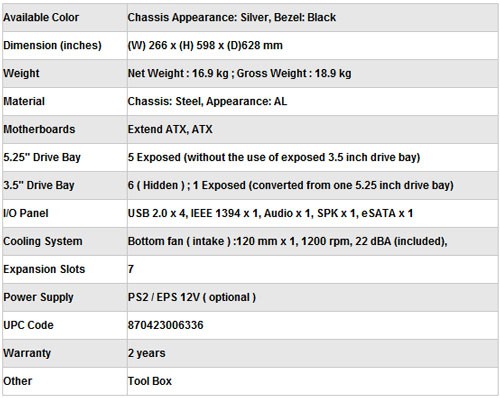

The mainly steel construction of the chassis gives the case a net weight of over 16.9 kg’s. This is without any parts inside the chassis. You’re definitely not going to want to carry this case around with you to those LAN Parties, though on the bright side, you might end up with a great workout. It’s also rather enormous, so if your desk has short legs, you might have to relocate with this chassis.
Features

The Cooler Master Cosmos 1000 features a number of signature features that include:
- Soundproof materials applied to build a quiet environment
- Sound barrier design reduces vibration for silent operation
- Dual bottom air intakes to enhance air flow and reduce system noise
- Six aluminum detachable HDD modules with ventilation holes
- Side removable VGA cooling tunnel to advance thermal airflow.
- Patented finger pressing buttons for quickly maintaining or upgrading 5.25” drive devices
- Tool-free design for opening side panel conveniently.
- Separate HDD modules make it easy to organize cable direction
- Cable management system for better cable routing and neatness
As you can see, it’s a pretty impressive laundry list of selling features, leaving me particularly curious about it’s quiet computing properties, while maintaing thermal performance. With a large number of fans and a GPU specific solution designed into the Cosmos 1000, we expect it to do both equally well. I’m also curious about the exectution of the cable management and tool-free capabilities once we get into the build.
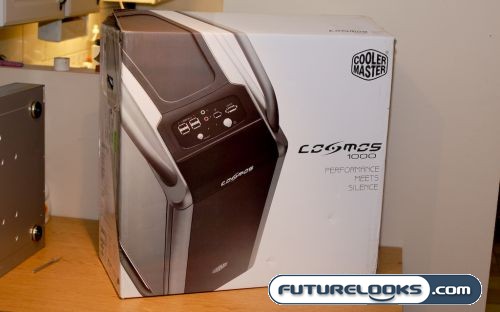
What’s in the Box?
The CoolerMaster Cosmos 1000 comes with, literally, everthing that you could possibly need to assemble a system, except for a power supply and your other hardware bits. Twist ties and cable straps for keeping things tidy were all there, ensuring that your build is a neat and clean one. An instruction manual is also included to help you with your assembly if needed.
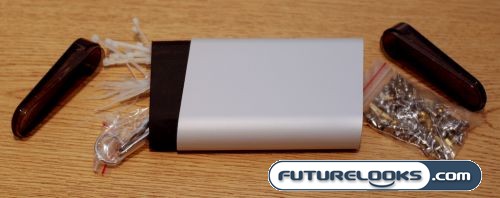

A little silver box inside the accessory bundle popped open to reveal all your screws and additional assembly hardware. They even included a set of screwdrivers. The box fits easily into one of the spaces in the front of the case, tucking away easily in case you need it down the road. Combined with the toolfree construction, I really wondered if I would even need to whip out my tool box.
A Computer Case From the Cosmos…
After hefting the 16.9 kg chassis out of the box, I was greeted with the stunning looks of the Cosmos 1000…
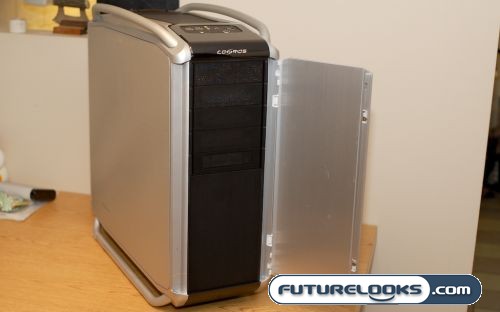
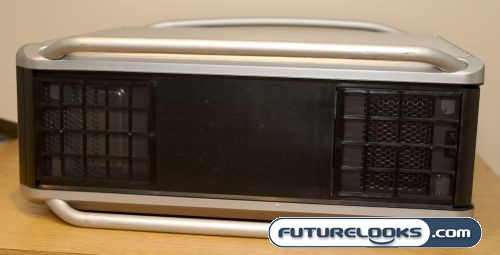
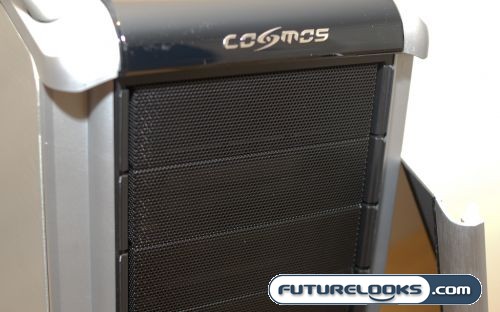
The chassis, with it’s tubular handles and brushed aluminum sidepanels, give it the look of a federation starship. Those tubular handles give you something to grab onto because this is NOT a light weight chassis. The front of the case is covered by a heavy duty aluminum panel with a black plastic fascia. It can be attached to the left or the right of the case simply by replacing the pins to the other side door. So whichever way you swing, the Cosmos 1000 has you covered. When open, the door reveals the four 5.25″ drive bays and a 3.5″ bay; all of which are covered using a black metal mesh for the best possible ventilation.
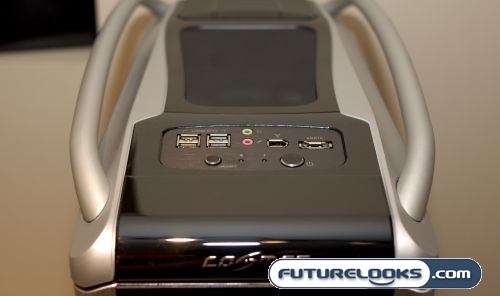

The front panel connectors and controls are smartly located at the top of the front panel, making them easy to access without having to craw around on the floor. The black rubber mat on top provides a non slip surface for cellphones, and if you’re careful, maybe even a coffee mug.
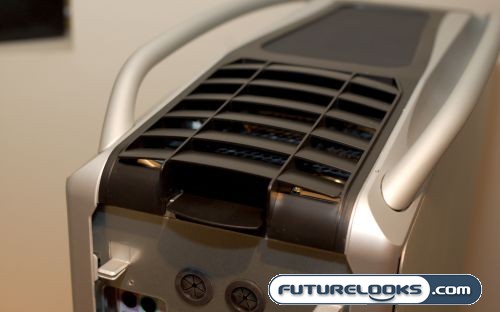
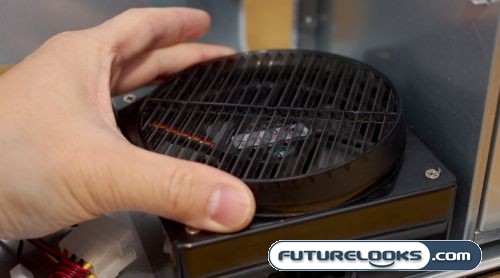
An impressive looking exhaust port graces the top rear of the case, covering up a pair of 120 mm fans. The fans can be upgraded to larger 140mm units if you require more ventilation. The black exhaust fascia can be removed to allow you to easily clean the underneath when required. You’ll also see two rubber grometted ports just below for routing water cooling hoses. On either side of those, you’ll see the two levers for ejecting the two sidepanels of the case.
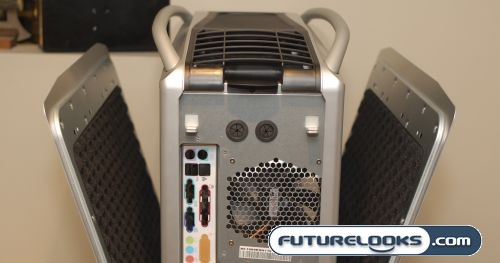
Moving To The Rear
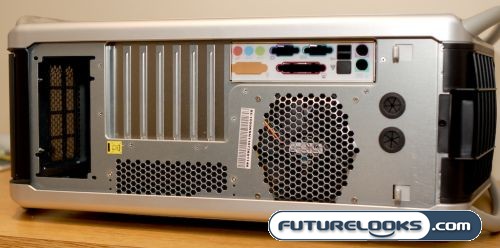

The rear of the case is probably the most standard looking part of the case. Here, you get a better view of the levers that eject the sidepanels and the rubber grommeted ports for water cooling. The Cosmos 1000 does use a bottom mounted power supply made famous by the Antec P180 and the recently reviewed, Antec P182. However, it doesn’t take advantage of the same dual chamber design as the Antec cases.
Stuff To See…Even On The Bottom…

Hidden on the bottom of the Cosmos 1000 are two filtered intake ports. The filters are removable by sliding them outwards and can be cleaned with a cloth or run under a sink. Filters are all the rage these days for the high end cases and its nice to see that Cooler Master didn’t skimp on those. The rear exhaust port is for the power supply fan while the front one has an internal mounted 120 mm fan, which draws in cool air fromt he bottom of the chassis. The tubular steel bars elevate the case high enough to allow the vents to work properly, even on carpet.
Journey to the Inside of the Cosmos 1000

The two levers that we’ve seen earlier pop the two sidepanels away from the chassis by moving a track inside the case. After you get them to open, you can simply lift them away, revealing the inside of the Cosmos 1000. The sidepanels are actually an integral part of the noise dampening system used in this case. They are fairly heavy, incorporating a steel frame that is screwed into the brushed aluminum outer panels. The black material you see is actually a dense foam, similar to the stuff they use in recording studios, giving it favourable noise dampening properties.
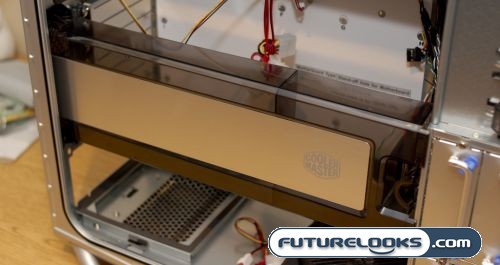

The first thing that you notice when you break into the case is the large removable VGA cooling tunnel. This tunnel helps channel cool air from the back of the case, to feed the fans on the video cards. No detail is missed as even the tail end of this tunnel receives the filter treatment.
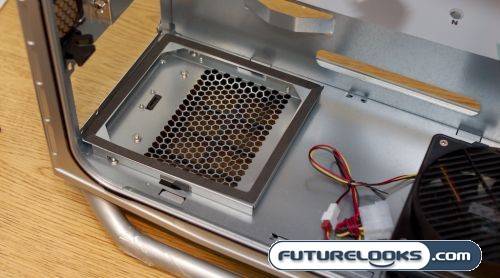

Removing the VGA cooling tunnel gives us a better look at what resides on the top side of those bottom intake vents. To the left, you’ll see the mounting point for the power supply. The power supply will mount face down if it uses a large 120 or 140 mm fan. Although you can run a power supply with a rear mounted fan, it won’t take advantage of the additional ventilation afforded by this mounting point.
The other lower intake fan is attached to a plastic mount that features a fan nozzle that you can rotate, allowing you to influence the direction of the air flow somewhat. This fan can also be removed and mounted to the top of the drive bays in case you don’t need as much internal airflow. Unfortunately, they don’t give you two of them, however, Cooler Master has recognized that people may want to cool both the inside of the case and the hard drive bays and are mailing out free ones to those that ask for them.
Keeping with the tool-free theme, the 5.25″ device bays use a quick release system that works surprisingly well. I’ve used other systems that leave the devices wiggling around, but Cooler Master seems to have balanced the right amount tension into these spring loaded wonders. Push them in to lock. Push them again to unlock.
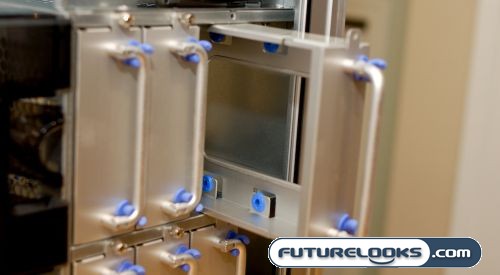

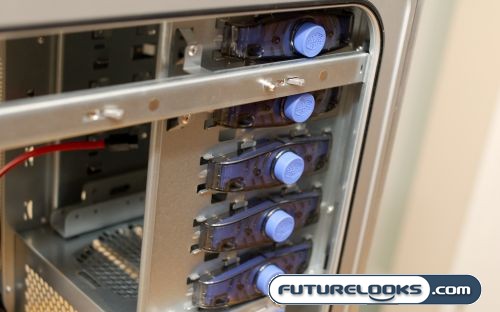
Although the hard drive bays aren’t as quick release oriented, they still hold up to tool-free scrutiny by employing thumb screws and handles. The only thing you will need tools for is for mounting the drives into the caddies, and even then, Cooler Master provides you with a screwdriver in the accessory box included. The drive caddies feature rubberized mounting grommets and handles that lock away when not in use.
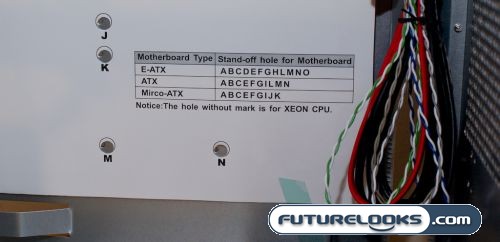

Motherboard mounting is assisted using a template that is taped to the inside of the case. Just install the motherboard standoffs that you need in the right holes and drop the board in. The only thing that isn’t great about this is that if you change the form factor of the board, you’ll have to refer to the manual again since you’re obviously not going to leave this piece of paper inside the case. Cooler Master was doing so well with the details, you would think that someone would just laser etch it inside the case, or just sticker up the holes permanently. The cavernous space supports from mATX to full sized E-ATX boards, and of course, your regular ATX boards.
The Cosmos 1000 is Exhausting!
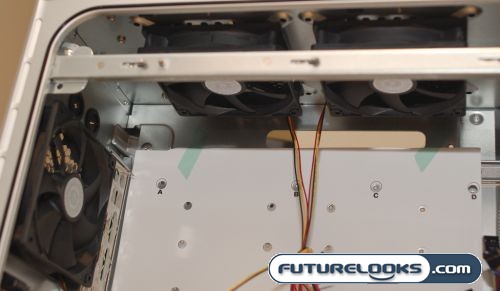

The Cosmos 1000 includes three 120 mm fans for exhaust duties. This should ensure that the CPU is able to remove any hot spots quickly. The two top fans, if needed, can be replaced with 140 mm units as mentioned earlier. All you need to do is find some and just mount them and you’re good to go. I also appreciated that Cooler Master included power adapters that allowed the fans to use either standard full sized MOLEX or mini-MOLEX motherboard power connectors.
System Setup
For our Cooler Master Cosmos 1000, we assembled a group of parts that should give this case a good thermal and noise workout. Our list includes:
- AMD AM2 X2 4200+ CPU (Provided by Geeks.com)
- Thermaltake V1 CPU Cooler – (As Reviewed)
- DFI Lanparty NF590 SLI-M2R/G Motherboard (Provided by DFI)
- EVGA nVidia 8800 ULTRA Video Cards in SLI
- Seagate 250 GB SATAII 16MB 7200 RPM Hard Drive (Provided by Geeks.com)
- Western Digital 36 GB 10K SATA Hard Drive
- Creative Labs X-Fi Xtreme Music Sound Card
- LG DVD Writer – (Provided by Geeks.com)
- Cooler Master Real Power Pro 1250 Watt Power Supply – (Provided by Cooler Master)
With these components, we’re hoping that the Cosmos 1000 struggles a bit to keep things under control as we have high hopes for the sound dampening panels. We also chose to go SLI with a pair of 8800 Ultras to see just what kind of affect the VGA cooling tunnel will have on thermal performance. Our operating system of choice was Windows Vista Premium. Let’s build our system!
Installation and Setup
For the most part, installation of our components was problem free, but there are a few things we’d like to highlight for you.
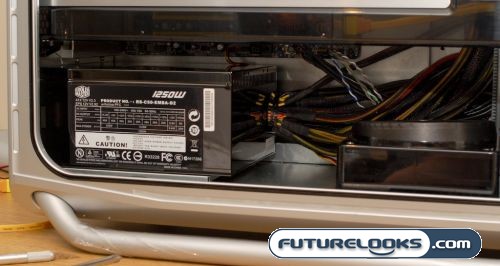

The power supply mounting point on this case, for some reason, had a conflict with the fan on our Cooler Master Real Power Pro 1250 Watt Power Supply. Unfortunately, I didn’t figure this out until AFTER we had all our parts installed, and our cables tucked away and cleaned up. When I started up the system for the first time, there was a horrible grinding noise coming from the power supply. I mounted and remounted the power supply and it just wouldn’t go away. Eventually, I opened up the power supply to see if something was out of place inside the unit. Nothing.
After more fiddling, I eventually tried pulling the grill off the power supply, and it solved the problem. Apparently, the weight of the power supply squashed the fan grill into the fan blades, creating quite the racket. Make sure you check your power supply to ensure that you don’t run into the same problem.
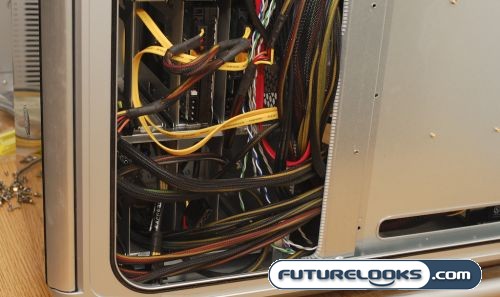

The back of the drive bays provided lots of spaces for shoving your unused power cables into, if your power supply isn’t modular. However, the large bundle of cables seemed to cause a problem with the door. The bulging wad of cables applied enough pressure to cause the sidepanel to simply “Pop Off” on occasion. I was gaming one day and all of a sudden, the sidepanel just fell off. I would strongly suggestion using a power supply with modular cables as it will allow you to control the cable bulge. Speaking of sidepanel, there is a rubber gasket that sits in a small channel around the perimeter of the case. This gasket sometimes sticks to the door when you remove it. I was able to poke it back in with a butter knife, but be aware of it. This seal helps keep the rattling of the door to a minimum, and without it, the door does rattle.
The Finished Product
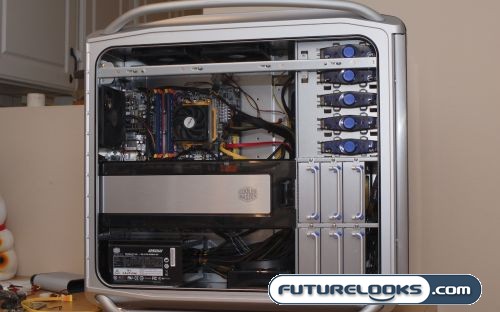
So after all is said and done, the Cooler Master Cosmos 1000 builds up into a very clean looking system. Thanks to the included twist ties and cable management accessories, we were very please with the results.
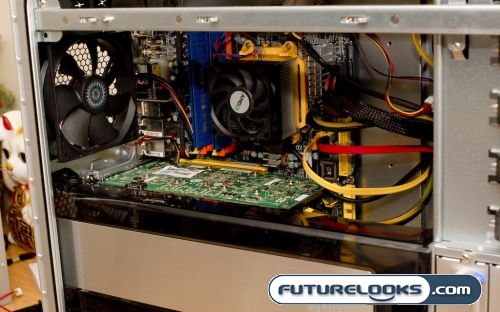
One thing that you won’t have to worry about with this case is your choice of CPU cooler. The Cosmos has enough room to fit the largest heatsinks as long as your motherboard doesn’t get in the way. The stock AMD heatsink that we originally had in there looks absolutely tiny compared to the cavernous enclosure surrounding it. The Thermaltake V1 Cooler that we used in our performance tests fit beautifully with no problems whatsoever.
Performance
After admiring our build for far too long, we were eager to take some readings to see if this computer case would back up its show with some go. Afterall, it doesn’t matter how good a case looks if its noisy and cooks your gear inside. No testing was done until we had a chance to cook all our components in the case for at least 24 hrs to make sure that our build was stable and that the heatsink compounds were able to provide maximum thermal conduction properties.
Our idle conditions were established by booting into Windows Vista from a cold start and then letting the system warm up on its own for one hour. After it was warmed up, we heated things up by running 3DMark06 in a looping demo for another hour. We took temperatures and noise level readings at both idle and load conditions. Noise level readings were taken using a sound level meter pointed six inches away from each of the case and CPU and System temperatures were monitored using ITE System Monitor.
Noise Levels (dBA) – Idle
- Top: 40 Left: 41 Right: 41 Front: 45 Rear: 45
Noise Levels (dBA) – Load
- Top: 43 Left: 48 Right: 53 Front: 48 Rear: 50
Sitting beside the system with it placed under a desk, you definitely know that the system is running, but it isn’t whiny or annoying. It makes a sound that is more of a low dull roar than anything else. Under load conditions, we see a definite increase in noise level according to the noise level meter. This extra noise seemed to be coming from the two 8800 Ultra Video Cards stuffed in the Cosmos 1000. Under load, you definitely know that it is running, but with your gaming headset on, I don’t think you would care anyway. Folks not running these notoriously hot video cards should be rewarded with a reciprocal decrease in noise.
Temperature (Celsius) – Idle
- CPU Temperature: 46 C / System Temperature: 43 C
Temperature (Celsius) – Load
- CPU Temperature: 57 C / System Temperature: 49 C
The temperature increases were definitely acceptable across the board and there weren’t any wild temperature fluctuations to report. The system temperature of the Northbridge was well within acceptable limits underload as well. Since I had been able to run the system for a few weeks, I did notice a peculiar temperature related problem with the VGA duct. At the end of the duct near the back of the case, there is a filter panel. After running the system through a few weeks of gaming sessions, I noticed that this filter panel had actually warped from the heat generated from the two 8800 Ultras. I actually pulled the VGA duct off and noticed that the GPU temperature dropped immediately by a couple degrees under load. Granted, the VGA duct does look cool, but it isn’t from a temperature standpoint.
Real-Time Price and Stock Check – Shop Like a PRO!
Final Thoughts
The Cooler Master Cosmos 1000 Full-Tower Case is definitely one of the best looking cases that I’ve seen in quite some time. Its unique design really pushes what is possible in case design these days with an impresssive array of high end features right out of the box. These are the main reasons why I was so concerned that I’d be totally blind to what could be wrong with the case so I appreciated having a chance to really live with the case and consider my opinion of it. I have to admit though, the case is truly seductive, begging for your attention, and asking you to buy it drinks all night. After the initial honeymoon and then living with the Cosmos 1000 day in day out for a few weeks, I have to say that it still holds a lot of the charm that I loved about it to begin with.
I really enjoyed the top mounted USB/eSata and Headphone/Microphone jacks. They were easy to reach and were well labelled. The only thing I didn’t like was the fact that the power button was so easy to hit. There were a couple times when I was fumbling for my coffee, placed on the cupholder area, that I accidently nicked the power button and ended up with a reboot. I’ve become more mindful of this and haven’t done it since, but I would have preferred them to be better protected, perhaps under the front door somewhere. Speaking of the front door, with such a high end looking case, there have to be some pretty high end components under there, and I was a little concerned about the lack of security, especially if you plan to actually lug this out to LAN parties or events. Speaking of lug, yes you will because it isn’t light, but at least the bars are nice and sturdy and seem to make great carry handles.
As far as sheer performance goes, the Cosmos 1000 is quiet for a case of this size. I never really expected it to be quiet, but was surprised at how quiet it turned out to be. Thanks to the noise reduction measures we talked about earlier, even with a fairly powerful dual SLI system onboard, it was definitely more than acceptable for every day use. Temperature wise though, although the rest of the system was happy, the VGA tunnel was a bit of a let down trying to tame our 8800 Ultra’s, but it did create some measure of sound reduction so if you had some cooler running cards, it might workout better for you.


Overall, I’m very impressed with the Cosmos 1000. It’s a super solid case that I definitely wouldn’t throw out of bed for leaving cookie crumbs. Its unique design, performance, and features definitely make it one of my favourite cases of all time. Despite some minor irritations, I have to say that this case has really earned my Editors’ Choice.
Pros
- Unique quality design reminds me of a Starship
- Fairly quiet for a case built for a high performance system
- Top mounted USB and Mic/Headphone jacks are very convenient
Cons
- VGA Tunnel was a bit of a let down for our 8800 Ultras
- Backdoor has a tendency of popping off if you don’t manage your cables properly
Overall Rating: 9.0 / 10.0
