


About APEX
As Futurelooks’ first review of an APEX case, we didn’t really know what to expect. They were founded in 1998 and have been manufacturing and engineering PC enclosures and switching power supplies. They are one of the premier OEM/ODM providers for large system integrators and offer a full line of PC enclosures in various form factors and sizes. With over 250 production-ready bezels, they are sure to have something that you’ll like. Let’s check out the specs of the PC-346.
Specifications
The PC-346 ATX Mid-Tower PC Case sports the following specifications:
- Dimension: 19”D (incl. front bezel) x 7.5”W x 16.25”H
- Drive Bays:
- External Drive Bay – 5.25” x 4
- Internal Drive Bay – 3.5” x 2
- Internal Hidden Drive Bay – 3.5” x 4
- Motherboard form factor: Micro ATX / ATX
- 7 expansion slots
- Allied Ver. 2.2 ATX12V 300W 20+4 pin power supply, Model: SL-8320BTX
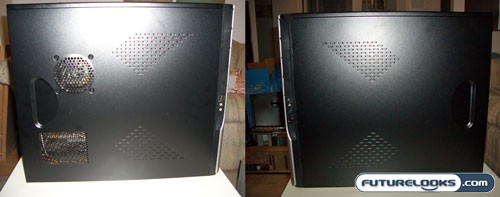
- 1 – 80mm rear fan (90mm optional)
- 1 – 80mm front fan optional
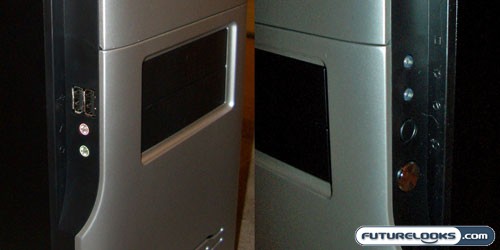
- Side mounted 2 x USB2.0 ports, 1 x speaker, 1 x microphone
- Optional CPU air guide to improve CPU cooling
Overall, it’s a pretty plain jane spread of features. What was kind of disappointing was the lack of 120mm fans. The case uses dual 80mm fans (with a 90mm optional rear fan) and could cause some noisiness, but we’ll be the judge of that.
First Impressions
When I received the case, the box had the name “Super Case” written all over it. After a little bit of digging, it seems like APEX doesn’t actually manufacture their case lineup, but instead, imports them from SuperCase International Corporation and sells them under the APEX brand. As it turns out, the PC-346 case can be found on Newegg for $39.99USD. It’s safe to say that this is a low cost budget economical case. What I was disappointed with was that they left the big Super Case logo on the box and didn’t even bother to rebrand anything. Truly cheap ass if you ask me.
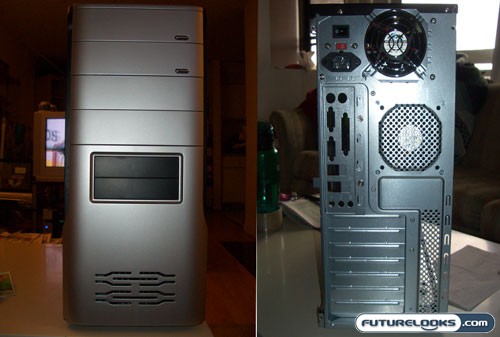
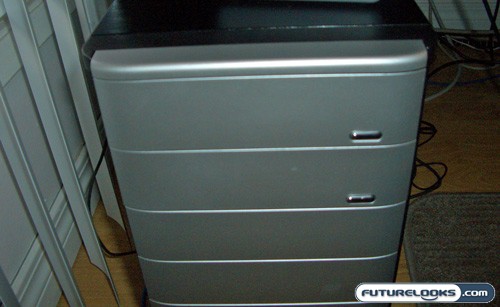
On the outside
The front bezel contained four 5-1/4” and two 3-1/2” drive bays. One thing that puzzled me is that only the top two 5-1/4” bays opened up to accept a cd/dvd drive. If I had more than 2 drives, I would have to pull out the front bezel and the smooth continuous look would be gone. Lucky for us, we only have one drive and you’re a freak if you have more than two.


On the Inside

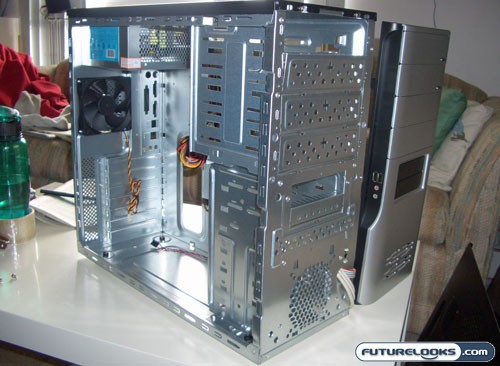
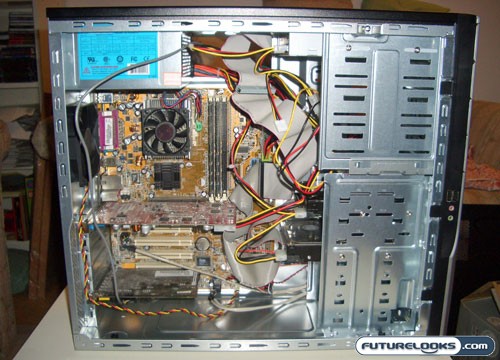
One thing that I immediately noticed upon opening our case was that most of the edges were rounded off. This will protect us from cutting ourselves when we’re in there installing all of our components. At least they didn’t cheap there. Bleeding is a bad thing. Included was a bag of screws, a 300W power supply, a power cord, and an 80mm fan installed on the rear of the case to exhaust hot air.


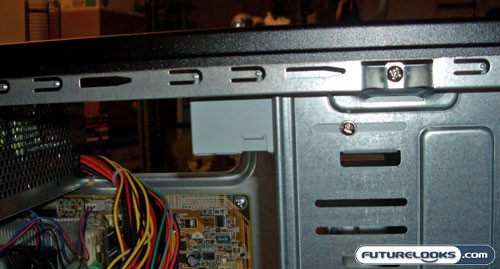
Another thing that I liked was the air guide to direct the hot air from the CPU out of the case. This should help to keep case temperatures down as the hot air is vented directly out instead of mixing with the other air before being expelled. One thing to point out though is the inability to adjust the length of this guide. If your using a larger CPU heatsink/fan, this may cause some fitment issues.
The front of the case also allowed for an additional 80mm fan. This will ensure air flow from the front to the back of the case if your components are running a little warm. Since the components that we’re installing today aren’t too high powered, I saw no need for an additional fan.

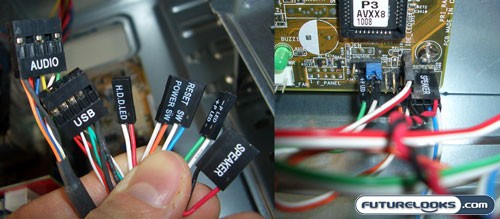
As usual, all of the front panel cables were given adequate length and were clearly labeled. Also included was an instruction sheet detailing the purpose of each connector as well as installation instructions, great for first time PC builders. I also liked the little legend that directed us which holes to screw in our motherboard spacers. The case allows for ATX, Mini-ATX, and Micro ATX motherboards. There is lots of room in the case to work with. Too bad there’s no removable motherboard tray, or removable hard driver / optical drive bays. Again, I remind myself that this is a budget case.
Hardware to be Installed
In order to see how did case did in the real world, we threw together a system with the following components…
| Components | Description |
| Motherboard | ASUS A7V8X-X |
| CPU | AMD Barton 2600+ (@ 1.90GHz) |
| Heatsink / Fan | Thermaltake Volcano 5 |
| Ram | 2×512 MB DDR400 |
| Harddrives | Western Digital Caviar 200GB |
| Maxtor 60GB | |
| Optical Drives | BenQ 16X DVD-R/W |
| Videocard | Powercolor Radeon 9800Pro |
| Soundcard | Creative Soundblaster Live value 4.1 |
The components are a couple years old, but given the price point of the case, putting some top drawer components would be a bit of a waste. However, they should still provide us with an idea of temperature and noise levels inside the enclosure.
Onto the Install
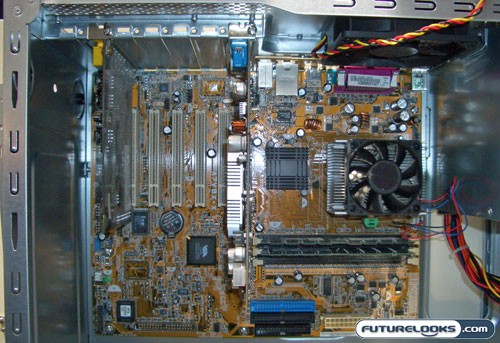
First thing to go into the case is our Asus A7V8X-X ATX motherboard. Following the legend, we installed all of the necessary spacers. The motherboard slid into the case easily and all of the screw holes lined up with our installed spacers making installation of the motherboard a snap.

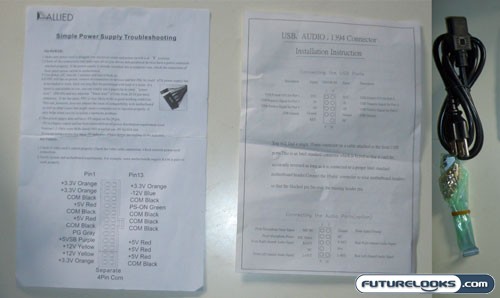
Plenty of hardware was included to get the job done and the installation “papers” did come in handy as a guide to the different power and motherboard connectors. Every connector was described and so our installation involving these items went off without a hitch. Well, maybe just one thing bugged us which we’ll get into later.

We wanted to install the optical drive on the top drive bay. To install the drive, we either had to remove the power supply, or remove the front bezel to make room. I decided that it was easiest to remove the 4 plastic clips on the front bezel and then slide the drive into place. Using a flip down drive cover, we had to line up the eject button with the button on the case. Once everything was lined up, we secured the drive to the case. So far so good.

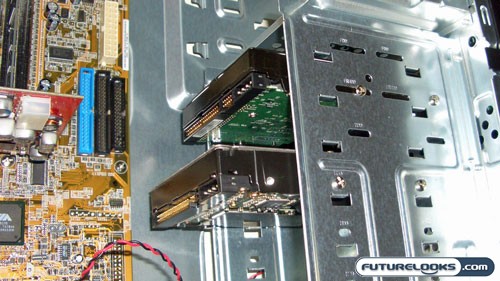
We installed 2 hard drives in 4 of the available 3.5”drive bays. The screw holes were also labeled on the drive bays making installation very simple and trouble free.

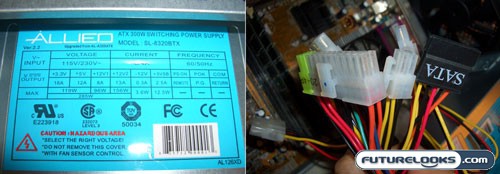
Once all of our components were secured in the case, we installed the device to motherboard cables and then worked on the power. All of our usual power connectors were here to play affixed to the included Allied power supply rated at 300 Watts. This may be adequate for the videocard that we are installing (Radeon 9800Pro), but if you’re lucky enough to have an SLI video card setup (though not likely in this case), you may need to look at upgrading to a power supply with something beefier.

Another problem that I ran into was the length of the peripheral power cable. With a Radeon 9800Pro, we required an external peripheral power cable. The supplied cable was too short, but luckily, I had an extension cable from another power supply. With everything in place, we cleaned up the wiring and cables and was ready to close up the case. It’s pretty clear that this case was really meant for a budget, low end build.
Handle With Care

You need to be careful with the side panel to ensure that the CPU air duct doesn’t interfere with the CPU fan. Another thing that annoyed me was the fitment of the side panels. In order to get them to line up with the 2 slide rails on the top and bottom took a little patience as the panel would bend causing misalignment with the rails. After a bit of messing around, I was able to secure the 2 side panels. Again, I remind myself that this is budget case.
Noise and Temperature

With only one 80mm rear case fan, I was a little bit concerned with temperature of the case. And with the CPU air cooler right in front of the case fan, I wasn’t sure how well the fan would be able to remove the hot air from the rest of the case. But with only one 80mm case fan, I was certain that the case would be fairly quiet rather than sounding like a vacuum cleaner.
Noise Levels
With only one 80mm case fan, a power supply fan, videocard fan, and a CPU heatsink / fan, the system was a bit on the noisy side. It did a decent job of muffling the CPU fan, but the whirring of the other fans are still a bit noticeable. In a quiet room, you can easily tell that the computer is on. If the computer was sitting on top of your desk right beside you, the noise would become annoying rather quickly. I think the culprit is the Thermaltake Volcano 5 CPU heatsink/fan. Swapping this out with something quieter may reduce some of the noise.
| Front | Rear | Left | Right | |
| Idle | 43 dBa | 48 dBa | 44 dBa | 43 dBa |
| Load | 45 dBa | 49 dBa | 46.5 dBa | 45.5 dBa |
Internal Case Temperatures
I measured the case temperature with the room temperature set at ambient (approx. 21C). Idle conditions were collected after 30 minutes while the system was first logged on. The load conditions were set with a continuous loop of 3Dmark06 loop for a 2 hour period to give all of the components a good workout. Let’s see what the deal is…
| CPU | SYSTEM | |
| Idle | 43 C | 46 C |
| Load | 58 C | 60 C |
The single 80mm case fan did do a decent job of keeping temperatures at bay. I would think if we added another 80mm case fan to the front of the case, air flow would increase and temperatures would drop, but at the sacrifice of noise. What would really make a difference would be 120mm case fans front and rear. Not only would they be quieter, but they would move a lot more air.
Final Thoughts and Conclusions

I know I mentioned that this is a budget/econo case many times, and well, it is. If you’re trying to build a custom system for yourself, I would recommend looking elsewhere. This case really isn’t that “Super”.
Firstly, you will require an upgraded power supply if you have the latest components as 300W just doesn’t cut it anymore for a midrange system, and quality is a little suspect. It also lacks the extra power connectors (and length) to accomodate some newer motherboards (like 4 and 8 pin power connectors). Secondly, if you do have the latest components, then the single 80mm case fan may be inadequate for the amount of heat you’ll produce. Thirdly, if you’re a hardcore computer techie like me with a desire for the latest and greatest, I would recommend that you look for something a little more upscale. However, if Grandma needs a new case for some reason, this might be a nice little upgrade if you don’t upgrade anything else.
Pros:
- Cheap case if you’re on a budget
- OEM styling that’s better than your grandma’s beige computer case
- Rounded edges
Cons:
- Cheap case if you require the latest and greatest
- Front panel location of USB/Audio jacks, Power/Reset buttons, and Power/HDD LEDs
- 300W Power supply only
- Short power connectors
- No tool-less assembly
Overall Rating: 6.0 / 10.0
Help us improve our reviews by leaving a comment below!