Installing a Pair of 3.5-Inch Hard Drives
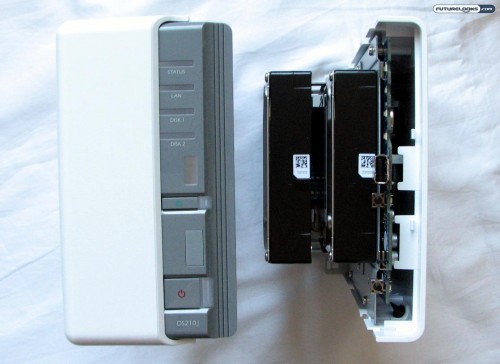
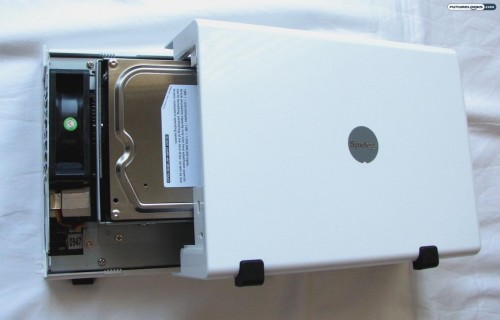
Before you can get started with actually using this thing, you’ll need to install a couple of hard drives. It’s not quite as cute and compact as the Synology DS409slim, but the installation process is just as easy. No cables needed are needed and it is really plug and play. All you do is remove the two screws holding the housing together and slide off the cover. After that, you slide your 3.5-inch drives into their respective bays until they are firmly connected to the SATA connector at the other end. Put in those mounting screws to keep the drives in place and you’re pretty much good to go.
For the purposes of this review, we used a pair of Samsung HD753LJ (750GB) hard drives, but you could just as easily use something else. The Western Digital 2TB Green Drives are a really good choice for both performance and power consumption. As mentioned, if you want to use 2.5-inch drives, you’ll need to buy the disk holders separately.
Build Quality and Operation
Based on its glossy white appearance, you’d almost think that the Synology DS210j came out of a design team in Cupertino. The overall appearance is chic and sleek. Build quality is reasonably solid, but you do have to realize that the plastic housing is still just plastic. I like the use of the grey panel in the front, rather than the black that was used in the DS207+. Aside from that, the light configuration and overall design remain largely unchanged. That’s a good thing.
Unfortunately, much like the Synology DS207+ that came some time before it, the DS210j suffers from relatively slow startup times. The bootup process took about a minute and a half, which is quite long considering that it should have a lightweight Linux-based OS under the hood. This might be a symptom of the fact that the DS210j offers quite a bit of functionality and those services need to start during the boot process.
Synology Assistant Gets You Started
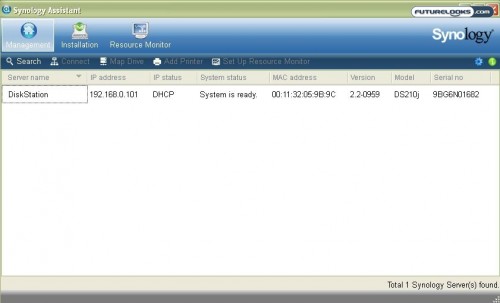
Even though this is at the lower end of the Synology lineup, the DS210j still comes with the same software that the more expensive units get. The user interface was already pretty good, but it has progressively improved over the years. Turning on the NAS and inserting the installation CD in my laptop, I went to the setup process to find the Synology Assistant. This will scan for available devices on your current network and double-clicking will push you through the rest of the installation process. From here, you can setup the device for your network and give it a name so you can easily recognize it on your network.
Disk Station Manager 2.2 Looks Slick
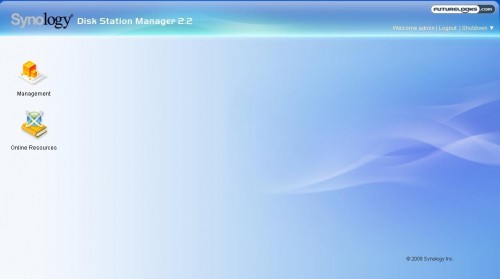
For the meat and potatoes of the NAS device, you’ll need to access the Synology Disk Station Manager 2.2. This can be accessed from the Synology Assistant, but you can also go directly to it through any web browser; just input the local IP of the NAS. By default, the username is admin and the password is left blank. After logging into the NAS, you’ll be shown the basic starting page shown above. The GUI is visually appealing and should be straightforward enough for even NAS novices.
When you first start, you’ll only see those two icons. As you activate and setup the additional services, like the Download Manager and Photo Station, their respective icons will show up here too. This GUI is a vast improvement over the clunky interface of the Thecus N0503 ComboNAS, which was confusing and, well, ugly.