First Impressions
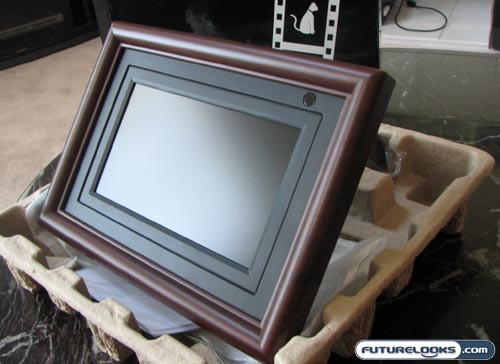
In an effort to provide you with a more traditional look, this picture frame features a wood motif, along with a black center that tries to “hide” the dimmed LCD display. The multi-tiered approach is similar to many conventional photo frames, so that works quite well. Near the top-right corner is the infrared sensor for the wireless remote.
The 7-inch display has a widescreen look, featuring a resolution of 480×234 pixels. This produces a rather strange aspect ratio of just a touch over 2:1. The exact ratio is closer to 2.05128 or so. In this way, it’s actually a wider display than the more conventional 16:9 for TVs, or 16:10 for computer monitors. Strangely, when I display an image that is exactly 480×234 pixels, I still get black bars on the top and bottom. Weird, right? Well, it turns out that while the official spec sheet mentions a resolution of 480×234, I only filled the display completely when I used a picture with a 16:9 aspect ratio. I’m wondering if the spec sheet is incorrect.
In terms of build quality, there’s a little bit of weight to the Rosewill digital picture frame, but it still feels like a big chunk of plastic. The buttons on the back (on top) are quite solid, but they do feel quite cheap to the touch. I’m also disappointed that the display takes up so little room on the front face of the frame. It’s like Rosewill is trying to fool me into thinking this frame is bigger than it is.
Uploading and Usability
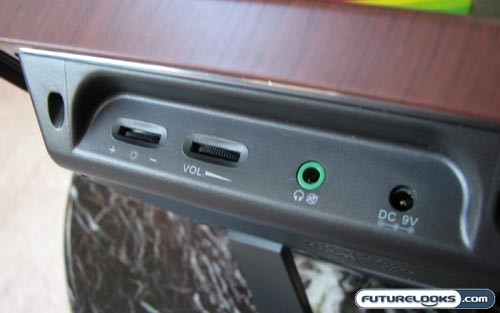
On one side of the frame, you’ll find the jacks for headphones and DC power, as well as dials for controlling the brightness and the volume. That’s right: Volume. This digital frame comes equipped with a pair of stereo speakers, so you can blast out some MP3 tunes to accompany the slideshow of pictures. I, of course, use the term “blast” figuratively. While reasonably loud, the sound quality on the speakers is probably on par with a clock radio.
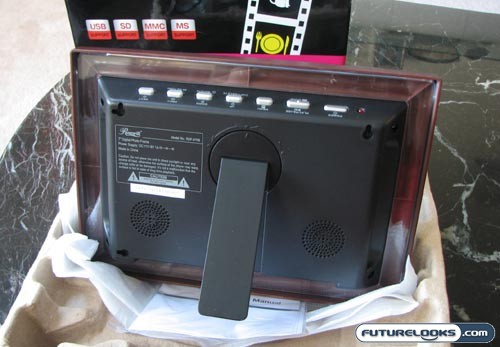
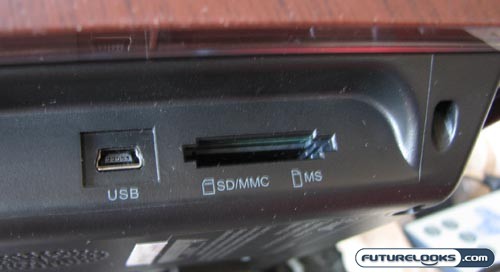
On the other side of the frame, you’ll find the mini-USB port and a 3-in-1 memory card slot that will accept SD and MMC memory cards as well as Memory Sticks. I like this triple design and you’ll be using it extensively. The frame only has 4MB of internal memory, so you’ll be relying on this memory card expansion quite a bit.
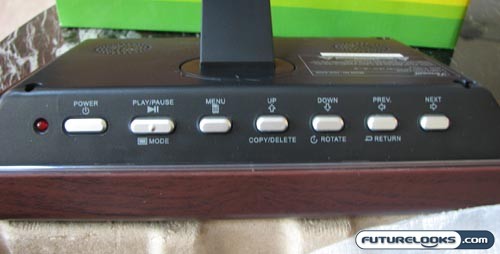
When you first boot up the frame, it typically sets off in its default slideshow mode. Looking around to the top of the frame, you’ll discover a series of buttons that will control its various functions. Pressing the Play/Pause button will switch you out of Slideshow and into Browse mode. Press it one more time and you’ll be offered a multi-picture grid to choose from.
Hitting the Menu button gets you to the main screen where you choose being pictures, music and setup. It’s all quite straightforward and easy to use, though I found performance to be quite slow at times, especially if you have larger pictures stored on your card. Under Setup, you adjust things like brightness and whether music should play in the background of a slideshow.
Real-Time Pricing and Stock Check – Shop Like a Pro!