Sending the Video Through the Air
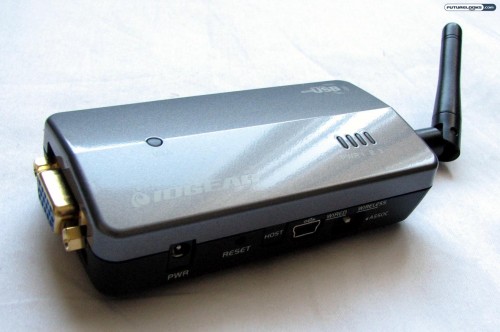
The next part consists of the wireless video receiver. This is the part that connects to your TV, feeding the video from your laptop over to the big screen. As expected, there is the same adjustable antenna on the one end.
On the other end is a VGA cable. If your TV or monitor has DVI, you can use the supplied adapter for that purpose. It is a little unfortunate to see a lack of HDMI connectivity, however, since that would be more convenient and robust overall.
Along the side, there is a power jack, a reset button, a host button, a USB mini jack, and a switch for choosing between a wired and wireless connection. The video receiver is one of the larger components, measuring about 9cm by 5cm.
The Wireless Audio Receiver

While the video receiver and USB transmitter have the familiar antennas that we’ve seen on routers and other wireless devices, the wireless audio receiver does not. It’s a vertical block with an internal antenna instead.
Around the back, there is the DC power outlet, a mini-USB port, and a standard 3.5mm audio jack. The audio jack can be used with either of the provided audio cables, depending on the connection options located on the back of your television. It can go to another 3.5mm jack or it can go to the two RCA audio jacks (red and white).
Initial Setup and Configuration
Going through the setup process seemed simple enough, as it is reasonably outlined in the provided user manual. If you already have DisplayLink installed on your computer, you might need to uninstall it first. After that, insert the accompanying CD and let it do its thing.

The installation process involves the Iogear-specific software, the wireless USB drivers, and the DisplayLink software. Interestingly, installing the software and drivers was fine, but the CD refused to install DisplayLink on my Windows 7 laptop. For that, I went directly to the DisplayLink website to download and run the newest version.
While the user manual for the Iogear says that you need to “pair” the wireless audio receiver with your USB wireless transmitter, it doesn’t indicate this for the wireless video receiver. In my experience, though, it did not work until I did so. This is very important to note; otherwise, all you’ll get is a black screen and no signal; the video receiver is supposed to be pre-paired out of the box, but this did not appear to be the case.
The pairing process is easy enough. Use the provided mini-USB cable to connect the two receivers to the computer you’ll be using. Click on the button to allow for the pairing relationship and you’re pretty much good to go. Connect the receivers to your TV, along with the power adapters, and they should show up in the wireless USB utility on the laptop.
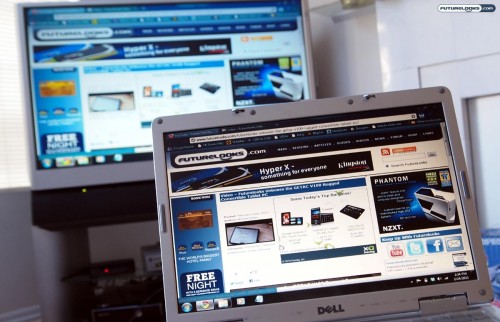
After the aforementioned fumbling around, I was able to “detect” the new display in Windows. Extending the desktop didn’t seem to work quite as well, possibly due to having a lower-powered machine, but a “mirrored” interface seemed to work just fine.
The resolution was “optimized” for my Panasonic HDTV (meaning it was pushed to a lower resolution), though I’d imagine you can maintain a higher resolution on a newer 1080p television. You have to remember that I had to go through the extra steps of pairing the video receiver and manually downloading the newest DisplayLink software for the Iogear GUWAVKIT to work on my Windows 7-powered Dell. These steps are not outlined in the user guide.