The New Radiator

To remove the heat, CoolIT chose to use a 120mm radiator and fan combo in the cooling loop. Unlike the Domino before it, the ECO uses a pretty barebones setup on the radiator. The fan is pre-mounted to the rad, and the hoses are firmly secured, and that’s about it. The radiator itself is powder coated aluminum with a rather dense collection of fins for good surface area effects. Though it’s thin it should be able to wick away a lot of heat.
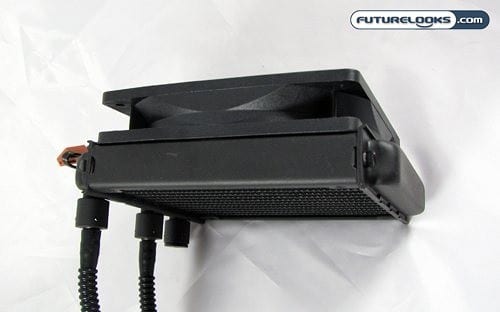
The total size of the radiator and fan assembly also lend to the ease of mounting the CoolIT into any case. The cooler is fairly universal as long as you define universal as cases that have 120mm rear exhaust fans. That’s actually fairly common these days, with only a few exceptions. The total thickness of the assembly won’t interfere with most motherboards.
The Test Rig
To test the CoolIT Systems ECO A.L.C. CPU cooler, I hooked it up to my standard (and apparently somewhat obsolete) test rig. Specs are as follows.
- AMD Phenom II X4 965 Black Edition CPU
- ASUS M4A79T Deluxe AM3 790FX Motherboard
- OCZ DDR3 PC3-12800 AMD Black Edition Ready 4GB Dual Channel Memory Kit
- ASUS EAH5850/G/2DIS/1GD5 Radeon HD 5850 Video Card
- Kingston SSDnow V-Series 128GB Solid State Hard Drive
- HighSpeed PC Top Deck Tech Station
- Ultra Products X4 1050W Modular ATX Power Supply
Of course we’ll be pitting the ECO A.L.C. against both the CoolIT Domino A.L.C. CPU cooler and the Corsair Hydro Series H50 High-Performance CPU cooler in our tests. We’ll test idle and load temperatures under all coolers, as well as take a peak at noise levels. OCCT is our program of choice for the former, with a good ol’ dB meter being used for the latter. Also worth nothing is the fact that our Phenom II X4 965 Black Edition is the original first run 140W TDP version that has a tendency to run on the “spicy” side. This should provide some extra load as most of the top CPUs like the new AMD Phenom II X6 1090T and even the INTEL Core i7 980X 6-Core use no more than 125 – 130W respectively.
Installation and Setup
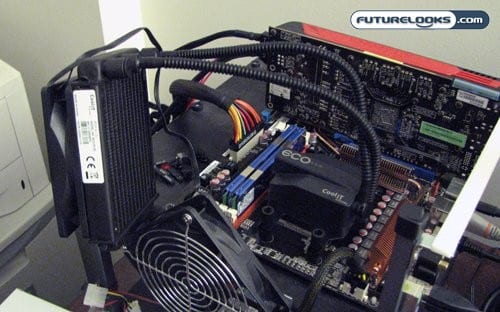
As noted, installation of the CoolIT ECO A.L.C. CPU cooler is fairly easy and straight forward. I found it a fair degree easier than the Corsair H50. The mounting system is also more sturdy then the original CoolIT Domino A.L.C. CoolIT also provides the brackets needed to install the ECO on the major Intel and AMD platforms. It’s even compatible with the new Phenom II X6 6-core processors from AMD.
As for the installation itself, the level of ease is based on what platform you are using. All the Intel platforms require removal of the motherboard from your case unless you have a new case with a CPU cooler installation cut out on the back of the motherboard tray. This is due to the need to install a mounting backplate, which is required for Socket 775, 1366, and 1156. AMD installations on the other hand may not require the removal of the motherboard, depending on clever you are. The bracket also accommodates all these sockets in one single innovative clip system that simply slides to the right setting, reducing the barrage of unnecessary parts.
The mounting system for the ECO, much like many other AMD cooling solutions, uses the existing AMD backplate found on every Socket AM2, AM2+, and AM3 motherboard. So if you’re clever enough to lay your case on it’s side, you simply need to unscrew the standard heatsink mounting bracket and secure the ECO exchange block. Then you plug the fan on the radiator into the CPU fan header on your board, the pump into the chassis header, and you’re done. Oh and don’t forget to disable any functions that automatically vary the fan speed in the BIOS.