Software
Asus includes a small cadre of home grown software with the M3A32-MVP Deluxe motherboard. Some of it is useful, and some it is replicated by other better applications provided by other component manufacturers. You’re mileage may vary on preference, so were just going to go through all of them.

AI Suite is Asus’ overclocking tool. From here you can monitor and change core speed, multipliers, and voltages. Use of this tool is dependant on your BIOS settings, and may be disabled if you turn off it’s functionality in the BIOS. I would rate this as moderately useful, but it is overshadowed by AMD OverDrive. The latter program offers much more tweaking on the AMD platform.
Asus Update is fairly self explanatory I think; it allows you to update the BIOS via the internet. You can also backup the existing BIOS should you need to. Very useful indeed.
Cool & Quiet is a simple monitoring program that tells you in real time your processor speed and core voltage. Though simple is good, this functionality is available from such applications as CPU-Z, AMD OverDrive, and Asus’ own AI Suite. You’re mileage may vary.
PC Probe is Asus’ quick and dirty version of Motherboard Monitor. It shows you temperatures for all sensors onboard, voltages for all channels, fan speeds, and more. This is useful for when you just want to monitor everything and not overclock. It’s a great companion to AMD OverDrive, as it loads much quicker.
Installation and Setup
Here’s the specifications of the rig used to test the M3A32-MVP Deluxe…
- AMD Phenom 9600 Black Edition 2.3GHz Quad Core CPU
- Foxconn 9800GTX-512N NVIDIA GeForce 9800 GTX 512MB PCIe Video Card
- OCZ Platinum XTC REV.2 PC2-6400 2GB 2X1GB DDR2-800 Memory Kit
- Seagate Barracuda 500GB 7200.10 16MB SATA2 Hard Drive
- Cooler Master Hyper 212 CPU Cooler
- Antec P182 Advanced Super Mid Tower Case
- Thermaltake Toughpower 1000W Power Supply
- Microsoft Windows Vista Ultimate RTM
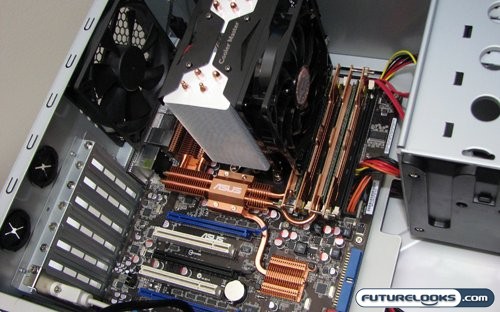
Installation of the Asus M3A32-MVP Deluxe was fairly straight forward. Only a couple issues crept up as we installed and setup the motherboard with out test rig.
The first issue we encountered was with the installation of the RAM we were originally going to use for testing. Originally we were going to run this test rig with a really nice Mushkin DDR2-800 kit, and even got them all snug and clamped into the Mempipe. Unfortunately the heat spreaders on the chips interfered with the cooler we were using.
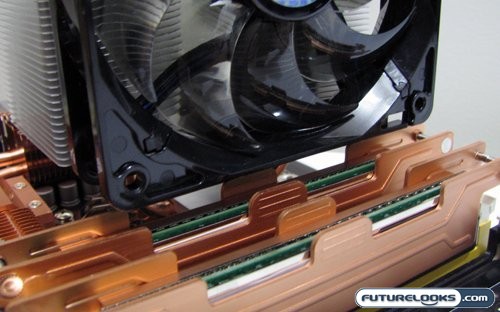
When we switched over to the OCZ kit, we were able to install our cooler just fine. This was all due to the positioning of the first and third RAM slots. If you are using a large cooler similar to the one used in our test rig, you’ll find that the first RAM slot tends to be positioned directly under the fan of the cooler. I’ve seen this problem before with several motherboards. Basically you’ll need to be aware of what components you are using, and if you are using RAM with a large cooling device, you may need to use slots 2 and 4. Luckily the Mempipe can adjust to these slots.
There is one issue we need to touch on that, although we didn’t experience, that has been noted in other publications. That issue is the position and orientation of the SATA ports. If you are using a case that is short in depth, and has a hard drive rack or other apparatus near the bottom, it may interfere with connecting the SATA cables. Our Antec P182 is definitely long enough to accommodate all our equipment, but there are cases our there that may not be so suitable. Once again this is a situation where someone building a system from scratch will need to be aware of.